Author: Alessandro Di Fava < alessandro.difava@pal-robotics.com >
Maintainer: Jordi Pages < jordi.pages@pal-robotics.com >
Support: tiago-support@pal-robotics.com
Source: https://github.com/pal-robotics/tiago_dual_tutorials.git
| |
Joint Trajectory Controller
Description: Example of how to move TIAGo++'s arms using a joint trajectory action.Keywords: joint, trajectory controller
Tutorial Level: BEGINNER
Next Tutorial: Moving individual joints
Contents
Purpose
This tutorial shows how to use the joint_trajectory_controller to move the arms of TIAGo++. The action can be used to give a trajectory to the arm expressed in several waypoints.
Pre-requisites
First make sure that the tutorials are properly installed along with the TIAGo++ simulation, as shown in the Tutorials Installation Section.
Available interfaces
There are two mechanisms for sending trajectories to the controller, as written in joint_trajectory_controller. By means of the action interface or the topic interface. Both use the trajectory_msgs/JointTrajectory message to specify trajectories.
For the TIAGo++ the following interfaces are available: torso control, head control, arm left control, arm right control. The following interfaces are used.
Torso controller
The torso prismatic joint can be controlled with the following joint trajectory interfaces:
/torso_controller/command (trajectory_msgs/JointTrajectory)
- Topic interface to move the torso lifter
- Action interface to move the torso lifter
Head controller
The 2 joints of the head can be controlled defining trajectories using the following interfaces:
/head_controller/command (trajectory_msgs/JointTrajectory)
- Topic interface to move the head
- Action interface to move the head
Arm left controller
Trajectories for the 7 joints of the left arm can be controlled using the following interfaces:
/arm_left_controller/command (trajectory_msgs/JointTrajectory)
- Topic interface to move the left arm
- Action interface to move the left arm
Arm right controller
Trajectories for the 7 joints of the right arm can be controlled using the following interfaces:
/arm_right_controller/command (trajectory_msgs/JointTrajectory)
- Topic interface to move the right arm
- Action interface to move the right arm
Hey5 left hand controller
For the version of TIAGo++ with the Hey5 hands the hand left control interface is also available:
/hand_left_controller/command (trajectory_msgs/JointTrajectory)
- Topic interface to move the 3 motors of the Hey5 left hand.
- Action interface to move the 3 motors of the Hey5 left hand.
Hey5 right hand controller
For the version of TIAGo++ with the Hey5 hands the hand right control interface is also available:
/hand_right_controller/command (trajectory_msgs/JointTrajectory)
- Topic interface to move the 3 motors of the Hey5 right hand.
- Action interface to move the 3 motors of the Hey5 right hand.
Gripper left controller
For the version of TIAGo++ with the grippers the gripper left control interface is available:
/parallel_gripper_left_controller/command (trajectory_msgs/JointTrajectory)
- Topic interface to move the parallel left gripper virtual joint, i.e. to control the separation of the fingers.
- Action interface to control the separation of the fingers of the left gripper
- Topic interface to move the 2 motors of the left gripper, i.e. each finger, individually.
Gripper right controller
For the version of TIAGo++ with the grippers the gripper right control interface is available:
/parallel_gripper_right_controller/command (trajectory_msgs/JointTrajectory)
- Topic interface to move the parallel right gripper virtual joint, i.e. to control the separation of the fingers.
- Action interface to control the separation of the fingers of the right gripper
- Topic interface to move the 2 motors of the right gripper, i.e. each finger, individually.
Execution
Open two consoles and source the public simulation workspace as follows:
cd ~/tiago_dual_public_ws
source ./devel/setup.bash
Launching the simulation
In the first console launch for example the following simulation
roslaunch tiago_dual_gazebo tiago_dual_gazebo.launch public_sim:=true world:=empty
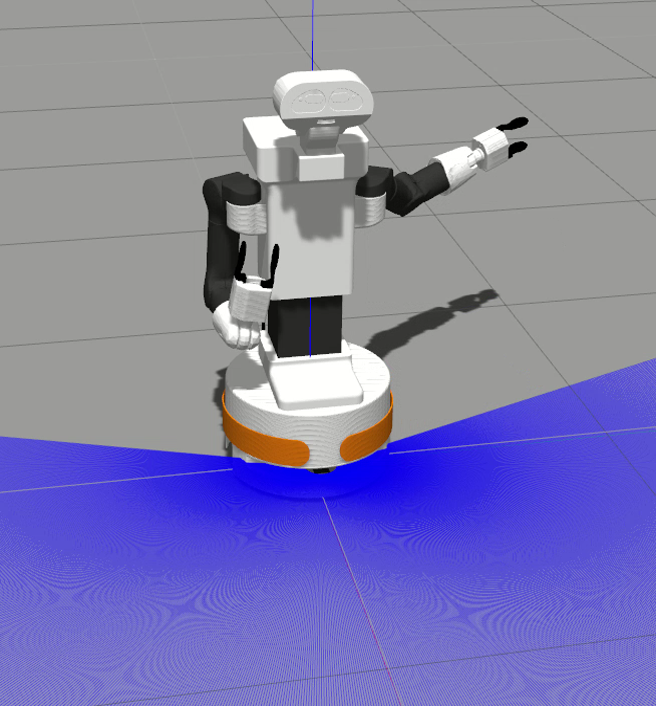
Gazebo will show up with TIAGo++ in an empty world.

Wait until TIAGo++ has tucked its arm. Then you may proceed with the next steps.
Launching the nodes
Now we are going to run an example with two waypoints that will bring TIAGo++ to the following joint space configurations both for the left and the right arms. First waypoint:
arm_1_joint: 0.0
arm_2_joint: 0.59
arm_3_joint: 0.06
arm_4_joint: 1.00
arm_5_joint: -1.70
arm_6_joint: 0.0
arm_7_joint: 0.0
Second waypoint:
arm_1_joint: 1.20
arm_2_joint: 0.59
arm_3_joint: 0.06
arm_4_joint: 1.00
arm_5_joint: -1.70
arm_6_joint: 0.0
arm_7_joint: 0.0
The node that will take care to execute the set of waypoints to reach such a kinematic configuration is run_dual_traj_control included in tiago_dual_trajectory_controller package and has to be called as follows
rosrun tiago_dual_trajectory_controller run_dual_traj_control
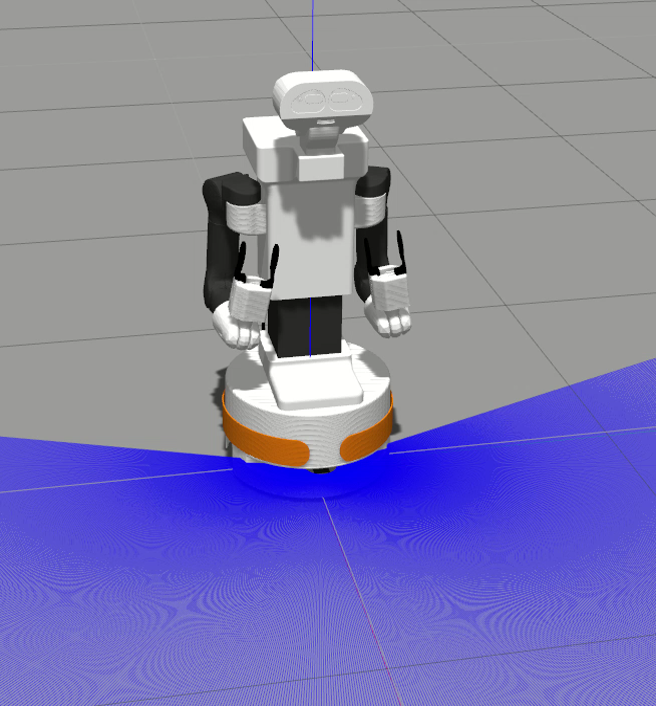
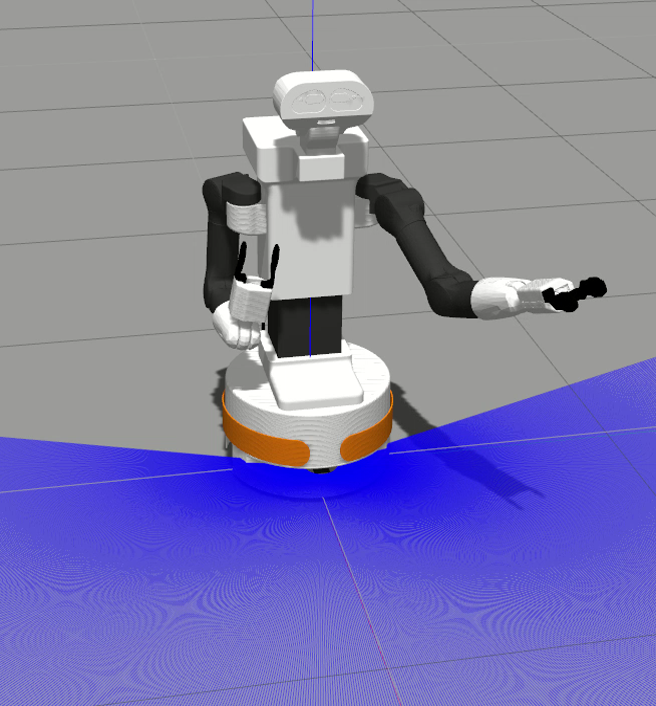
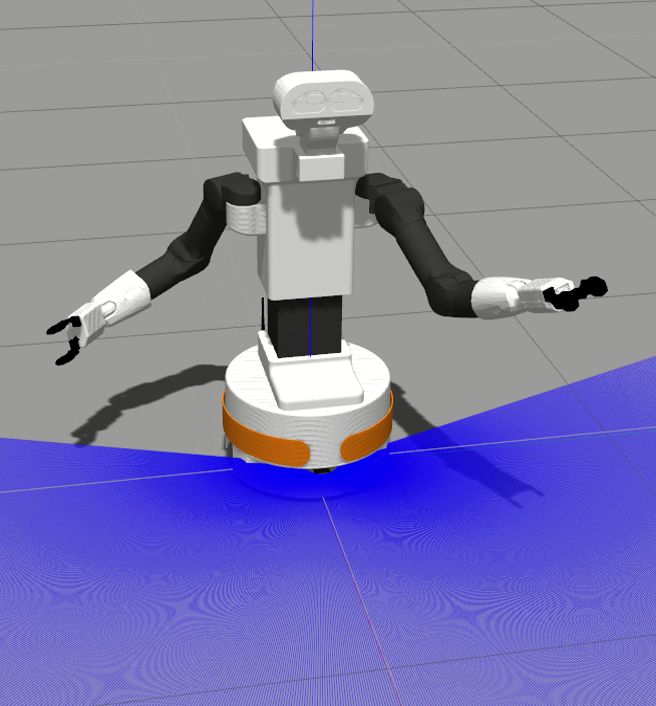
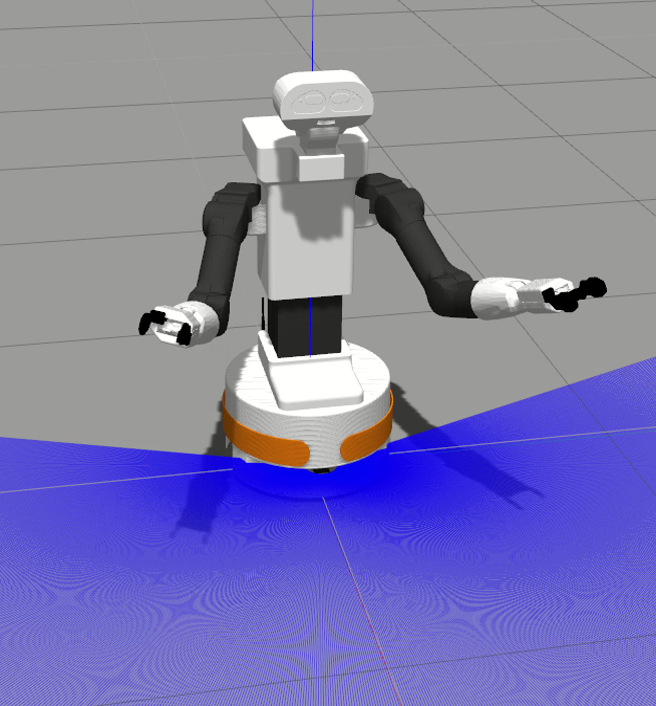
An example of plan executed by the node is depicted in the following sequence of images:
|
|
|
|
|
|
Inspecting the code
The code to implement such a node is shown below. Note that the key parts of the code are:
- Create a left arm controller action client
- Wait for left arm controller action server to come up
- Create a right arm controller action client
- Wait for right arm controller action server to come up
- Generates a simple trajectory with two waypoints for the left arm(left_goal)
- Sends the command to start the given trajectory
- Give time for trajectory execution
- Generates a simple trajectory with two waypoints for the right arm(right_goal)
- Sends the command to start the given trajectory
- Give time for trajectory execution Toggle line numbers
   1 // C++ standard headers
   2 #include <exception>
   3 #include <string>
   4
   5 // Boost headers
   6 #include <boost/shared_ptr.hpp>
   7
   8 // ROS headers
   9 #include <ros/ros.h>
  10 #include <actionlib/client/simple_action_client.h>
  11 #include <control_msgs/FollowJointTrajectoryAction.h>
  12 #include <ros/topic.h>
  13
  14
  15 // Our Action interface type for moving TIAGo's head, provided as a typedef for convenience
  16 typedef actionlib::SimpleActionClient<control_msgs::FollowJointTrajectoryAction> arm_control_client;
  17 typedef boost::shared_ptr< arm_control_client>  arm_control_client_Ptr;
  18
  19
  20 // Create a ROS action client to move TIAGo's arm
  21 void createArmClient(arm_control_client_Ptr& action_client, const std::string arm_controller_name)
  22 {
  23   ROS_INFO("Creating action client to %s ...", arm_controller_name.c_str());
  24
  25   std::string action_client_name = "/" + arm_controller_name + "/follow_joint_trajectory";
  26   action_client.reset( new arm_control_client(action_client_name) );
  27
  28   int iterations = 0, max_iterations = 3;
  29   // Wait for arm controller action server to come up
  30   while( !action_client->waitForServer(ros::Duration(2.0)) && ros::ok() && iterations < max_iterations )
  31   {
  32     ROS_DEBUG("Waiting for the arm_controller_action server to come up");
  33     ++iterations;
  34   }
  35
  36   if ( iterations == max_iterations )
  37     throw std::runtime_error("Error in createArmClient: arm controller action server not available");
  38 }
  39
  40
  41 // Generates a simple trajectory with two waypoints to move TIAGo's arm
  42 void waypointsArmGoal(control_msgs::FollowJointTrajectoryGoal& goal)
  43 {
  44   // Two waypoints in this goal trajectory
  45   goal.trajectory.points.resize(2);
  46
  47   // First trajectory point
  48   // Positions
  49   int index = 0;
  50   goal.trajectory.points[index].positions.resize(7);
  51   goal.trajectory.points[index].positions[0] = 0.00;
  52   goal.trajectory.points[index].positions[1] = 0.59;
  53   goal.trajectory.points[index].positions[2] = 0.06;
  54   goal.trajectory.points[index].positions[3] = 1.00;
  55   goal.trajectory.points[index].positions[4] = -1.70;
  56   goal.trajectory.points[index].positions[5] = 0.0;
  57   goal.trajectory.points[index].positions[6] = 0.0;
  58   // Velocities
  59   goal.trajectory.points[index].velocities.resize(7);
  60   for (int j = 0; j < 7; ++j)
  61   {
  62     goal.trajectory.points[index].velocities[j] = 1.0;
  63   }
  64   // To be reached 4 second after starting along the trajectory
  65   goal.trajectory.points[index].time_from_start = ros::Duration(4.0);
  66
  67   // Second trajectory point
  68   // Positions
  69   index += 1;
  70   goal.trajectory.points[index].positions.resize(7);
  71   goal.trajectory.points[index].positions[0] = 1.20;
  72   goal.trajectory.points[index].positions[1] = 0.59;
  73   goal.trajectory.points[index].positions[2] = 0.06;
  74   goal.trajectory.points[index].positions[3] = 1.00;
  75   goal.trajectory.points[index].positions[4] = -1.70;
  76   goal.trajectory.points[index].positions[5] = 0.0;
  77   goal.trajectory.points[index].positions[6] = 0.0;
  78   // Velocities
  79   goal.trajectory.points[index].velocities.resize(7);
  80   for (int j = 0; j < 7; ++j)
  81   {
  82     goal.trajectory.points[index].velocities[j] = 0.0;
  83   }
  84   // To be reached 8 seconds after starting along the trajectory
  85   goal.trajectory.points[index].time_from_start = ros::Duration(8.0);
  86 }
  87
  88
  89 // Generates a simple trajectory with two waypoints to move TIAGo's left arm
  90 void waypointsArmLeftGoal(control_msgs::FollowJointTrajectoryGoal& goal)
  91 {
  92   // The joint names, which apply to all waypoints
  93   goal.trajectory.joint_names.push_back("arm_left_1_joint");
  94   goal.trajectory.joint_names.push_back("arm_left_2_joint");
  95   goal.trajectory.joint_names.push_back("arm_left_3_joint");
  96   goal.trajectory.joint_names.push_back("arm_left_4_joint");
  97   goal.trajectory.joint_names.push_back("arm_left_5_joint");
  98   goal.trajectory.joint_names.push_back("arm_left_6_joint");
  99   goal.trajectory.joint_names.push_back("arm_left_7_joint");
 100
 101   waypointsArmGoal(goal);
 102 }
 103
 104
 105 // Generates a simple trajectory with two waypoints to move TIAGo's right arm
 106 void waypointsArmRightGoal(control_msgs::FollowJointTrajectoryGoal& goal)
 107 {
 108   // The joint names, which apply to all waypoints
 109   goal.trajectory.joint_names.push_back("arm_right_1_joint");
 110   goal.trajectory.joint_names.push_back("arm_right_2_joint");
 111   goal.trajectory.joint_names.push_back("arm_right_3_joint");
 112   goal.trajectory.joint_names.push_back("arm_right_4_joint");
 113   goal.trajectory.joint_names.push_back("arm_right_5_joint");
 114   goal.trajectory.joint_names.push_back("arm_right_6_joint");
 115   goal.trajectory.joint_names.push_back("arm_right_7_joint");
 116
 117   waypointsArmGoal(goal);
 118 }
 119
 120
 121 // Entry point
 122 int main(int argc, char** argv)
 123 {
 124   // Init the ROS node
 125   ros::init(argc, argv, "run_dual_traj_control");
 126
 127   ROS_INFO("Starting run_dual_traj_control application ...");
 128
 129   // Precondition: Valid clock
 130   ros::NodeHandle nh;
 131   if (!ros::Time::waitForValid(ros::WallDuration(10.0))) // NOTE: Important when using simulated clock
 132   {
 133     ROS_FATAL("Timed-out waiting for valid time.");
 134     return EXIT_FAILURE;
 135   }
 136
 137   // Create an arm left controller action client to move the TIAGo's left arm
 138   arm_control_client_Ptr arm_left_client;
 139   createArmClient(arm_left_client, "arm_left_controller");
 140
 141   // Create an arm right controller action client to move the TIAGo's right arm
 142   arm_control_client_Ptr arm_right_client;
 143   createArmClient(arm_right_client, "arm_right_controller");
 144
 145   // Generates the goal for the TIAGo's left arm
 146   control_msgs::FollowJointTrajectoryGoal arm_left_goal;
 147   waypointsArmLeftGoal(arm_left_goal);
 148
 149   // Sends the command to start the given trajectory 1s from now
 150   arm_left_goal.trajectory.header.stamp = ros::Time::now() + ros::Duration(1.0);
 151   arm_left_client->sendGoal(arm_left_goal);
 152
 153   // Wait for trajectory execution
 154   while(!(arm_left_client->getState().isDone()) && ros::ok())
 155   {
 156     ros::Duration(4).sleep(); // sleep for four seconds
 157   }
 158
 159   // Generates the goal for the TIAGo's right arm
 160   control_msgs::FollowJointTrajectoryGoal arm_right_goal;
 161   waypointsArmRightGoal(arm_right_goal);
 162
 163   // Sends the command to start the given trajectory 1s from now
 164   arm_right_goal.trajectory.header.stamp = ros::Time::now() + ros::Duration(1.0);
 165   arm_right_client->sendGoal(arm_right_goal);
 166
 167   // Wait for trajectory execution
 168   while(!(arm_right_client->getState().isDone()) && ros::ok())
 169   {
 170     ros::Duration(4).sleep(); // sleep for four seconds
 171   }
 172
 173   return EXIT_SUCCESS;
 174 }
Note that for the first waypoint, for each joint in the trajectory, we use a velocity of 1.0 m/s. It specifies the velocity of the trajectory when reaching the waypoint. We obtain it with the following line of code
62 goal.trajectory.points[index].velocities[j] = 1.0;
As we want the robot to move smoothly when reaching the first target waypoint. By setting the velocity to 0.0 m/s will cause a step-wise movement, where the robot will stop in each waypoint. We set the velocity to 0.0 m/s just for the last waypoint.
The joint_trajectory_controller will map the position+velocity trajectory to position commands through a PID loop.
Joint trajectory messages allow to specify the time at which the trajectory should start executing by means of the header timestamp. In the following line of code, the node will start the given trajectory 1s from "now"
150 arm_left_goal.trajectory.header.stamp = ros::Time::now() + ros::Duration(1.0);
The required control commands are sent to the arms controller through the topic of their action interfaces:
/arm_left_controller/follow_joint_trajectory
/arm_right_controller/follow_joint_trajectory
