| Note: This tutorial assumes that you have completed the previous tutorials: Track and Detect, Training. |
| |
How to tune BLORT to your needs
Description: This tutorial gives useful hints about tuning and boosting BLORT.Tutorial Level: INTERMEDIATE
Introduction
Segmentation
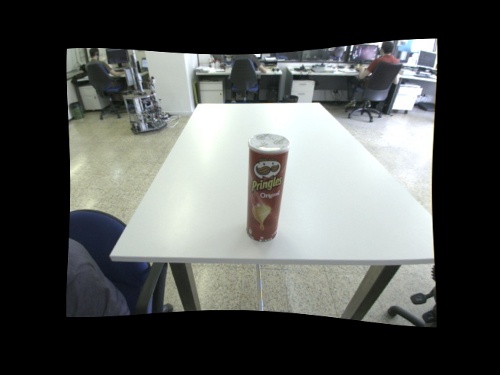
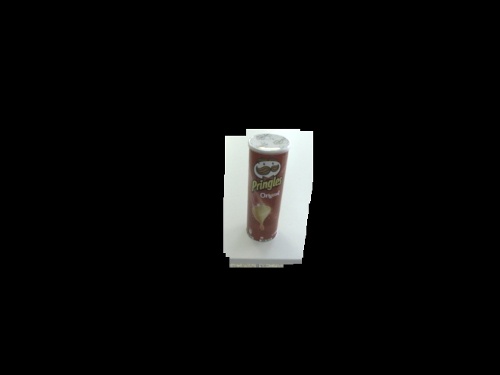
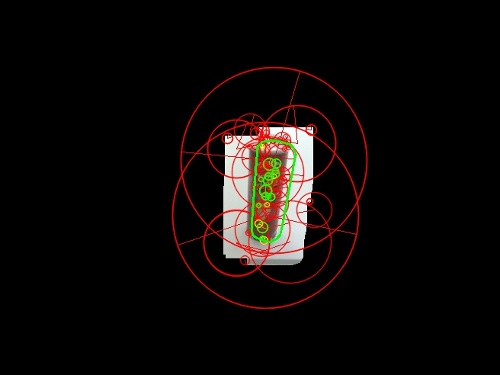
To improve the speed of the feature based detector and the edge based tracker you can use some segmentation nodes to pre-filter the images. The above example in steps using disparity based and histogram based segmentations. Raw input:

After applying disparity segmentation mask:

After applying histogram segmentation mask:

BLORT results:

![]()
You can find segmentation nodes in the package pal_vision_segmentation. At the moment you can use the following:
- stereo disparity based segmentation (can be configured to a given distance)
- template matching based segmentation (needs a template image of the target)
- histogram backprojection based segmentation (needs a template image of the target)
An example on how to use segmentation is as follows. First of all, play the bag file of the previous tutorial as follows
roscd blort_ros
cd Resources/bags
rosbag play pringles_single_stereo_image.bag --loop
Then, in order to ease the task of the detector and tracker nodes we segment the image using color segmentation by running $ roslaunch pal_vision_segmentation histogram_segment.launch
where the launch file contents are:
<launch>
    <group ns="/histogram_segmentation">
        <rosparam command="load" file="$(find pal_vision_segmentation)/default_tabletop_histogram.yaml" />
    </group>

    <node pkg="pal_vision_segmentation" type="histogram_segmentation" name="histogram_segmentation" args="$(find pal_vision_segmentation)/etc/pringles1.png">
        <remap from="image" to="/stereo/left/image" />
    </node>
</launch>
Note that color histogram segmentation is used provided an image of the target object.
To start the detector and tracker nodes execute: $ roslaunch blort_ros tracking_histogram.launch
<launch>
        <!-- Tracker node -->
        <node pkg="blort_ros" type="gltracker_node" name="blort_tracker" args="$(find blort_ros)">
                <param name="launch_mode" value="tracking" />
                <remap from="/blort_camera_info" to="/stereo/left/camera_info" />
                <remap from="/blort_image" to="/histogram_segmentation/image_masked" />
        </node>

        <!-- Detector node -->
        <node pkg="blort_ros" type="gldetector_node" name="blort_detector" args="$(find blort_ros)">
                <remap from="/blort_camera_info" to="/stereo/left/camera_info" />
        </node>
</launch>
To have some control and feedback execute:
$ roslaunch blort_ros view_control.launch
<launch>
        <node pkg="dynamic_reconfigure" type="reconfigure_gui" name="reconfigure_gui" />

        <!-- Visual feedback -->
        <node pkg="image_view" type="image_view" name="image_view_tracker">
                <remap from="/image" to="/blort_tracker/image_result" />
        </node>

        <!-- Visual feedback -->
        <node pkg="image_view" type="image_view" name="image_view_detector">
                <remap from="/image" to="/blort_detector/image_result" />
        </node>
</launch>
Should you implement your own segmentation technique please add a link to your package to the list below. List of additional segmentation techniques for BLORT:
- add your item here
Pose estimation results
If you are working with tf, we have good news for you!
To use the results published on the output topic you can use a tf converter node this package. The following line will convert and publish all pose estimation results to tf under blort_target_frame which has stereo_optical_link as parent.
$ rosrun blort_ros pose2Tf /stereo_optical_link /target_frame pose:=/blort_tracker/detection_result
Or the other version which will repeat the last received pose over time:
$ rosrun blort_ros pose2Tf_repeat /stereo_optical_link /target_frame pose:=/blort_tracker/detection_result
The tracking.ini file
These instructions are aimed to tune the tracker_node.
Note: Only play with the parameters if you are unable or rarely able to get results. |
Probably you've already noticed that the tracking.ini file contains more details than the ones you used so far.
These are the parameters of the original BLORT implementation which are quite fixed. If you'd like to make the tracker more strict, raise the BaseThreshold value. This will effect the confidence of the tracker, so you can expect a lot less pose values published since the tracker will only publish it when it's sure that the pose is good.
You can also modify the number of particles if you are desperate.
Detector tuning
These instructions are aimed to tune the detector_node.
Note: Only play with the parameters if you are unable or rarely able to get results. |
The detector parameters can be found in the file detector_params.yaml in the package directory.
nn_match_threshold: 0.55
ransac_n_points_to_match: 4
If the detector node is unable to estimate the pose while it should, or it's too slow, you can tune the ransac and nearest neighbor algorithms inside the detector. The nearest neightbor algorithm does the matching between features learned during the training stage and the actual image. The threshold controls the acceptance.
The ransac parameter controls the minimum number of good matches to start the ransac with. If you raise it, the detector will work for longer but will more likely provide good results while if you decrease it might produce weak pose estimates.


