| Note: This tutorial assumes that you have completed the previous tutorials: ROS tutorials. |
| |
Launching robot in Gazebo Simulator and driving it
Description: How to launch MRP2 robot in Gazebo World and How to explore areas by driving it via different waysTutorial Level: BEGINNER
Next Tutorial: Explore surrounding areas and make a map
Contents
Connecting Controller to PC
If you haven't got a joystick controller, directly pass to the second section.
Connect your controller's receiver to your PC. Usually it can recognize it in several seconds. If you want to verify, you can use dmesg | tail -n7 command.
Launching Gazebo Simulator
If this is your first time controlling the robot from PC, ROS_MASTER_IP and ROS_HOSTNAME variables might be emtpy if you are just going to simulate the robot on gazebo that should be fine. For verifying, Open up a terminal on your PC and type;
$ echo $ROS_MASTER_IP
$ echo $ROS_HOSTNAME
Verifying environment variables in easy way
You can write this command to simple file for running local applications:
$ touch ~/.ros_local_bashrc
$ echo "export ROS_MASTER_IP= && export ROS_HOSTNAME=" >> ~/.ros_local_bashrc
And just source it everytime when you started a new terminal:
$ source .ros_local_bashrc
Launching Gazebosim
If you didn't set up the control or you've already verified variables are empty, just enter:
$ roslaunch mrp2_gazebo mrp2_gazebo.launch
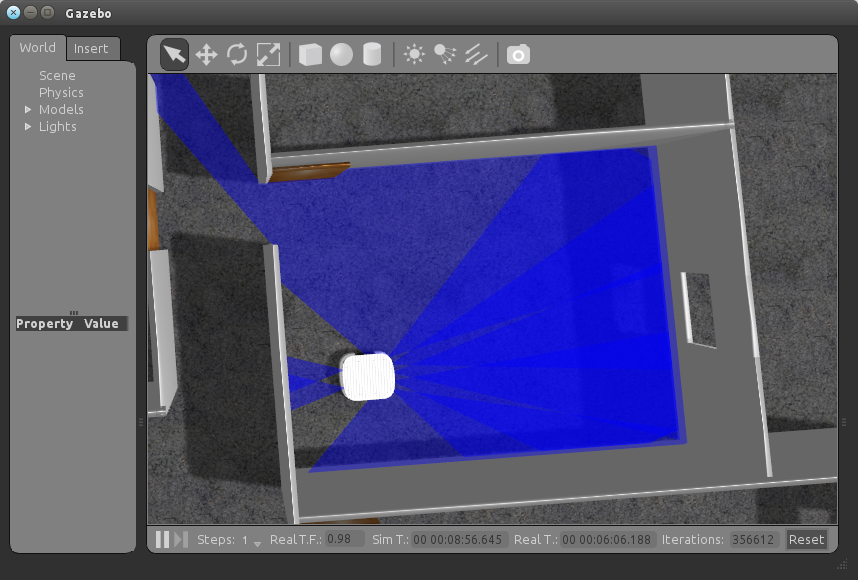
Necessary node's will run and Gazebo screen will appear:
You can interact with world by moving objects, adding new ones etc. But if you will try to run amcl, Don't move the robot and walls, because, by default, the map which saved for amcl is set to those locations of robot and walls. If you will try gmapping only, you can locate walls and robot, your coordinate on new map will start with your starting position when the gmapping process's start.
Controlling Robot
This section describes Joystick and rqt_robot_steering methods. To find out other methods, Please take a look at ROS Tutorials.
Controlling via Joystick
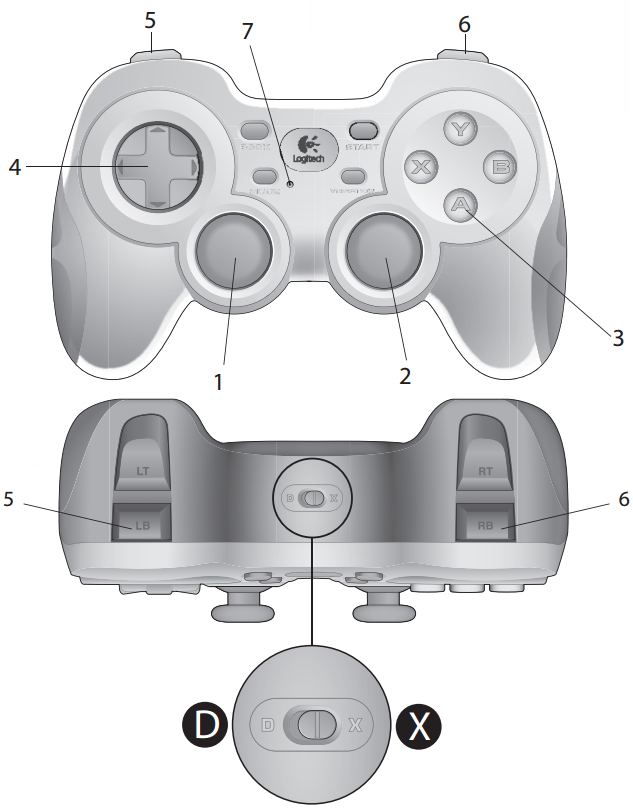
With a default configurations, now, you can control your robot via Joystick Controller. Just try buttons to look what are they doing, or take a look at these:

Button    Function
----------------------------------------------------------
1         Move Forward/Backward Linear - Analog
2         Move Clockwise/Counter Clockwise Angular - Analog
3         Activate/Deactivate Gamepad
4         Not Used
5         Decrease Velocity Limit
6         Increase Velocity Limit
7         Connection Indicator LED
Controlling via rqt_robot_steering
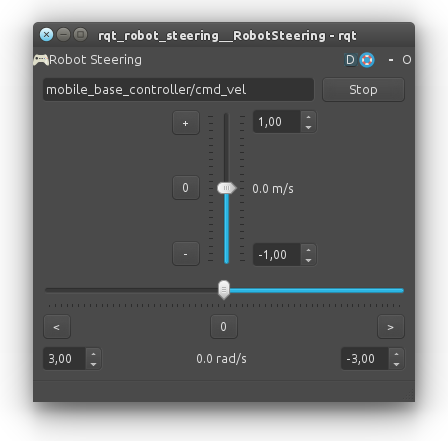
rqt_robot_steering is a tool that simply publishes a messages to robot's velocity command topics.

For opening up, in another terminal (We recommend terminal tabs), be sure the ROS_MASTER_IP and ROS_HOSTNAME variables are empty and type;
$ rosrun rqt_robot_steering rqt_robot_steering
and be sure, the topic is set to /mobile_base_controller/cmd_vel
Now, You can use slider buttons to send velocity commands to robot.
You should take some time to understand how robot steering works. After that you can move forward to our navigation tutorial.


