Only released in EOL distros:
Package Summary
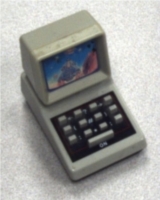
Completed as a graduate class project, this stack tracks a toy computer using 2D RGB information and can cause the PR2 to point at the object in 3D space using the Kinect's point cloud.
- Author: Russell Toris, David Kent, Adrian Boteanu
- License: BSD
- Source: git https://github.com/WPI-RAIL/rail_cv_project.git (branch: fuerte-devel)
Contents
About
For our final Computer Vision project, our team was given the task of detecting a small toy computer (shown to the right). After discussing potential ways of tackling such a problem and noting the numerous computer vision techniques used to detect objects, we decided to baseour approach around classification. Although there are many out-of-the-box solutions that could be used to aid us ina vision based classification system, we wanted to instead use lower level processing techniques to build a more robust and original pipeline. The pipeline, which is discussed in detail in the final report, consists of a custom image segmentation algorithm and feature extraction. By doing so, we would be able to customize exact parameters to help us more accurately detect target objects. |
|
Objectives
|
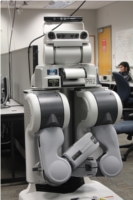
Our project consisted of an overarching goal of accurately detecting the toy computer using the techniques mentioned above. To challenge ourselves to build a robust system, we decided to take this goal one step further. We began by noting that computer vision is an area of research that encompasses various areas of the sciences and engineering. Therefore, we wanted to build a system that would not only meet the main recognition objective, but, more importantly, we wanted to make practical use of this data. Thus, the decision was made to use the PR2 robot (seen left). Our end objective was to use the robot's Kinect RGB camera to accurately, confidently, and efficiently detect the image using only 2D image data. Once we had made a confident match, we would then use the Kinect's features to pinpoint a probable location of the object in 3D space. By converting this point into the robot's coordinate frame, we can then have the robot physically indicate the location of the object. This physical demo was the ultimate end goal of the project. |
In hopes of releasing our code, we decided to make use of the widely used OpenCV code base. Furthermore, all of our code was implemented to be used within ROS.
Nodes
processor
The processor node reads in streams from the PR2's onboard cameras and attempts to detect the toy computer via multiple steps. Additional information is available in the project's writeup.Subscribed Topics
/kinect_head/rgb/image_rect_color (sensor_msgs/Image)- The RGB image from the PR2's kinect used to detect the object in real time.
- The RGBD point cloud from the Kinect used to find the 3D location of the detected object.
Published Topics
/tf (tf/tfMessage)- Two TFs are published by this node. The first is the location of the detected object as TF between /head_mount_kinect_rgb_optical_frame and /computer_object_link. The second is the padded goal point for the point action as a TF between /head_mount_kinect_rgb_optical_frame and /touch_goal.
robot
The robot node moves the robot in response to the processor node. Additional information is available in the project's writeup.Subscribed Topics
/move_left_arm/feedback (move_arm_msgs/MoveArmFeedback)- Feedback from the inverse kinematics server for the left arm movement.
- The status from the inverse kinematics server for the left arm movement.
- The result from the inverse kinematics server for the left arm movement.
- Feedback from the inverse kinematics server for the right arm movement.
- The status from the inverse kinematics server for the right arm movement.
- Listens for the location of the detected object in 3D space relative to the PR2.
Published Topics
/move_left_arm/goal (move_arm_msgs/MoveArmGoal)- The goal message to move the left arm of the robot.
- Used to cancel the move arm command for the left arm.
- The goal message to move the right arm of the robot.
- Used to cancel the move arm command for the right arm.
Installation
To install the rail_cv_project stack, you can choose to either install from source, or from the Ubuntu package:
Source
To install from source, execute the following:
Ubuntu Package
To install the Ubuntu package, execute the following:
sudo apt-get install ros-fuerte-rail-cv-project
Startup
To run the project, a launch file is provided to start the necessary robot nodes. The actual processing node that detects the object can either be run on the PR2's onboard computer or on a local machine connected to the robot's roscore. It is important to note that the processor node will attempt to display several windows so X forwarding must be enabled on the robot's SSH connection if you decide to run the processor node on the robot.
Robot Nodes
To run the nodes that are needed to run on your PR2, after you have started your robot (i.e., robot start), run the following launch file:
roslaunch rail_cv_project robot.launch
Project Nodes
To run the nodes distributed with this project, run the following nodes in two separate terminals:
run rail_cv_project processor
run rail_cv_project robot
Demo Videos
The following is a set of videos that demo the full working system:
Support
Please send bug reports to the GitHub Issue Tracker. Feel free to contact us at any point with questions and comments.
|
|
|


