QAProcess: DevelopersGuide | Review Status | PackageProposalProcess | PackageDocumentation | APIReviewProcess | DocReviewProcess | CodeReviewProcess | StackDocumentation | StackVersionPolicy | AutomatedTesting | StackReleaseProcess | WritingTutorials | Graveyard
| Note: Before writing a tutorial take the time to review the ROS tutorials. |
| |
튜토리얼 작성하기
Description: 이 튜토리얼은 튜토리얼 작성을 위한 튜토리얼입니다.Keywords: teaching, tutorials, writing
Tutorial Level: BEGINNER
Contents
시작하기
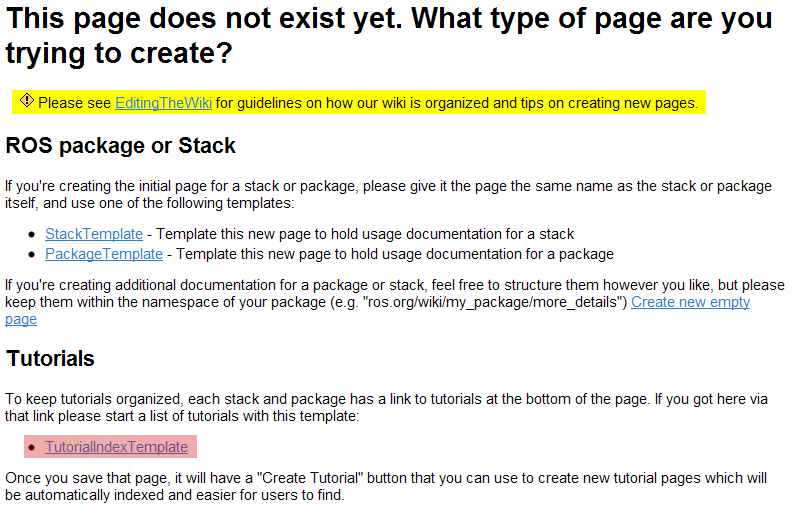
튜토리얼 작성을 위해 작성하고자 하는 Stack과 Package page로 이동합니다. 만약 아직 튜토리얼이 존재하지 않는다면, 아래와 같은 Page가 출력됩니다.

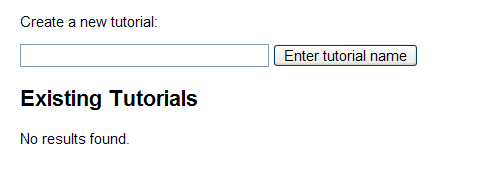
Click on the TutorialIndexTemplate link, and save the suggested preview without changes. This will create a new page for creating tutorials as shown below:

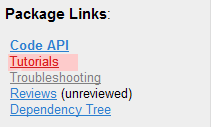
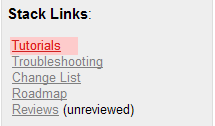
This page is useful for creating tutorials and will display the list of current tutorials. In the sidebar of the stack or package page there will be a link created for tutorials as shown below:
|
|
새 튜토리얼 만들기
In the create a new tutorial box enter a page name for your new tutorial and click the button. This will create a new page using the TutorialTemplate which looks something like (some ! are added in front of the keys so that the header for this page is generated correctly):
####################################
##FILL ME IN
####################################
## for a custom note with links:
## !note =
## for the canned note of "This tutorial assumes that you have completed the
## previous tutorials:" just add the links
## !note.0.link=
## descriptive title for the tutorial
## !title =
## multi-line description to be displayed in search
## !description =
## the next tutorial description (optional)
## !next =
## links to next tutorial (optional)
## !next.0.link=
## !next.1.link=
## what level user is this tutorial for
## !level= (BeginnerCategory, IntermediateCategory, AdvancedCategory)
## !keywords =
####################################

!<<IncludeCSTemplate(TutorialCSHeaderTemplate)>>
Note that until you save the page at least once, the preview button does not seem to be working properly.
Template Header 채우기
위의 template은 위와 같은 page와 비슷한 header를 자동으로 생성합니다.
Note
Note는 tutorial을 page 위에 tutorial을 따라가기 위한 주의점이나 정보를 담는 파란 박스를 생성합니다.
아래의 text는 아래와 같이 생성됩니다.
note= This is my awesome text
Note: This is my awesome text. |
아래와 같이 사용한다면:
note.0=[[ROS/Tutorials|ROS tutorials]]
note.1=[[Documentation| ros.org]]
위의 text는 아래와 같이 링크를 추가합니다. 이번 예제는 전 예제를 비슷하게 따라했다는 것을 가정합니다.
Note: This tutorial assumes that you have completed the previous tutorials: ROS tutorials, ros.org. |
Note that if you want to place links in your custom text for the note they should go in-line rather than in note.0, note.1, etc. This will keep "This tutorial assumes that you have completed the previous tutorials:" from appearing undesired.
Title
Title은 Index page와 Tutorial page 위에 표시되는 제목입니다.
!title= My Awesome Tutorial
Description
Description은 Page위에 표시되며, Title과 같이 index page에서 설명으로 표시됩니다.
description= My awesome tutorial is amazingly awesome and cool, you won't even believe it, do it now!
아래와 같이 보입니다:
Description: My awesome tutorial is amazingly awesome and cool, you won't even believe it, do it now! |
Next
Next는 링크하고 싶은 tutorial에 링크 할 때 사용됩니다. 이 Field는 옵션이며, 아무 것도 채워지지 않았을 경우 아무 것도 표시되지 않습니다.
next=Here are the next awesome tutorials
next.0.link=[[ROS/Tutorials|ROS tutorials]]
next.1.link=[[actionlib_tutorials/Tutorials|actionlib tutorials]]
아래와 같이 보입니다:
Next Tutorial: Here are the next awesome tutorials ROS tutorials actionlib tutorials. |
혹은:
next.0.link=[[actionlib_tutorials/Tutorials|Actionlib tutorials]]
아래와 같이 보입니다:
Next Tutorial: Actionlib tutorials. |
Level
Level은 2가지 목적을 위해 사용됩니다. 하나는 독자에게 이 tutorial의 level을 알려주는 목적과 index page에서 category로 분류하기 위한 목적을 가지고 있습니다.
level=AdvancedCategory
아래와 같이 보입니다:
Tutorial Level: ADVANCED |
Keywords
Keywords 는 독자에게 만들고자 하는 tutorial을 쉽게 찾도록 도와줍니다.
keywords= great, cool, awesome
아래와 같이 보입니다:
Keywords: great, cool, awesome |
유용한 Macros
튜토리얼 작성을 위한 유용한 Macro에 대한 설명입니다.
Parsers
현재 wiki에는 아래와 같은 parser가 설치되어 있습니다.
c++
- example:
latex
- example:
latex error! exitcode was 1 (signal 0), transscript follows:

This is pdfTeX, Version 3.14159265-2.6-1.40.19 (TeX Live 2018) (preloaded format=latex)

kpathsea: Running mktexfmt latex.fmt
mktexfmt: mktexfmt is using the following fmtutil.cnf files (in precedence order):
mktexfmt:   /usr/share/texlive/texmf-dist/web2c/fmtutil.cnf
mktexfmt: mktexfmt is using the following fmtutil.cnf file for writing changes:
mktexfmt:   /usr/share/httpd/.texlive2018/texmf-config/web2c/fmtutil.cnf
/usr/bin/mktexfmt: mkdir(/usr/share/httpd/.texlive2018/) failed: Permission denied
I can't find the format file `latex.fmt'!
latex error! exitcode was 1 (signal 0), transscript follows:

This is pdfTeX, Version 3.14159265-2.6-1.40.19 (TeX Live 2018) (preloaded format=latex)

kpathsea: Running mktexfmt latex.fmt
mktexfmt: mktexfmt is using the following fmtutil.cnf files (in precedence order):
mktexfmt:   /usr/share/texlive/texmf-dist/web2c/fmtutil.cnf
mktexfmt: mktexfmt is using the following fmtutil.cnf file for writing changes:
mktexfmt:   /usr/share/httpd/.texlive2018/texmf-config/web2c/fmtutil.cnf
/usr/bin/mktexfmt: mkdir(/usr/share/httpd/.texlive2018/) failed: Permission denied
I can't find the format file `latex.fmt'!
python
- example:
CodeRef
만약 미리 작성해 놓은 코드를 다시 사용하고 싳으면 CodeRef를 사용합니다.
Coderef는 아래와 같이 사용합니다.
<<CodeRef(blockname,1,2)>>
아래와 같이 보입니다:
python:
#!cplusplus 와 #!python 는 {{{ 다음 새줄로 작성하는 것을 주의합시다.
You have to save (not just preview) before the new code block becomes part of the system.
TutorialChain
TutorialChain 매크로는 튜토리얼 목록을 만들기 위해 사용합니다. Tutorial Chain은 튜토리얼 목록을 앞뒤의 링크로 묶어줍니다.
<<TutorialChain(WritingTutorials)>>
아래와 같이 Title과 Description을 보여줍니다.
- How to Write a Tutorial
This tutorial covers useful template and macros for writing tutorials, along with example tutorials that are available for guidance on ros.org
IncludeCSTemplate
This macro takes the keys at the top of the page and turns them into clearsilver variables that can be operated on using the clearsilver templating commands. In the case of tutorials the keys are used in the TutorialCSHeaderTemplate.
!<<IncludeCSTemplate(TutorialCSHeaderTemplate)>>
Embed Tutorials
You can embed videos using the Youtube and Vimeo macros
<<Youtube(Q5KC-trrw_o)>>
예제 튜토리얼
Here is a list of good tutorials to base your tutorials off of:


