Contents
Overview
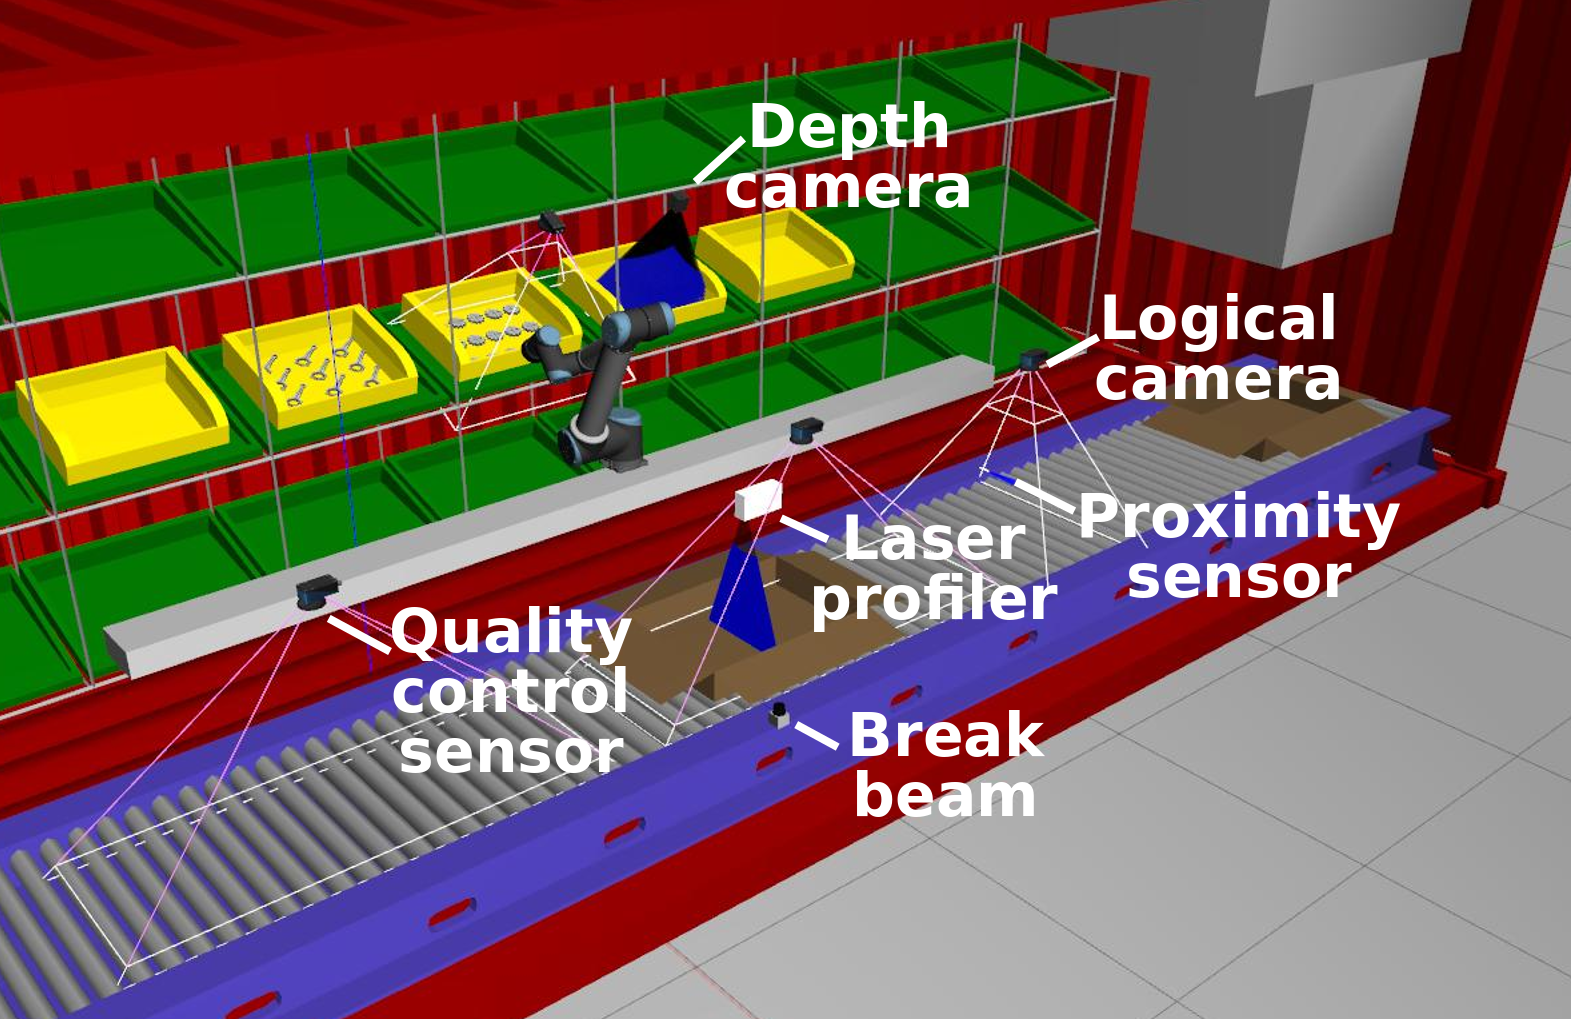
The purpose of this tutorial is to introduce you to the sensors available to you in the Agile Robotics for Industrial Automation Competition (ARIAC) and how to interface with them from the command-line. See the Hello World tutorial for an example of how to programmatically read the sensor data.
Note: this tutorial assumes you are using ROS Kinetic (Ubuntu Xenial 16.04), the officially supported ROS distro for ARIAC 2018.
Prerequisites
You should have already completed the GEAR interface tutorial.
Reading sensor data
As described in the competition specifications, there are sensors available for you to place in the environment. How you can select which sensors to use is covered in the competition configuration specifications.
To start with, launch ARIAC with a sample workcell environment configuration that contains an arm and some sensors in various locations:
$ roslaunch osrf_gear sample_environment.launch fill_demo_shipment:=true

Start the competition so that the shipping box has some products appear in it (this will happen when the first order is received).
$ rosservice call /ariac/start_competition
Break beam
This is a simulated photoelectric sensor, such as the Sick W9L-3. This sensor has a detection range of 1 meter and the binary output will tell you whether there is an object crossing the beam. There are two ROS topics that show the output of the sensor: /ariac/{sensor_name} and /ariac/{sensor_name}_change. A message is periodically published on topic /ariac/{sensor_name} with the output of the sensor. Once GEAR has been started, you can display the output of the break_beam sensor with:
$ rostopic echo /ariac/break_beam_1
You'll receive periodic updates showing if an object was detected. Alternatively, you could subscribe to the /ariac/{sensor_name}_change which will only show one message per transition from object not detected to object detected or vice versa:
$ rostopic echo /ariac/break_beam_1_change
You should see that the break beam says that it detects an object (the shipping box on the belt).
Proximity sensor
This is a simulated ultrasound proximity sensor such as the SU2-A0-0A. This sensor has a detection range of ~0.15 meters and the output will tell you how far an object is from the sensor. The ROS topic /ariac/{sensor_name} publishes the output of the sensor with the sensor_msgs/Range message type. We have installed a proximity sensor in the grill next to the belt. Once GEAR has been started, you can subscribe to the proximity sensor topic with:
$ rostopic echo /ariac/proximity_sensor_1
For demonstration purposes, let's spawn a part that trips the sensor:
$ rosrun gazebo_ros spawn_model -sdf -model pulley_part_1 -x 0.40 -y 2.58 -z 0.9 -file `catkin_find osrf_gear --first-only --share`/models/pulley_part_ariac/model.sdf
You should see that the sensor detects the part (reported range is less than the max range).
---
header:
  seq: 16
  stamp:
    secs: 8
    nsecs: 950000000
  frame_id: proximity_sensor_frame
radiation_type: 0
field_of_view: 0.125
min_range: 0.00999999977648
max_range: 0.15000000596
range: 0.0201679486781
Laser profiler
This is a simulated 3D laser profiler such as the Cognex DS1300. The output of the sensor is an array of ranges and intensities. The size of the array is equal to the number of beams in the sensor. The maximum range of each beam is ~0.725m. The output of the sensor is periodically published on the topic /ariac/{sensor_name}. Once GEAR has been started you can subscribe to the laser profiler topic with:
$ rostopic echo /ariac/laser_profiler_1
The profile of the products in the shipping box can be detected by the sensor when they pass beneath it. Note that the ranges reported will vary over time as there is noise in the sensor output.
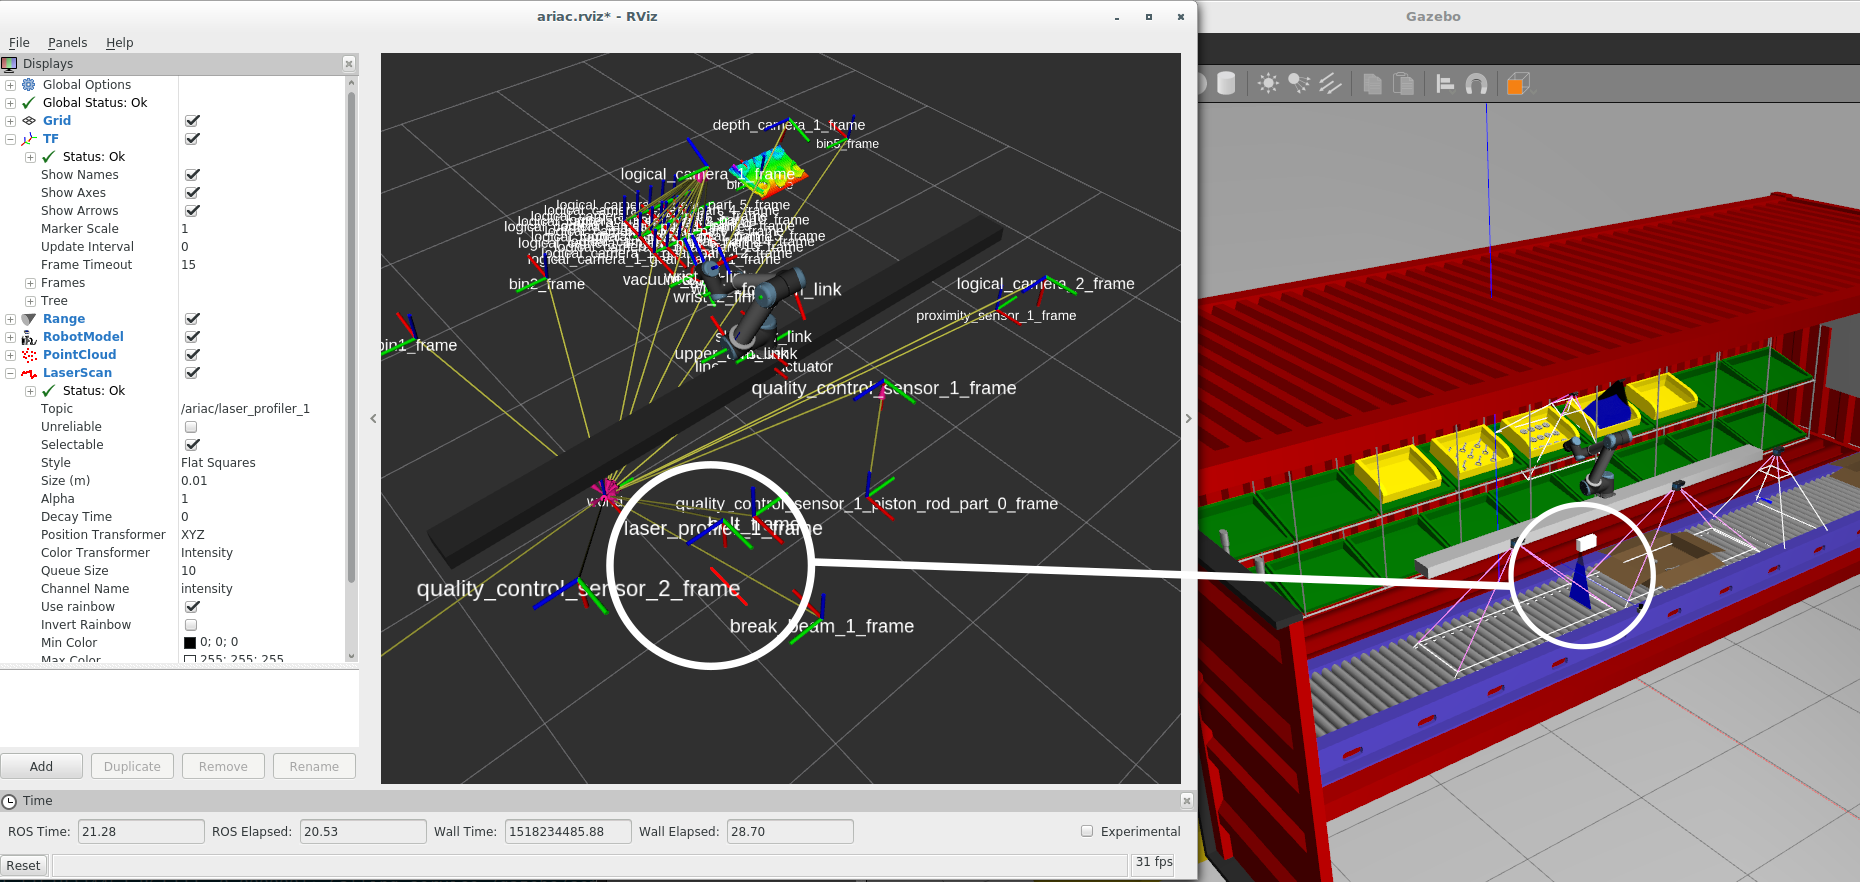
To visualize the laser scan, launch RViz:
$ rosrun rviz rviz -d `catkin_find osrf_gear --first --share`/rviz/ariac.rviz

Disable the TF frames (uncheck the box) to clear the clutter from the display. You should be able to notice the scan being displayed relative to the laser profiler's TF frame (it looks like a solid red line in RViz). In another terminal, give power to the conveyor belt:
$ rosservice call /ariac/conveyor/control "power: 100"
As the boxes pass beneath the laser profiler, the profile will change in the Z direction.
Depth camera
This is a simulated time-of-flight depth camera such as the Swissranger SR4000. The output of the sensor is a point cloud. Because of the amount of data being published, if you want to echo the sensor message, you probably want to use the following option to suppress the data values:
$ rostopic echo /ariac/depth_camera_1 --noarr
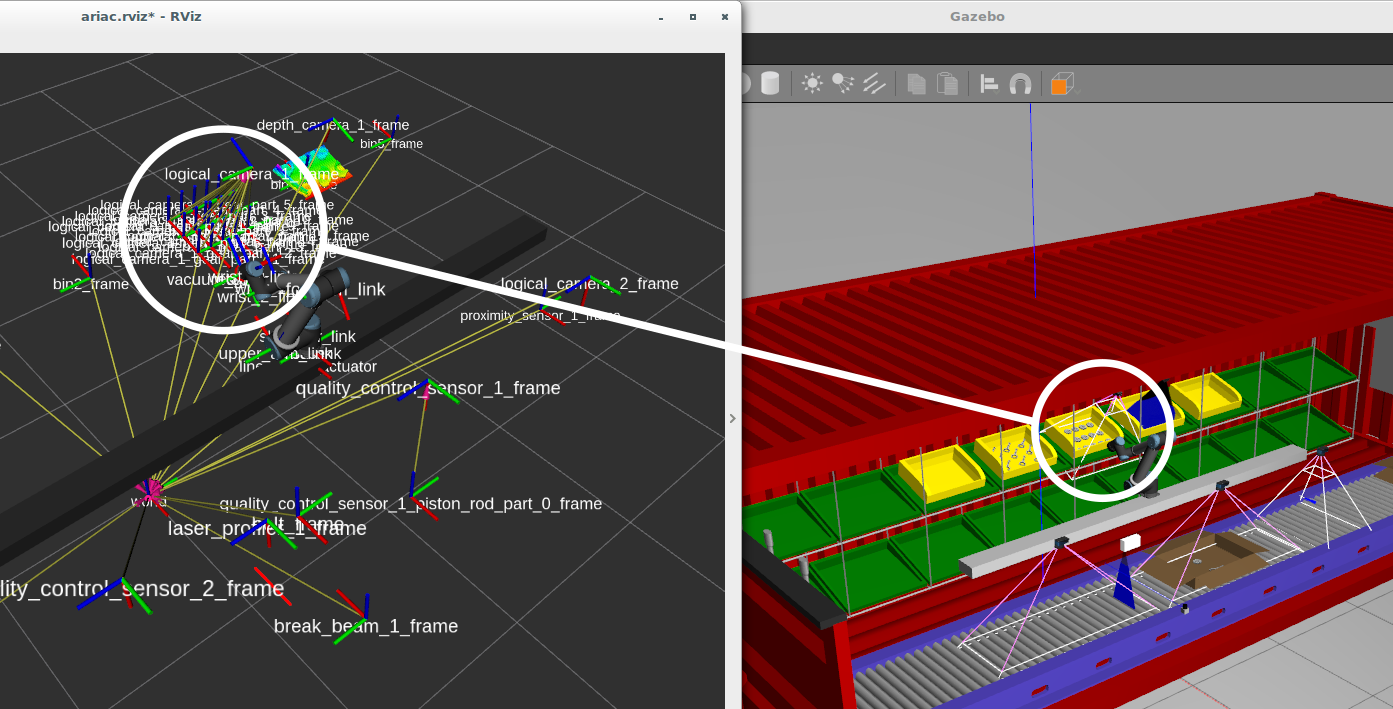
There is a depth camera positioned above one of the bins. In the rviz display from before, you will be able to notice it detecting a number of products that are sitting in the bin.

Logical camera
This is a simulated camera with a built-in object classification and localization system. The sensor reports the position and orientation of the camera in the world, as well as a collection of the objects detected within its frustum. For each object detected, the camera reports its type and pose from the camera reference frame. In the sample environment, there is a logical camera above the bins that store products. Run ARIAC and subscribe to the logical camera topic:
$ rostopic echo /ariac/logical_camera_1
You should see that the logical camera reports the pose of multiple products, and its own pose in the world. Note that there is some noise in the poses reported by the camera.
models:
  -
    type: "gear_part"
    pose:
      position:
        x: 0.708037337429
        y: 0.152578954575
        z: 0.0779227635947
      orientation:
        x: 0.594620953319
        y: 0.00280400244862
        z: -0.803999640305
        w: 0.0016241407837
  -
    type: "gear_part"
    pose:
      position:
        x: 0.752399964559
        y: 0.244549231932
        z: 0.226220045371
      orientation:
        x: 0.601300269654
        y: -0.00428369639142
        z: -0.799001888917
        w: -0.00395185599492


...

pose:
  position:
    x: -0.4
    y: 1.2
    z: 1.54
  orientation:
    x: -0.496880137844
    y: -5.13831469851e-14
    z: 0.867819179678
    w: -8.97425295754e-14
---
TF transforms
In addition to publishing to the /ariac/{logical_camera_name} ROS topic, logical cameras also publish transforms on the /tf ROS topic that can be used by the TF2 library.
The TF2 library can be used to calculate the pose of the products detected by the logical cameras in the world co-ordinate frame (see http://wiki.ros.org/tf2). It does this by combining the the transform from the /world frame to /logical_camera_frame, with the transform from /logical_camera_frame to the frame of the detected products.
Here's an example of using TF2 command-line tools to do the conversion to the world co-ordinate frame. Note that the frame of the detected products is prefixed by the name of the camera that provides the transform, so that transforms provided by multiple cameras that see the same products are unique.
$ rosrun tf tf_echo /world /logical_camera_1_gear_part_1_frame
At time 489.822
- Translation: [-0.975, 0.957, 1.006]
- Rotation: in Quaternion [0.006, 0.124, -0.003, 0.992]
            in RPY (radian) [0.011, 0.248, -0.004]
            in RPY (degree) [0.611, 14.222, -0.227]
As another example, to use the logical camera that is positioned above the conveyor belt to get the pose of a shipping box it sees in world co-ordinates, you would run the following command (if there isn't a shipping box with that ID beneath the camera, you won't get the same output):
$ rosrun tf tf_echo /world /logical_camera_2_shipping_box_3_frame
At time 656.431
- Translation: [1.160, 2.580, 0.444]
- Rotation: in Quaternion [0.006, 0.006, 0.004, 1.000]
            in RPY (radian) [0.012, 0.013, 0.008]
            in RPY (degree) [0.711, 0.720, 0.472]
There are many ROS tools for interacting with TF frames. For example the pose of the models detected by the logical camera can be visualized in RViz:
$ rosrun rviz rviz -d `catkin_find osrf_gear --share`/rviz/ariac.rviz

For more information on working with TF frames programmatically see the tf2 tutorials.
Note that GEAR uses tf2_msgs and not the deprecated tf_msgs. Accordingly, you should use the tf2 package instead of tf.
Next steps
Now that you are familiar with the sensors available, continue to the Hello World tutorial to see how to programmatically interface with ARIAC.


