| Note: Some of the files in here haven't been released yet and may not work. Sorry!. This tutorial assumes that you have completed the previous tutorials: Adding Virtual Objects. |
| |
Attaching Virtual Objects to the Robot
Description: In this tutorial we describe attaching virtual objects to the robot's body - these are objects that are assumed to move with the robot instead of being static in the environment.Keywords: attached_objects planning_scene electric
Tutorial Level: INTERMEDIATE
Setting up the tutorial
In one terminal run the following:
roslaunch pr2_arm_navigation_tutorials pr2_floorobj_world.launch
In another terminal run:
roslaunch pr2_arm_navigation_tutorials planning_scene_architecture.launch
This will bring up an Rviz window.
Running the tutorial
This tutorial uses the executable in pr2_arm_navigation_tutorials called get_state_validity_virtual_attached_object. In another terminal, run the following command:
rosrun pr2_arm_navigation_tutorials get_state_validity_virtual_attached_object
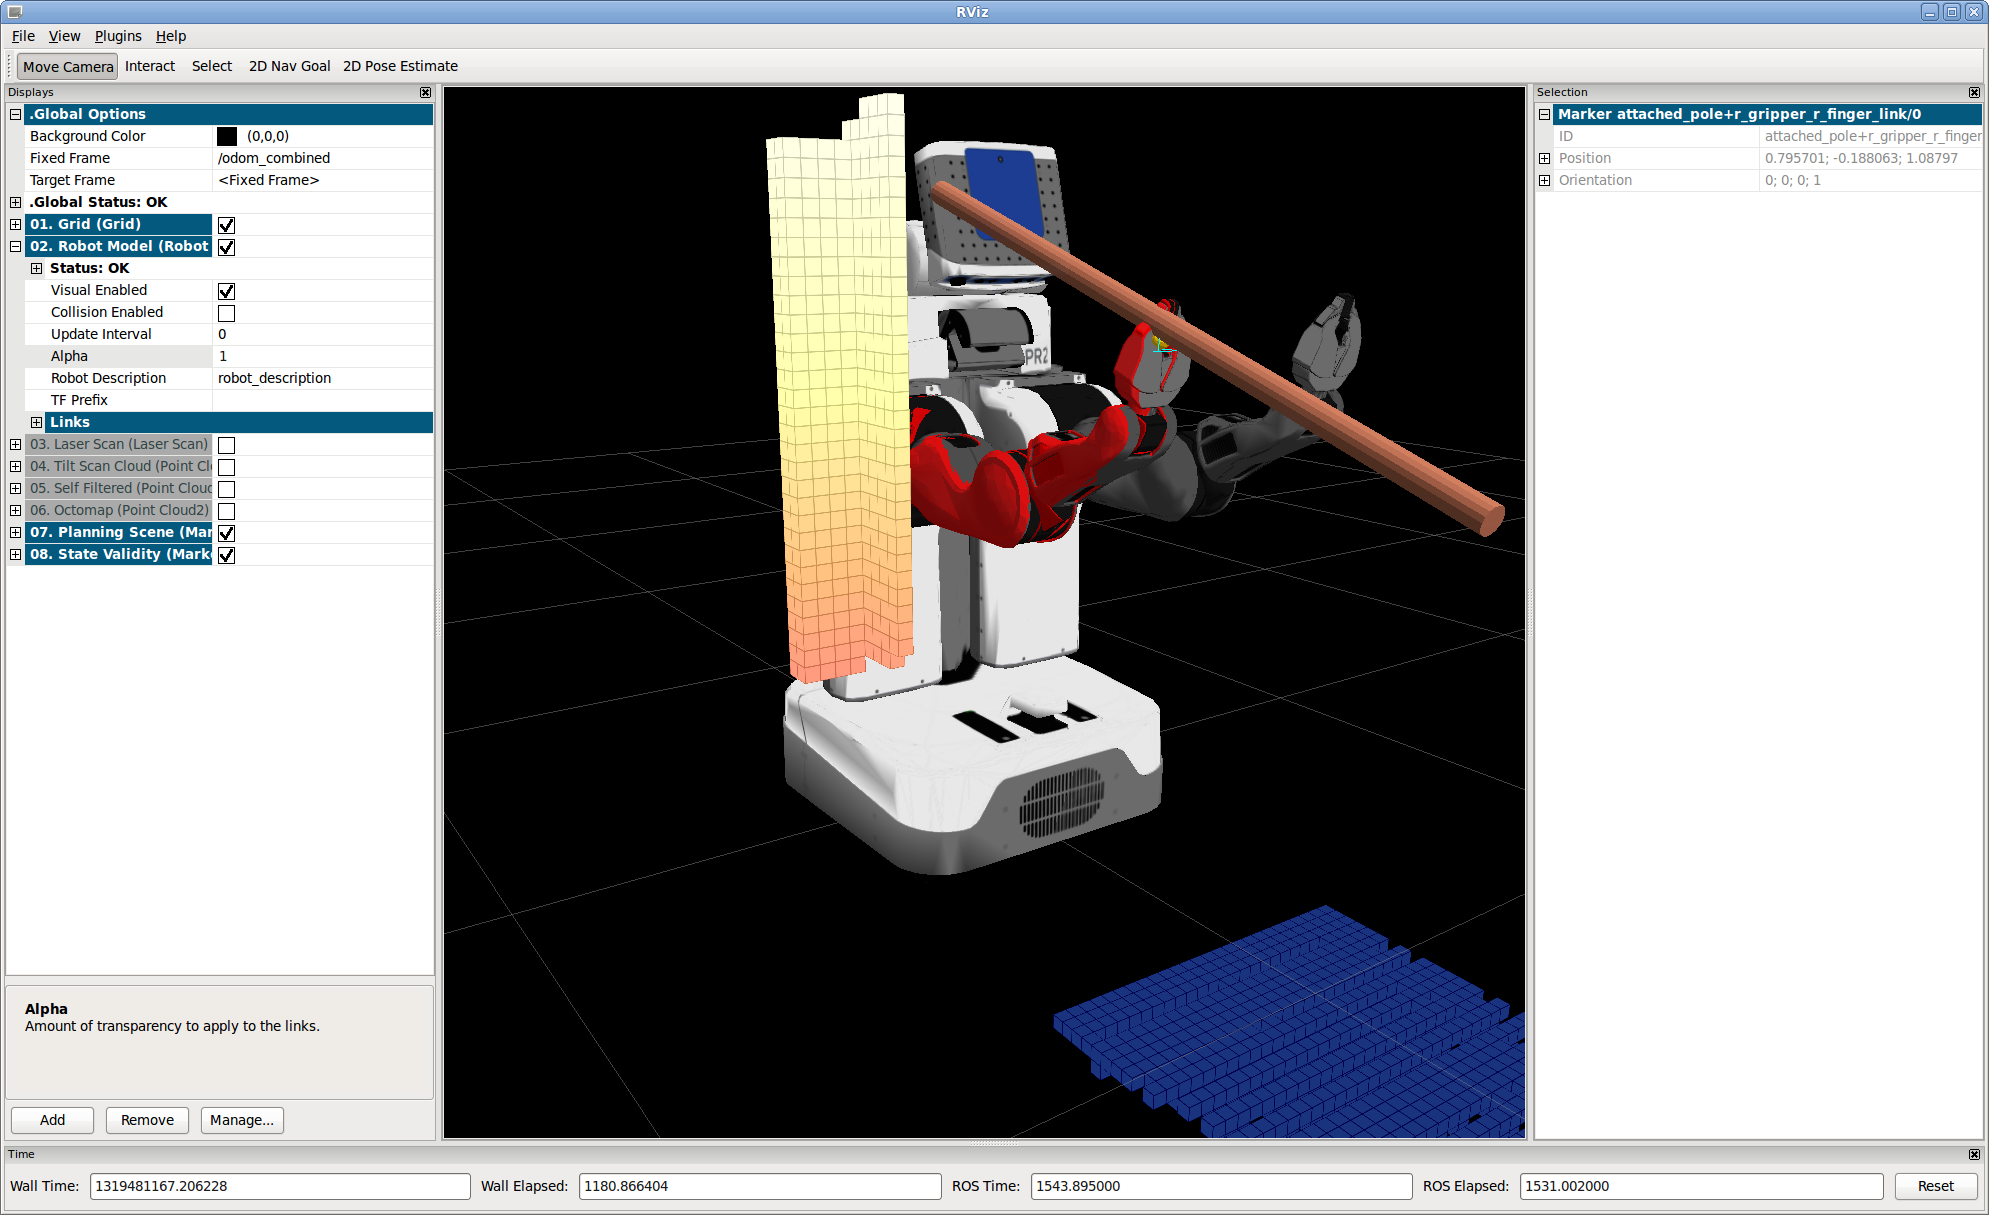
You should see something like the following (note that the object may flicker between green and brown in Rviz):

In this example we've attached a pole to one of the robot's right fingers. The link to which the object is attached is very important. When we attach the object a fixed transform is computed between the link for attachment and the object - note that it's not required that the object actually touch the link for attachment, though we assume it's ok if they do touch. Then when we do forward kinematics in the future and update the link of attachment we will also update the position of the attached object given the position of the attached object. Thus if we chose to attach the object to the base link of the robot and moved the robot's arm then the object would not move, as we would not have updated the position of the base link. Generally the appropriate link to attach to is one that is actually in contact with the object, like the fingertip pads.
The second important part of the attached object specification are the touch links - the set of links that the object is allowed to touch. To illustrate, try the following command:
rosrun pr2_arm_navigation_tutorials get_state_validity_virtual_attached_object 0
You should get the following:

In this case we're in the same position, but with a 0 as the first argument of the call we haven't added any touch links. This means that the attached object is now in collision with other parts of the gripper. We need to tell the collision checking algorithm that it's ok if the object contacts the gripper, though it's not ok if touches other parts on the right arm - we don't want to swing the poll into the upper arm, for instance. By default the only link that is added to the touch links is the link for attachment. Now quit and try the following:
rosrun pr2_arm_navigation_tutorials get_state_validity_virtual_attached_object 1 .8
You should get something that looks like this:

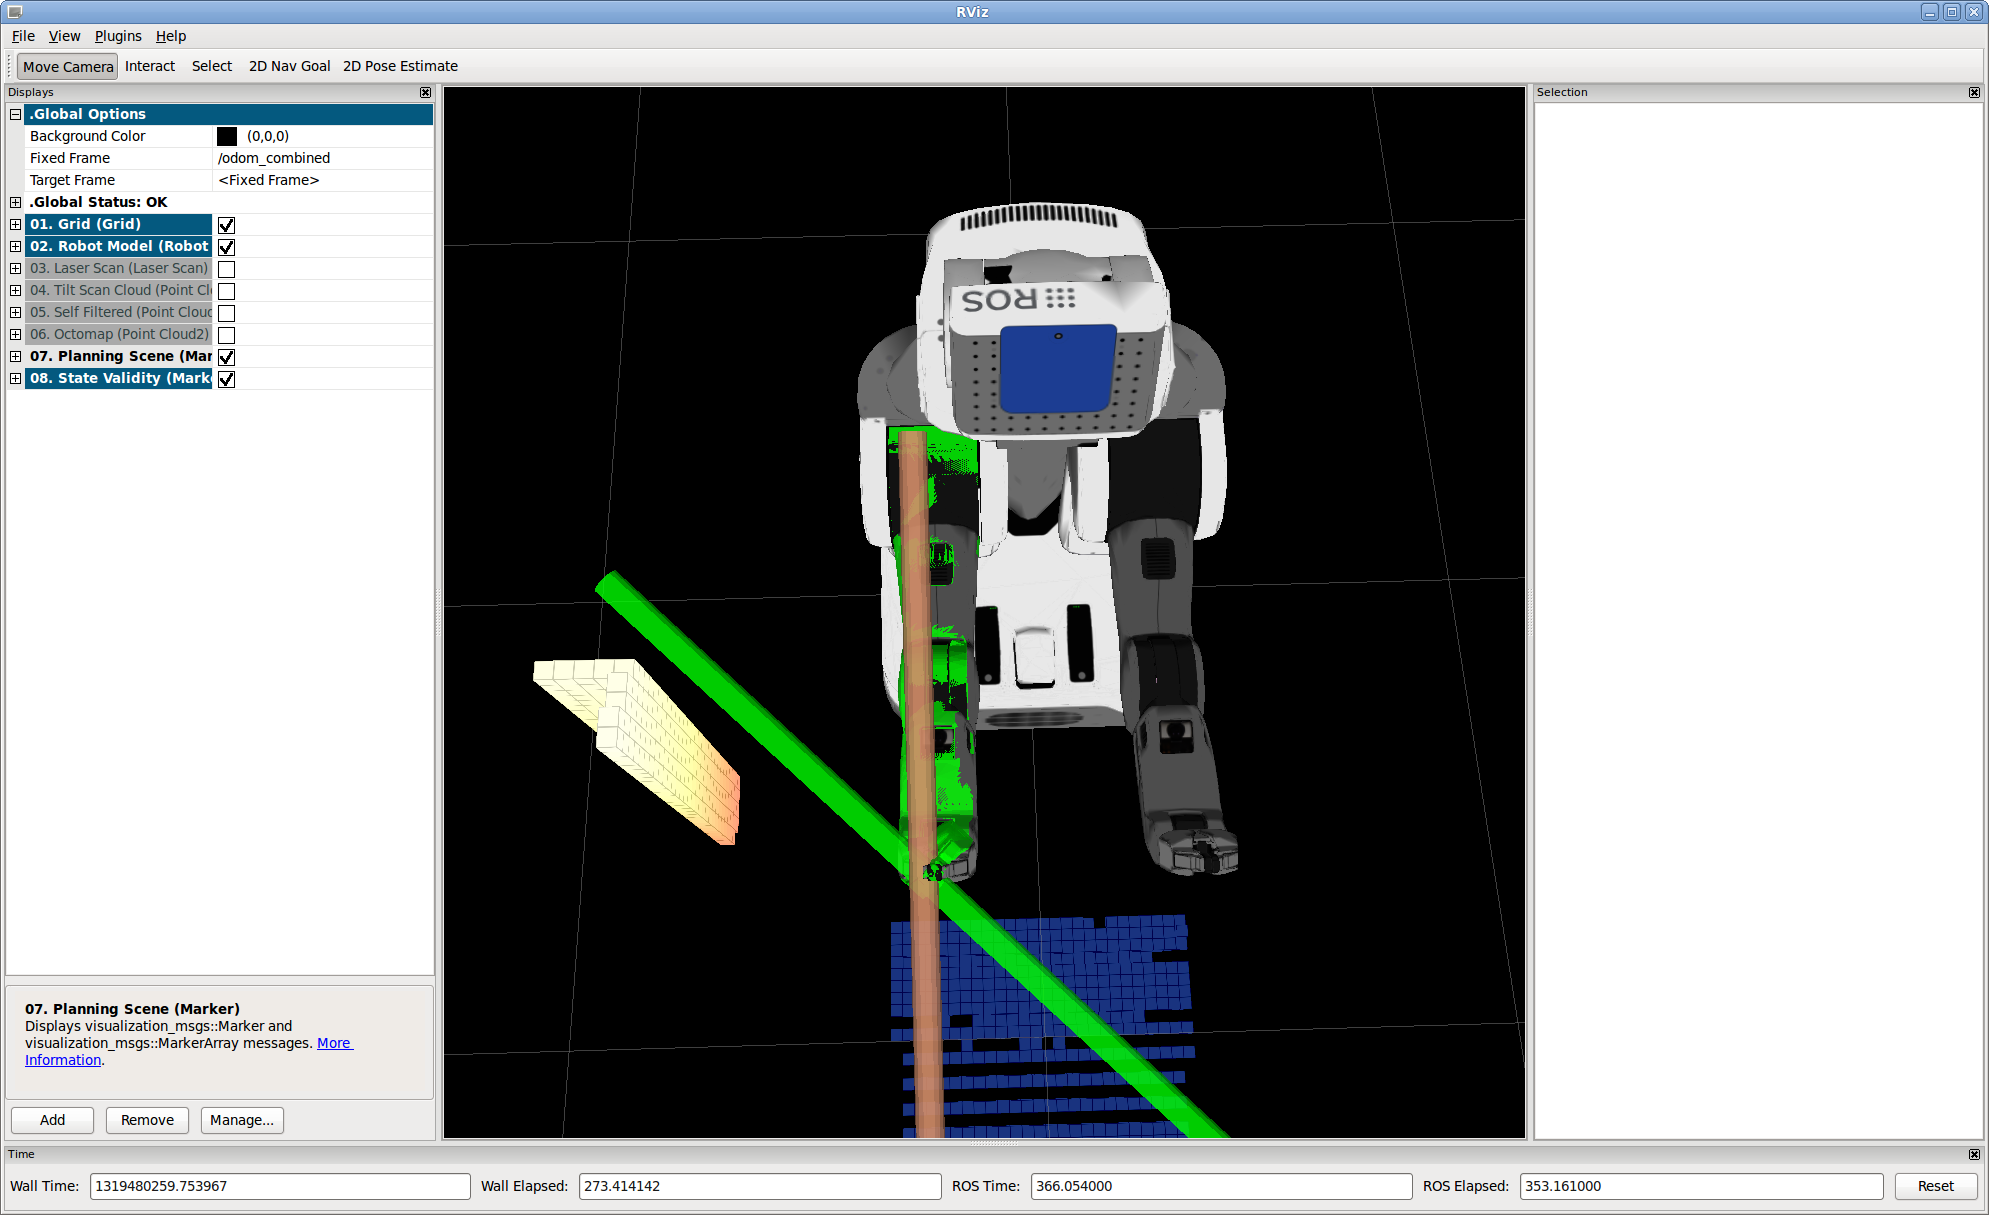
Now we're adding the entire right gripper to the touch links and also specifying a second argument, which maps to a position for the r_wrist_roll_joint - as we give different commands it spins the wrist around. In this case we've attached the object to the robot's gripper, and when we update the position for the r_wrist_roll_joint, which is further up in the kinematic tree, it will also compute a new position for the fingers, and thus a new position for the object. The above pose for the wrist results in a valid state for the pole, but this command won't:
rosrun pr2_arm_navigation_tutorials get_state_validity_virtual_attached_object 1 .9
You should get something that looks like this:

Rotating the wrist a little further brings the object in contact with the pole, which isn't allowed. Finally, quit and try this:
rosrun pr2_arm_navigation_tutorials get_state_validity_virtual_attached_object 1 -1.55
You should get something that looks like this:

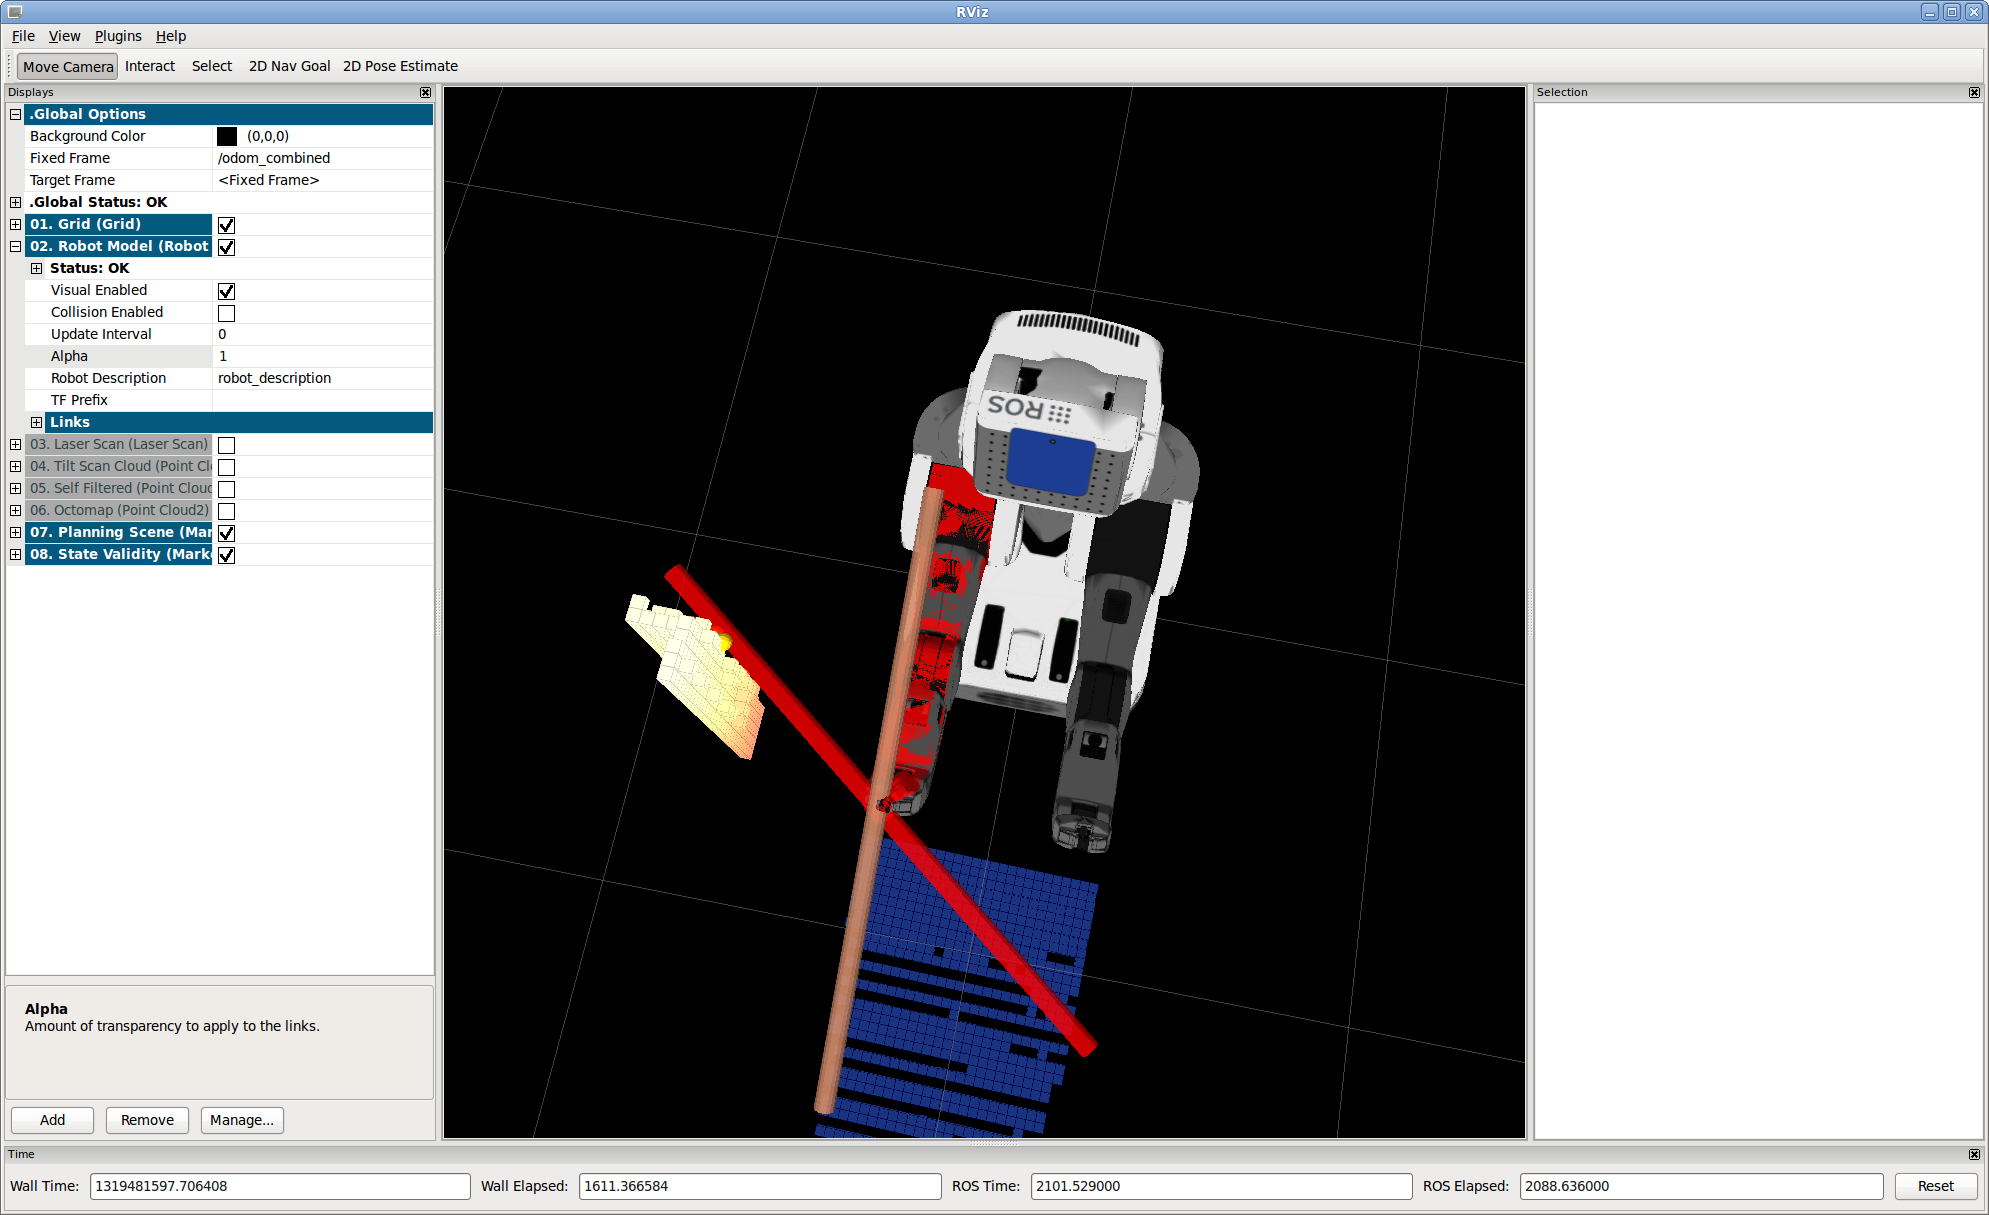
Spinning the other way brings us in contact with the other gripper. Though we've specified that it's ok for the attached object to touch the right gripper, it's not ok if it touches the left.
The code
   1 #include <ros/ros.h>
   2 #include <arm_navigation_msgs/GetPlanningScene.h>
   3 #include <planning_environment/models/collision_models.h>
   4
   5 static const std::string SET_PLANNING_SCENE_DIFF_NAME = "/environment_server/set_planning_scene_diff";
   6
   7 int main(int argc, char **argv){
   8   ros::init (argc, argv, "get_state_validity_test");
   9   ros::NodeHandle rh;
  10
  11   ros::Publisher vis_marker_publisher_;
  12   ros::Publisher vis_marker_array_publisher_;
  13
  14   vis_marker_publisher_ = rh.advertise<visualization_msgs::Marker>("state_validity_markers", 128);
  15   vis_marker_array_publisher_ = rh.advertise<visualization_msgs::MarkerArray>("state_validity_markers_array", 128);
  16
  17   ros::service::waitForService(SET_PLANNING_SCENE_DIFF_NAME);
  18   ros::ServiceClient get_planning_scene_client =
  19     rh.serviceClient<arm_navigation_msgs::GetPlanningScene>(SET_PLANNING_SCENE_DIFF_NAME);
  20
  21   arm_navigation_msgs::GetPlanningScene::Request planning_scene_req;
  22   arm_navigation_msgs::GetPlanningScene::Response planning_scene_res;
  23
  24   bool add_touch = true;
  25   if(argc > 1) {
  26
  27     std::stringstream s(argv[1]);
  28     s >> add_touch;
  29   }
  30
  31   //add a cylinder into the collision space attached to the r_gripper_r_finger_tip_link
  32   arm_navigation_msgs::AttachedCollisionObject att_object;
  33   att_object.link_name = "r_gripper_r_finger_tip_link";
  34
  35   att_object.object.id = "attached_pole";
  36   att_object.object.operation.operation = arm_navigation_msgs::CollisionObjectOperation::ADD;
  37
  38   att_object.object.header.frame_id = "r_gripper_r_finger_tip_link";
  39   att_object.object.header.stamp = ros::Time::now();
  40   arm_navigation_msgs::Shape object;
  41   object.type = arm_navigation_msgs::Shape::CYLINDER;
  42   object.dimensions.resize(2);
  43   object.dimensions[0] = .02;
  44   object.dimensions[1] = 1.2;
  45   geometry_msgs::Pose pose;
  46   pose.position.x = 0.0;
  47   pose.position.y = 0.0;
  48   pose.position.z = 0.0;
  49   pose.orientation.x = 0;
  50   pose.orientation.y = 0;
  51   pose.orientation.z = 0;
  52   pose.orientation.w = 1;
  53   att_object.object.shapes.push_back(object);
  54   att_object.object.poses.push_back(pose);
  55   if(add_touch) {
  56     att_object.touch_links.push_back("r_end_effector");
  57   }
  58   planning_scene_req.planning_scene_diff.attached_collision_objects.push_back(att_object);
  59
  60   if(!get_planning_scene_client.call(planning_scene_req, planning_scene_res)) {
  61     ROS_WARN("Can't get planning scene");
  62     return -1;
  63   }
  64
  65   planning_environment::CollisionModels collision_models("robot_description");
  66   planning_models::KinematicState* state =
  67     collision_models.setPlanningScene(planning_scene_res.planning_scene);
  68
  69   std::vector<std::string> arm_names =
  70     collision_models.getKinematicModel()->getModelGroup("right_arm")->getUpdatedLinkModelNames();
  71   std::vector<std::string> joint_names =
  72     collision_models.getKinematicModel()->getModelGroup("right_arm")->getJointModelNames();
  73
  74   if(argc > 2) {
  75     std::stringstream s(argv[2]);
  76     double val;
  77     s >> val;
  78     std::map<std::string, double> nvalues;
  79     nvalues["r_wrist_roll_joint"] = val;
  80
  81     state->setKinematicState(nvalues);
  82   }
  83
  84   std_msgs::ColorRGBA good_color, collision_color, joint_limits_color;
  85   good_color.a = collision_color.a = joint_limits_color.a = .8;
  86
  87   good_color.g = 1.0;
  88   collision_color.r = 1.0;
  89   joint_limits_color.b = 1.0;
  90
  91   std_msgs::ColorRGBA point_markers;
  92   point_markers.a = 1.0;
  93   point_markers.r = 1.0;
  94   point_markers.g = .8;
  95
  96   std_msgs::ColorRGBA color;
  97   visualization_msgs::MarkerArray arr;
  98   if(!state->areJointsWithinBounds(joint_names)) {
  99     color = joint_limits_color;
 100   } else if(collision_models.isKinematicStateInCollision(*state)) {
 101     color = collision_color;
 102     collision_models.getAllCollisionPointMarkers(*state,
 103                                                  arr,
 104                                                  point_markers,
 105                                                  ros::Duration(0.2));
 106   } else {
 107     color = good_color;
 108   }
 109
 110   collision_models.getRobotMarkersGivenState(*state,
 111                                              arr,
 112                                              color,
 113                                              "right_arm",
 114                                              ros::Duration(0.2),
 115                                              &arm_names);
 116
 117   collision_models.getAttachedCollisionObjectMarkers(*state,
 118                                                      arr,
 119                                                      "right_arm",
 120                                                      color,
 121                                                      ros::Duration(0.2),
 122                                                      false,
 123                                                      &arm_names);
 124
 125   while(ros::ok()) {
 126     vis_marker_array_publisher_.publish(arr);
 127     ros::spinOnce();
 128     ros::Duration(.1).sleep();
 129   }
 130   collision_models.revertPlanningScene(state);
 131   ros::shutdown();
 132 }
Understanding the Code
The code is largely identical to the previous tutorial except for a couple a places. Here's where we setup the attached object:
  31   //add a cylinder into the collision space attached to the r_gripper_r_finger_tip_link
  32   arm_navigation_msgs::AttachedCollisionObject att_object;
  33   att_object.link_name = "r_gripper_r_finger_tip_link";
  34
  35   att_object.object.id = "attached_pole";
  36   att_object.object.operation.operation = arm_navigation_msgs::CollisionObjectOperation::ADD;
  37
  38   att_object.object.header.frame_id = "r_gripper_r_finger_tip_link";
  39   att_object.object.header.stamp = ros::Time::now();
  40   arm_navigation_msgs::Shape object;
  41   object.type = arm_navigation_msgs::Shape::CYLINDER;
  42   object.dimensions.resize(2);
  43   object.dimensions[0] = .02;
  44   object.dimensions[1] = 1.2;
  45   geometry_msgs::Pose pose;
  46   pose.position.x = 0.0;
  47   pose.position.y = 0.0;
  48   pose.position.z = 0.0;
  49   pose.orientation.x = 0;
  50   pose.orientation.y = 0;
  51   pose.orientation.z = 0;
  52   pose.orientation.w = 1;
  53   att_object.object.shapes.push_back(object);
  54   att_object.object.poses.push_back(pose);
  55   if(add_touch) {
  56     att_object.touch_links.push_back("r_end_effector");
  57   }
The attached object specification contains an object as well as a few additional fields for link_name and touch_links. In this case we set the link name to be r_gripper_r_finger_tip_link, which is one of the links that will generally be in contact with an object. In this case we also specify the attachment point in the frame of the attached link, though any other frame can be used. The attachment point will be computed given the planning scene robot state. Finally, we set the entire r_end_effector group for the touch links - we could also specify individual links if we wanted to.
NOTE: if porting this tutorial to another robot, be sure that the frame to which you attach has a collision model, otherwise attachment will fail.
Finally at the bottom we add the markers for attached objects to our marker array. The brown marker for the attached object is produced by the planning_scene_validity_server, and this program produces the green and red markers.


