!
| |
Running the demos
Description: Running the demos from the armadillo2_demos packageTutorial Level: BEGINNER
Contents
AMCL
This demo demonstrates how to use navigation stack with AMCL.
To launch the AMCL demo, follow the instructions below: Open a new terminal and write the following to launch the robot and enable AMCL:
$ roslaunch armadillo2 armadillo2.launch lidar:=true amcl:=true have_map:=true map:="`rospack find armadillo2_navigation`/maps/home.yaml" gazebo:=true world_name:="`rospack find armadillo2_gazebo`/worlds/home.world" move_base:=true
Open a new terminal and write the following to launch the Rviz interface:
rosrun rviz rviz -d `rospack find armadillo2_navigation`/rviz/amcl.rviz
Gazebo and Rviz should open up, with a view of the robot located on a map. Inside RViz, Select 2D Nav Goal from RViz toolbar.
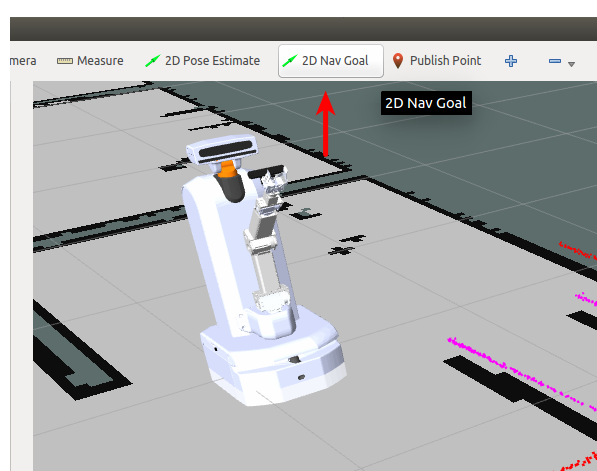
Use right mouse click to draw an arrow inside one of the maps rooms. This action commands the robot to move to the base of the arrow, and to turn to the direction of the arrow.
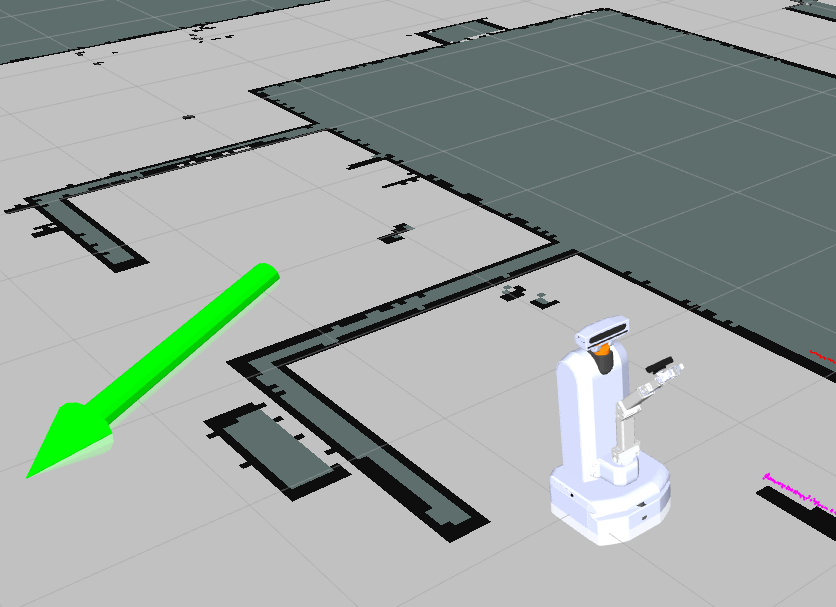
Once right mouse button is released (after drawing the arrow), the robot will search for the shortest path to the goal (taking into consideration obstacles along the way), and drive there. The robot's planned path appears as a green line connected to the robot on one end, and to the base of the arrow on the other.
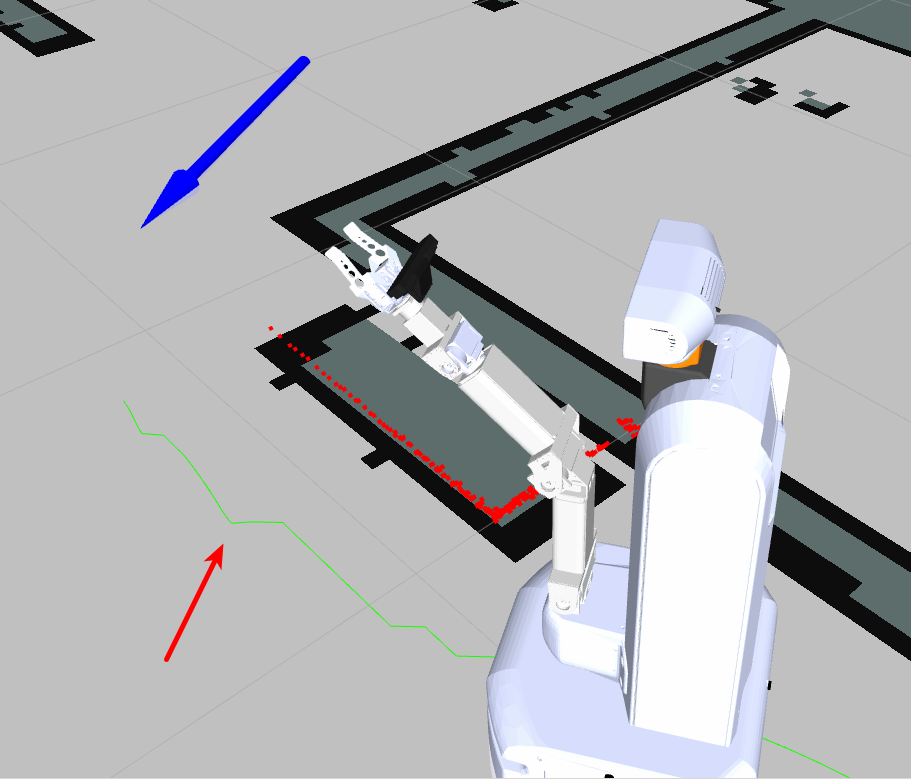
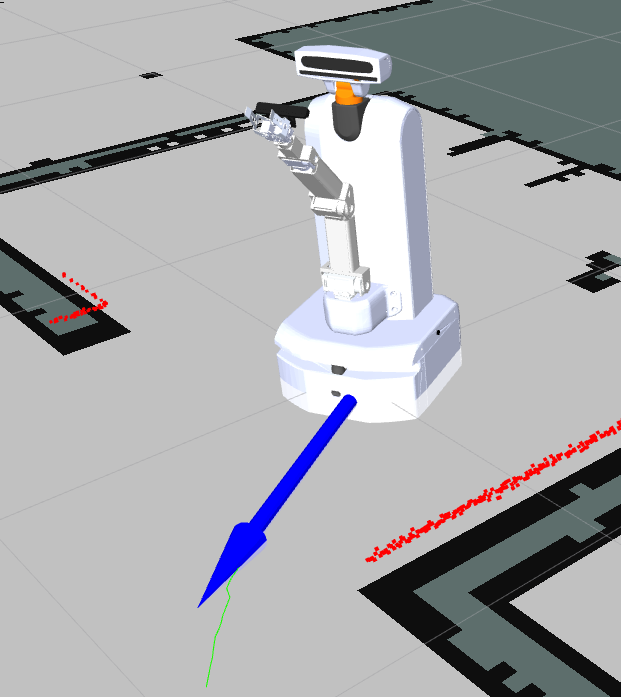
After reaching the goal, the robot moves into the right pose:
Note: To launch the AMCL for the real robot set the Gazebo parameter to false, and specify a map.
Hector SLAM
This demo demonstrates how to use Hector SLAM to scan an area and build a map dynamically. Hector slam uses laser to scan around the robot. In this tutorial we will use steering plug-in to drive the robot around and build the map. To launch the Hector SLAM demo, open a new terminal and type the command:
$ roslaunch armadillo2 armadillo2.launch lidar:=true hector_slam:=true gazebo:=true world_name:="`rospack find armadillo2_gazebo`/worlds/home.world"
Then, open a new terminal and type the command:
$ rosrun rviz rviz -d `rospack find armadillo2_navigation`/rviz/hector_slam.rviz
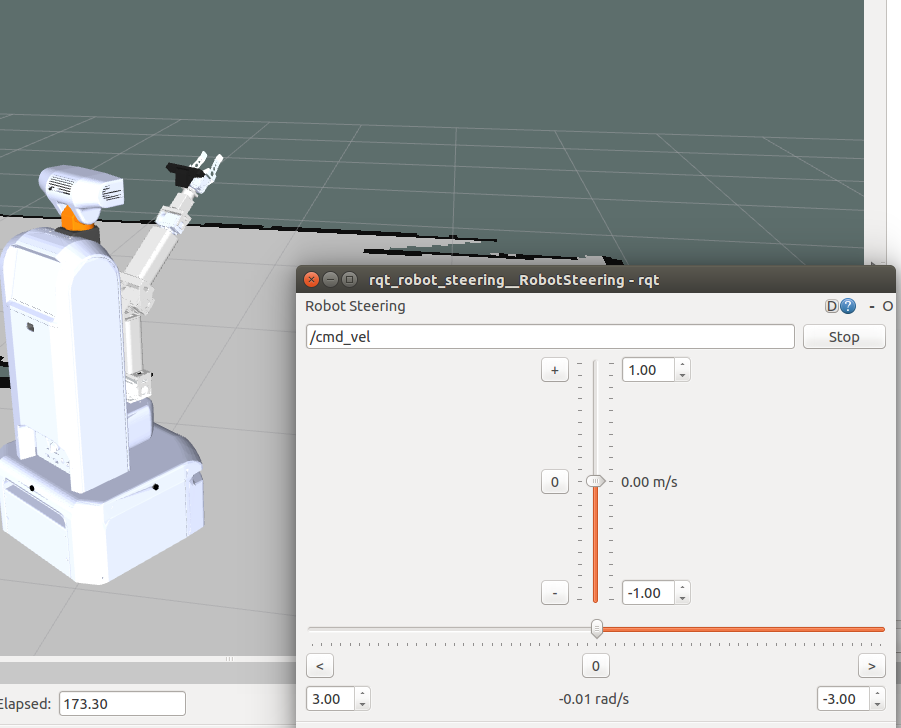
Gazebo and Rviz should open up, with a view of the robot located on a map. Now we want to move the robot arround. One way to do it, is by using steering plug-in. In a new terminal type the command:
$ rosrun rqt_robot_steering rqt_robot_steering
A panel with two sliders should appear on the screen. Move the sliders in order to move the robot around. You will be able to notice that the map is building up along with the movement of the robot.
Note:
1. You can also use 2D Nav Goal to move the robot arround. Inside RViz, Select 2D Nav Goal from RViz toolbar. Use right mouse click to draw an arrow inside one of the maps rooms. This action commands the robot to move to the base of the arrow, and to turn to the direction of the arrow.

Use right mouse click to draw an arrow inside one of the maps rooms. This action commands the robot to move to the base of the arrow, and to turn to the direction of the arrow.
1. Subtle robot movements are required in order to get a good scan of the map. Abrapt or fast movements of the robot will produce in an inaccurate scan.
2. To launch the Hector SLAM for the real robot set the Gazebo parameter to false, and specify a map.
GMapping SLAM
This demo demonstrates how to use GMapping SLAM to scan an area and build a map dynamically. GMapping slam uses odometer, and laser to scan around the robot. In this tutorial we will use steering plug-in to drive the robot around and build the map. To launch the Gmapping SLAM demo, open a new terminal and type the command:
$ roslaunch armadillo2 armadillo2.launch lidar:=true gmapping:=true gazebo:=true world_name:="`rospack find armadillo2_gazebo`/worlds/home.world"
Then, open a new terminal and type the command:
$ rosrun rviz rviz -d `rospack find armadillo2_navigation`/rviz/hector_slam.rviz
Gazebo and Rviz should open up, with a view of the robot located on a map. Now we want to move the robot arround. One way to do it, is by using steering plug-in. In a new terminal type the command:
$ rosrun rqt_robot_steering rqt_robot_steering
A panel with two sliders should appear on the screen. Move the sliders in order to move the robot around. You will be able to notice that the map is building up along with the movement of the robot.

Note:
1. You can also use 2D Nav Goal to move the robot arround. Inside RViz, Select 2D Nav Goal from RViz toolbar. Use right mouse click to draw an arrow inside one of the maps rooms. This action commands the robot to move to the base of the arrow, and to turn to the direction of the arrow.

Use right mouse click to draw an arrow inside one of the maps rooms. This action commands the robot to move to the base of the arrow, and to turn to the direction of the arrow.
2. Subtle robot movements are required in order to get a good scan of the map. Abrapt or fast movements of the robot will produce in an inaccurate scan.
3. To launch the Hector SLAM for the real robot set the gazebo parameter to false, and specify a map.
RTAB Mapping
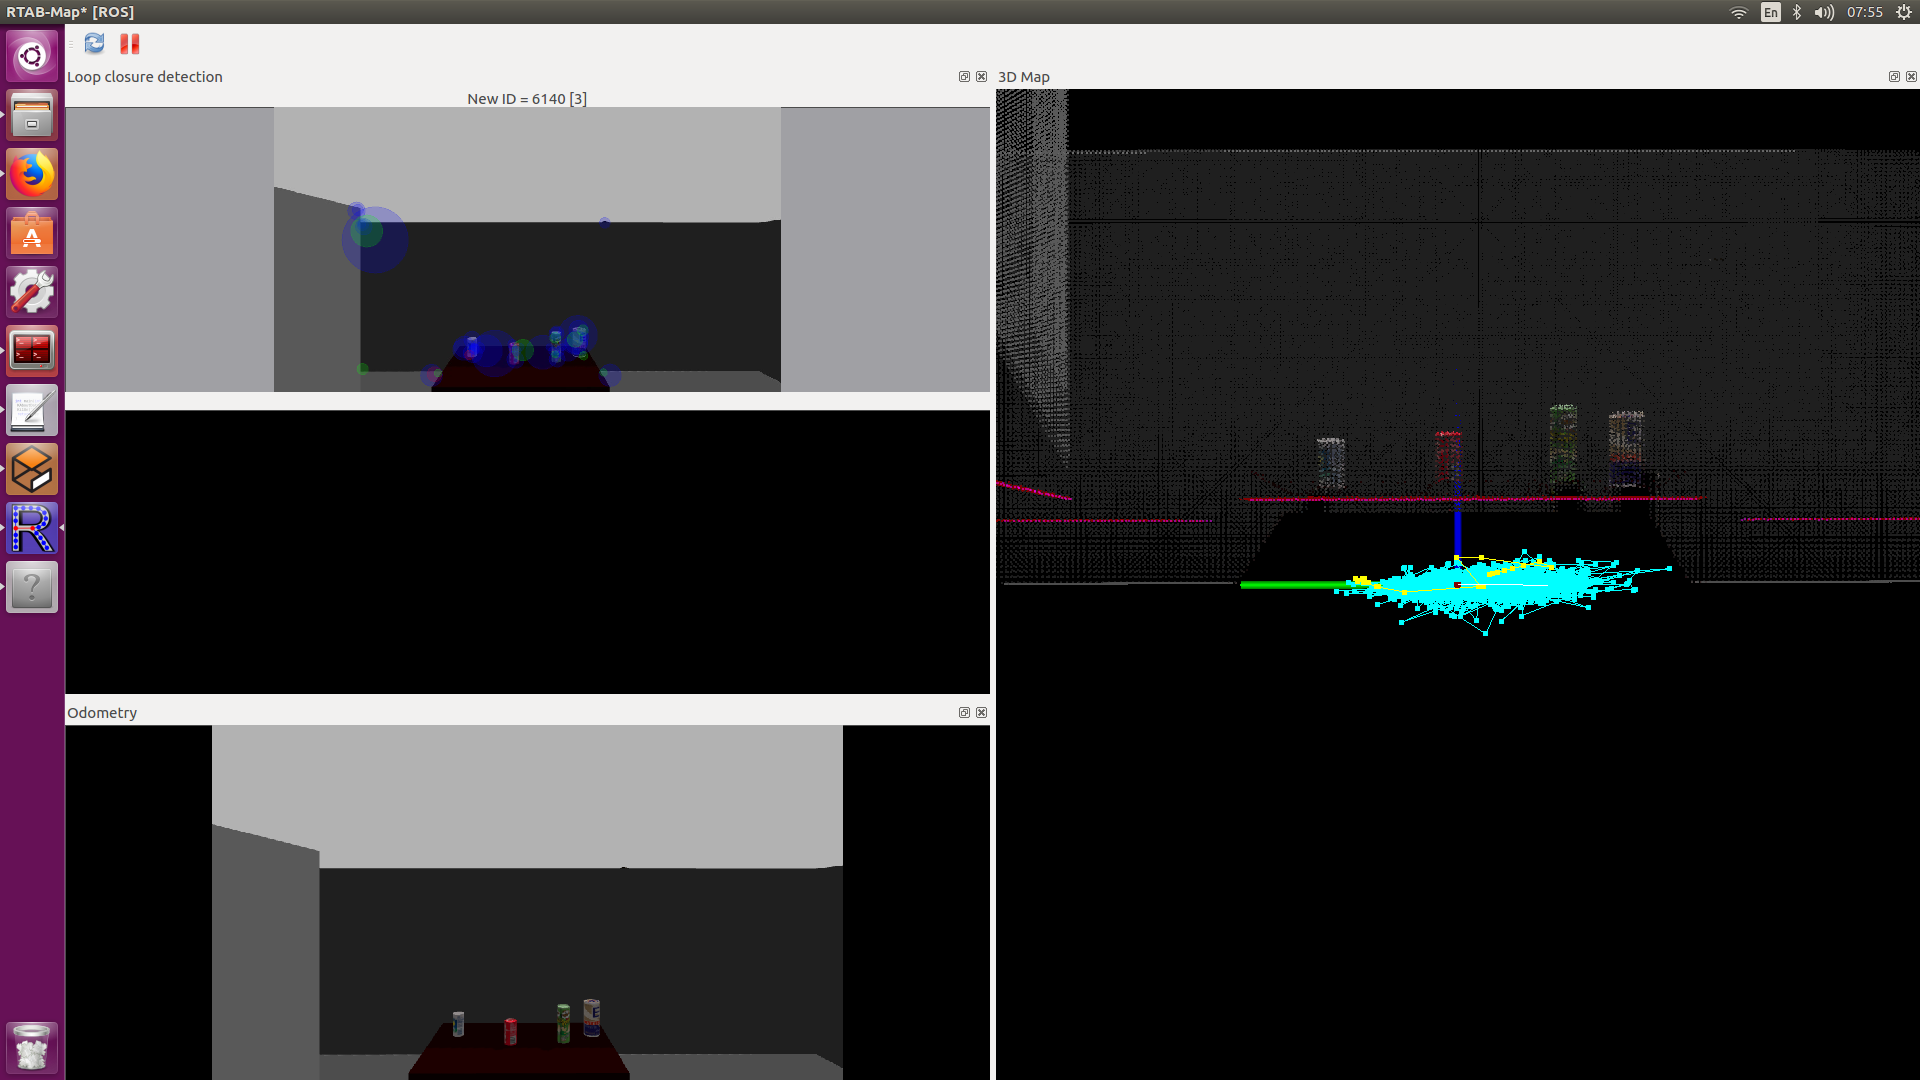
RTAB-Map (Real-Time Appearance-Based Mapping) is a RGB-D Graph-Based SLAM approach based on an incremental appearance-based loop closure detector. The loop closure detector uses a bag-of-words approach to determinate how likely a new image comes from a previous location or a new location. This demo demonstrates how to use RTAB-Map to scan an area and build a 3d map dynamically. In this tutorial we will use steering plug-in to drive the robot around and build the 3D map. To launch the RTAB-Map demo, open a new terminal and type the command:
$ roslaunch armadillo2 armadillo2.launch kinect:=true gazebo:=true world_name:="`rospack find armadillo2_gazebo`/worlds/home.world"
To run the robot in the real world, omit the gazebo and the world_name parameters. Then, open a new terminal and type the command:
$ roslaunch armadillo2_navigation rtabmap.launch
RTAB Map rqt plugin should open up, with a view of the output of the RGBD camera that mounted on the head of the robot. Now we want to move the robot around. One way to do it, is by using steering plug-in. In a new terminal type the command:
$ rosrun rqt_robot_steering rqt_robot_steering
A panel with two sliders should appear on the screen. Move the sliders in order to move the robot around. You will be able to notice that the map is building up along with the movement of the robot.
Find objects
To run find objects demo, run the following commands: In simulation:
$ roslaunch armadillo2 armadillo2.launch moveit:=true kinect:=true gazebo:=true world_name:="`rospack find armadillo2_gazebo`/worlds/objects_on_table.world" x:=-0.5
or in with the real robot:
$ roslaunch armadillo2 armadillo2.launch kinect:=true
and in a new terminal:
$ roslaunch object_detection find_objects.launch
Pan-Tilt tracking
To run the pan-tilt tracking demo, run the following commands: In simulation:
$ roslaunch armadillo2 armadillo2.launch moveit:=true kinect:=true gazebo:=true world_name:="`rospack find armadillo2_gazebo`/worlds/objects_on_table.world"
or in with the real robot:
$ roslaunch armadillo2 armadillo2.launch kinect:=true moveit:=true
and in a new terminal:
$ roslaunch object_detection point_head.launch
Drive to Object
To run drive to object demo, run the following commands: In simulation:
$ roslaunch armadillo2 armadillo2.launch gazebo:=true moveit:=true kinect:=true lidar:=true move_base:=true gmapping:=true world_name:="`rospack find armadillo2_gazebo`/worlds/objects_on_table.world"
or in with the real robot:
$ roslaunch armadillo2 armadillo2.launch moveit:=true kinect:=true lidar:=true move_base:=true gmapping:=true
in a new terminal:
$ roslaunch object_detection drive2object.launch
and to initiate, in a new terminal:
$ rosservice call /drive2object_go
Pick and Place
To run pick and place demo, run the following commands: In simulation:
$ roslaunch armadillo2 armadillo2.launch moveit:=true softkinetic:=true gazebo:=true world_name:="`rospack find armadillo2_gazebo`/worlds/objects_on_table.world" x:=0.65 y:=-0.35
or in with the real robot:
$ roslaunch armadillo2 armadillo2.launch softkinetic:=true moveit:=true
in a new terminal:
$ roslaunch object_detection pick_and_place.launch
and to initiate, in a new terminal:
$ rosservice call /pick_go
Drive and Pick
To run drive and pick demo, run the following commands: In the real robot:
$ roslaunch armadillo2 armadillo2.launch moveit:=true kinect:=true lidar:=true move_base:=true gmapping:=true
And then, after a few seconds, run this command in a new terminal, to start using the softkinetic camera.
$ roslaunch softkinetic_camera softkinetic_camera_ds325.launch
Or in simulation:
$ roslaunch armadillo2 armadillo2.launch gazebo:=true softkinetic:=true kinect:=true lidar:=true moveit:=true move_base:=true gmapping:=true world_name:="`rospack find armadillo2_gazebo`/worlds/objects_on_table.world"
in a new terminal:
$ roslaunch object_detection drive_and_pick.launch
E-Speak
This demo demonstrates how to use e-speak node to convert text to speech. First, ROS master must be available. Open a new terminal and type the command:
$ roscore
Now, let's bring up the e-speak node. Open a new terminal and type the command:
$ rosrun espeak_ros espeak_node
The node is now listening to espeak_node/speak_line topic, and expecting std_msgs/String messages. To publish a message to this topic, open a new terminal and type the command:
$ rostopic pub -1 espeak_node/speak_line std_msgs/String "hello armadillo"
You should hear a voice output that speak the words "hello armadillo".


