| Note: This tutorial assumes that you have completed the previous tutorials: On the creation of Arni. |
| |
Creating specifications
Description: This tutorial covers the basic steps to create a specification.Tutorial Level: INTERMEDIATE
Next Tutorial: creating constraints
Contents
Creating a specification manually
Specifications do what their name implies: They define ranges in which a value has to be or the user will get a warning. They are very useful to detect anomalies during the execution of ROS. A typical example would be a camera link. In our example setup the frame rate sometimes dropped critically which was caused by a too weak router.
We will now set up an example specification for the current setup.
For that we need to create a yaml file to save our specification to.
spec.yaml:
arni:
  specifications:
    good_frequency:
      - c!/listener!/chatter!/talker:
          frequency: [9.5, 10.5]
good_frequency is the name of our specification. The specification defines that the frequency of the connection between listener and talker on the topic chatter should be between 9.5 and 10.5 Hertz.
Specifications can be written for any type of item which is hosts, nodes, topics and connections. To get to know all the parameter and to not have to write the whole file we recommend using the recording feature as explained below. It allows to get a simple template file which you can modify to your needs.
Launching the processing node
Now start the processing node so that rated statistics are generated:
rosrun arni_processing arni_processing
Start rqt and open the Topic Monitor: 
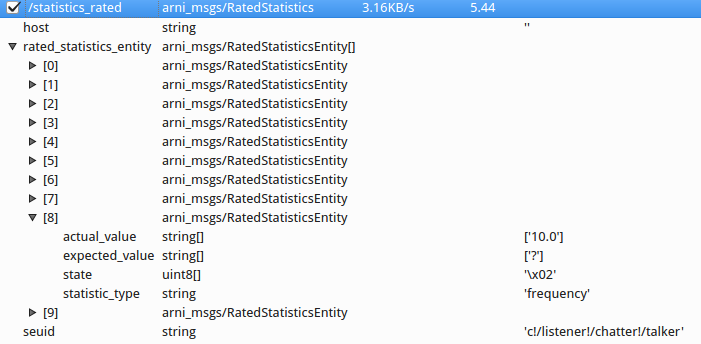
The picture shows that the frequency of the connection c!/listener!/chatter!/talker has state UNKNOWN (2). That's because there is no specification that defines what frequency size is good or bad. You already have in your specification file but the processing node does not know it yet.
Change that by loading your specification to the parameter server:
rosparam load spec.yaml
And finally tell the monitoring node that there is a new specification:
rosservice call /monitoring_node/reload_specifications
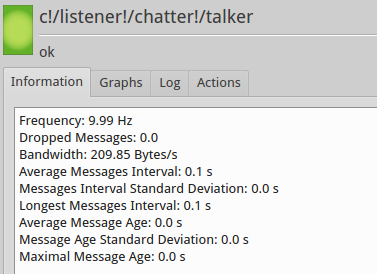
Now start arni detail and, after selecting the right connection in the tree wigdet you will see something similar to this in the detail widget:

If you want to you can now kill the talker (rosnode kill /talker) and see what happens in the GUI. Then restart it again, you will see how the processing node detects all of that.
Changing specifications during runtime
Since the specification are loaded to the parameter server we can replace them just as any other parameter.
Lets say, you want the frequency to be between 20 and 30 Hz. You can do that with the processing node still running.
- modify your spec.yaml
- You might have to call rosparam delete /arni/specifications (often not necessary)
rosparam load spec.yaml
rosservice call /monitoring_node/reload_specifications
And you're done. The processing node will also show in its debug output that new specification have been loaded.
Alternative: Use the GUI. Open arni detail and on the tree view look on the bottom for the button "Load config". Here you can load your yaml file, all will be done automatically.
The other way - recording specifications automatically
As a convenience feature arni offers you to record your setup for some time and save the measured data as a specification. If e.g. the cpu of the host is running between 5% and 20% during the recording time, the specification file will say it should be exactly in that range. This makes sense for some parameters for others not. Use this as way to generate templates for specifications. Simply record your setup, save the recorded data and modify the resulting yaml to your need. This is our preferred way of creating specifications since it is quite simple.
How to:
- Open arni detail and go to the tree widget
- Mark any item you want to be in the specification file by right-clicking on it and selecting "Mark for recording"
- Klick on start recording on the bottom. As explained before let this run as long as possible on your standard setup so that the range margins are not to narrow.
- Click on stop recording and save the file. You can now either directly load this new config or modify it first which we would recommend. A lot entries are too narrow or make no real sense so they should be removed.
Small tip: You could also organise your specification into several logical units like "good_frequency" in the beginning. Also you could split the config into multiple files so that you do not always have to load all of the specifications to the server. If you do this remember to use unique names for your logical units since otherwise the previous specification might be overwritten!
Now that you've created a working specification lets create some constraints.


