| |
How to use the object_configuration_generator
Description: This tutorial shows how to generate an object configuration file (see asr_lib_ism for more information) from a database or an other object configuration file.Tutorial Level: BEGINNER
Setup
1. Set the following described parameters:
param/sqlitedb.yaml: baseFrame should name the coordinate frame (see tf) you want to use.
param/visualization.yaml: visualization_topic defines the topic to which the visualization will be published (see !visualization_msgs::MarkerArray).
launch/object_configuration_generator.launch: output_file_path defines where the generated configuration should be written to.
Set additional either
param/sqlitedb.yaml: dbfilename should define the path to the database you want to use.
launch/object_configuration_generator.launch: object_configuration_pattern_names defines which patterns should be loaded and used from the database.
or
launch/object_configuration_generator.launch: config_file_path defines a path to an existing configuration file from which data will be loaded to generate new configuration files. If this parameter is defined the parameters dbfilename and bject_configuration_pattern_names will be ignored.
2. Start rviz.
rosrun rviz rviz
3. Make sure that baseFrame exist, so that the configuration can be visualized.
Tutorial
First start the object_configuration_generator by calling
roslaunch asr_ism object_configuration_generator

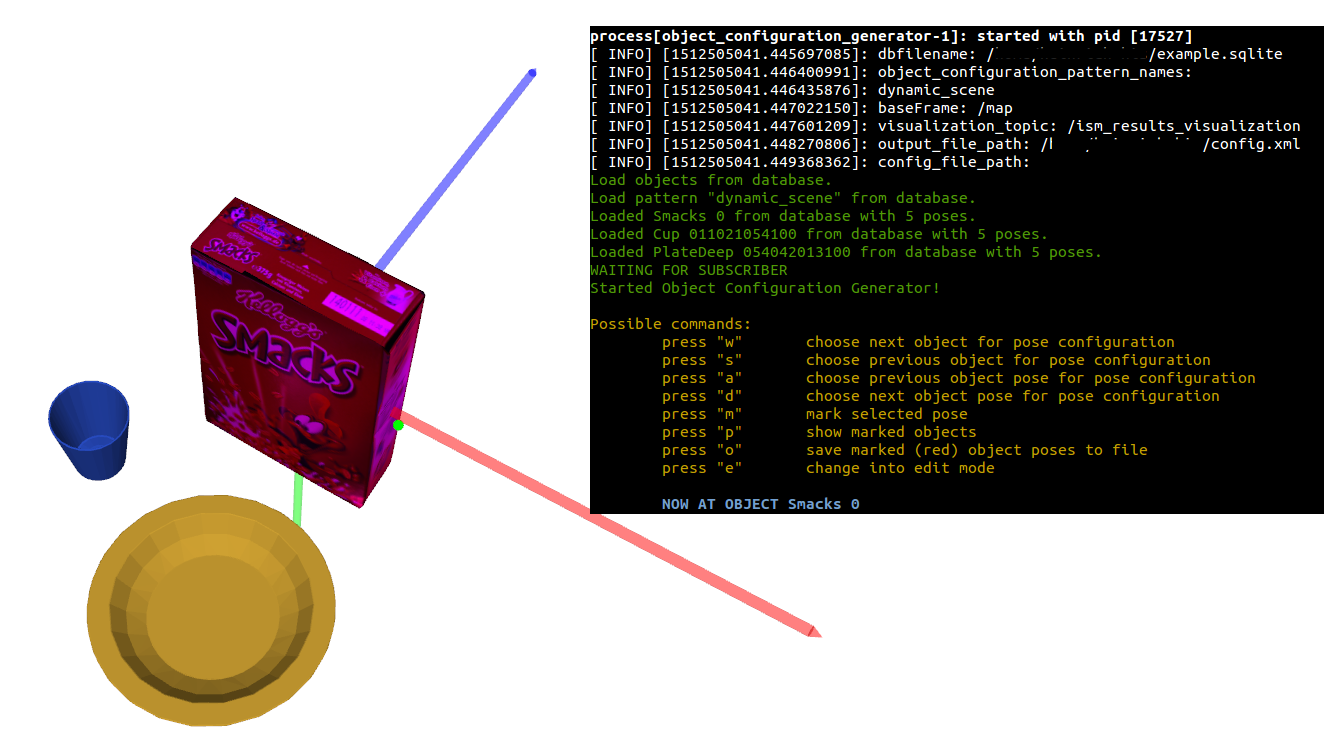
Picture 1: Terminal output and visualization right after the startup of the object_configuration_generator
Picture 1 shows the terminal output after the startup. It lists the set parameters, status information of the objects loaded from the database or configuration file and the user commands. The visualization consists of the object meshes where the current selected object is highlighted with the color magenta. Additional the selected pose of the selected object is visualized as coordinate axes using rgb-to-xyz color-code from ROS, all remaining poses of this object are visualized as green spheres.

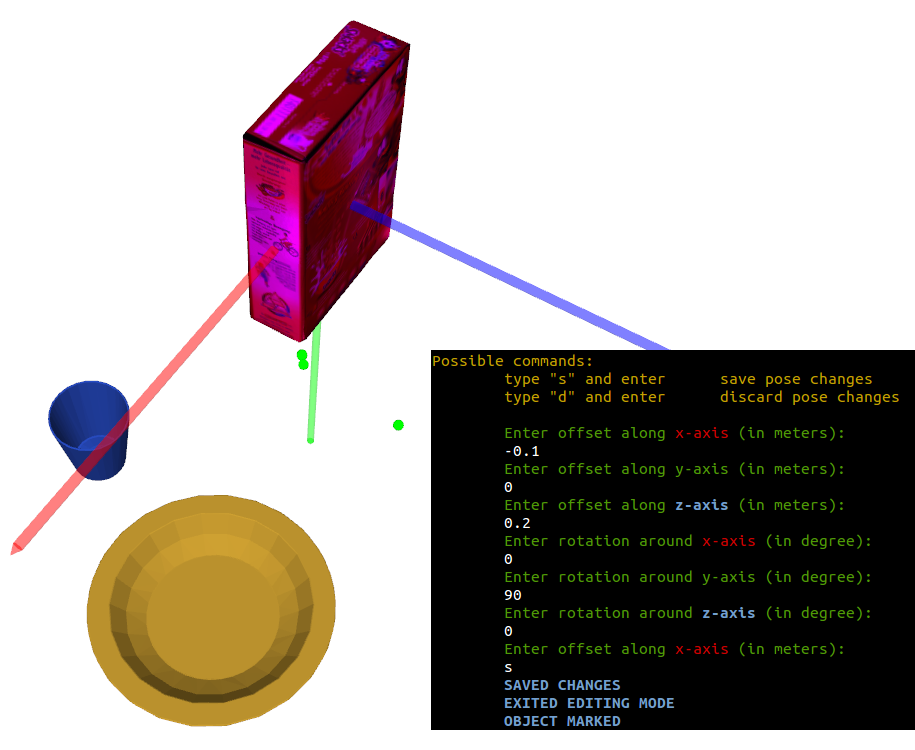
Picture 2: Result of editing the configuration from Picture 1
To edit the selected pose you have to switch into edit mode with the [e]-command. In the edit mode the node asks either for a translation in the direction of an axis or for a rotation around an axis which can be passed by typing in the value and confirm the input with the [enter]-key. You can exit the edit mode by discarding the changes with typing “d” and confirm with [enter] or save the changes by typing “s” and press [enter]. If the changes are saved the object will be marked and an edited pose will be added to the list of poses for the selected object. If a object already has an edited pose, the new pose will replace the old one (see example in Picture 2).

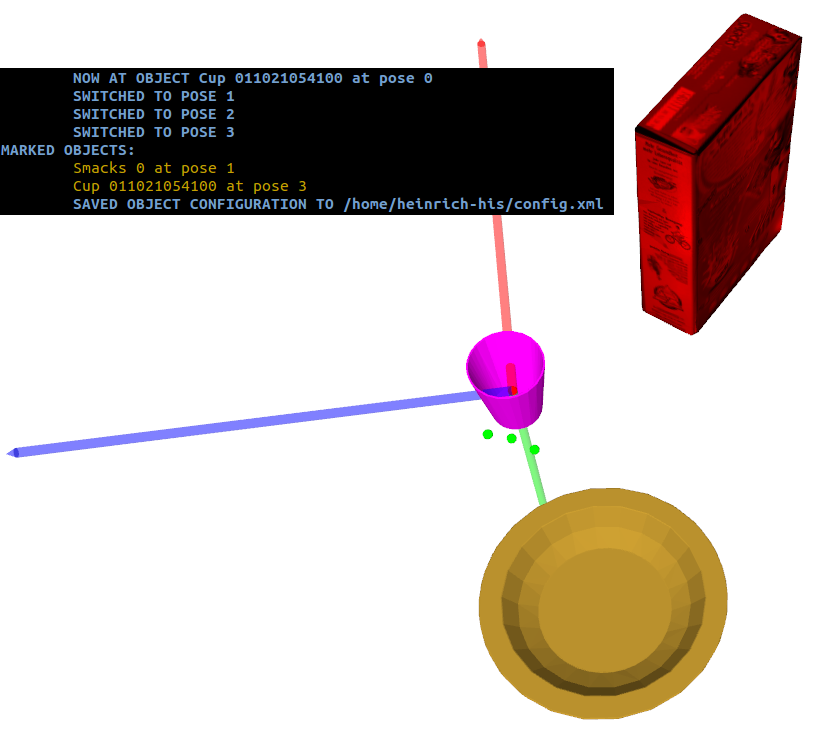
Picture 3: Example after saving the configuration
To switch between objects you can use the [w]- and [s]-commands and to switch between poses of the selected object you can use the [a]- and [d]-commands. The generated configuration consists of the marked object poses which will be saved to a configuration file. Marked objects are highlighted in red or can be printed to the terminal with the [p]-command; if you switch a pose of a marked object the current selected pose will be tracked and used as marked pose. Finally you can save the configuration with the [o]-command and terminate the node with the ctrl+c combination (see Picture 3).


