| |
How to train a new object
Description: This tutorial will help you through the process of creating and training a new object model for BLORT.Tutorial Level: INTERMEDIATE
Next Tutorial: Track and Detect
Introduction
The node “learnsifts” is the training node. The training needs to be done manually.
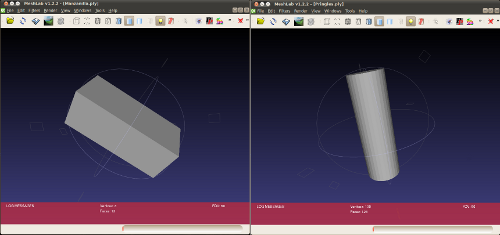
To begin the training stage a CAD model of the object is needed. Below are examples of a Manzanilla teabox and a Pringles cylinder. BLORT uses the .ply format to describe 3D objects.

Creating the model
Tips:
- Make sure that the CAD model is in SI metrics (meters). Rescale if needed.
- Use simple models even for more complicated objects. If there are too many edges, the tracker confidence will never reach a good rate. A convex hull is applicable most of the times.
Models can be downloaded from here: http://sketchup.google.com/3dwarehouse/ or anywhere from the web.
To manipulate CAD models one can use any program, the important thing is that the result must be converted to ply.
Some CAD softwares:
- Meshlab (the simplest one, but good for rescaling, computing convex hull and viewing models)
Google SketchUp
- Blender
- whatever CAD you can use
Example with Meshlab:
Configuration
The models should be placed in the folder $(find blort_ros)/Resources/ply. Open $(find blort_ros)/config/tracking.ini and look for these lines:
[Files]
Model = Pringles.ply
SiftModel = Pringles.sift
You should replace “Pringles” with whatever name your .ply file has. The corresponding sift file will be created if it doesn’t exist yet.
Train
Launch
Remap the topics to fit your needs: $(find blort_ros)/launch/learnsifts.launch:
<launch>
    <node pkg="blort_ros" type="learnsifts" name="blort_learnsifts" args="$(find blort_ros)">
<!--
        <remap from="/blort_camera" to="/stereo/left/camera_info" />
        <remap from="/blort_image" to="/stereo/left/image" />
-->
        <remap from="/blort_camera" to="/gscam/camera_info" />
        <remap from="/blort_image" to="/gscam/image_raw" />
    </node>
</launch>
Execute:
$ roslaunch blort_ros learnsifts.launch
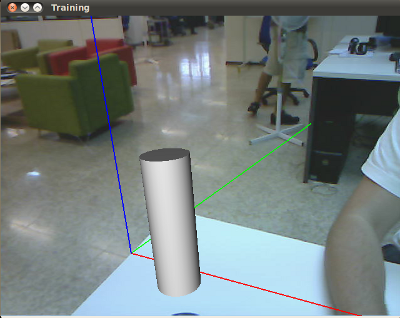
Something like this should appear:

Note: If you are re-training a model make sure that you create a backup of the previous files since they will be overwritten during the learning process. |
Note: If the model appears with texture that means that it has already been trained. |
Note: If you cannot see the object or it’s position is not what you prefer, feel free to edit $(blort_ros)/bin/pose.cal to get a preferred default pose. |
Usage
Control keys table:
[Space] |
Save texture face and extract SIFTS. |
[r] |
Reset tracker to initial pose |
[l] |
Lock/Unlock tracking |
[u] |
Untexture/remove texture from model |
[Return] |
Save SIFT and ply models. |
[q,Esc] |
Quit program |
[m] |
Switch model display mode (fancy) |
A typical training procedure should look something like the following:
- start image feed
- launch learnsifts
- place the object approximately behind the rendered grey object
- press [l] to unlock the tracker and move the object gently to fit the rendering as much as possible
- press [Space] whenever you feel that it’s time to capture a new face
- turn the object around gently to see a new face
- repeat steps 5.-6.
- should you ever loose track of the object, press [l] to lock the tracker and press [r] to bring the object back to it’s original pose to pick up the track again
- hit [Return] when finished
- hit [q] to close the trainer


