| Note: This tutorial assumes that you have completed the previous tutorials: navigation tutorials, ros.org. |
| |
Running the cart pushing stack on a PR2
Description: This tutorial will describe how to launch and send goals to the cart pushing stack on a PR2Tutorial Level: BEGINNER
Next Tutorial: cart_pushing/Tutorials/Running the cart pushing stack in Stage
Contents
The cart
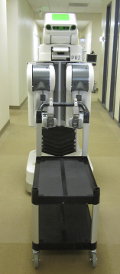
The particular cart we use is a holonomic food cart with multiple shelves. It is available from Hubert Food products. http://food-cart.hubert.com/hubert-food-transport-cart.html - buy the smaller one (33L). You will need to take off the upper shelf and the corresponding supports (at the front of the cart) to end up with a cart that looks like this.

Launching the navstack for cart pushing
The cart pushing stack provides simple launch files for cart pushing with the PR2 robot.
On the PR2 robot
Compile
The first step is to make the cart_pushing_executive package:
rosmake cart_pushing_executive
Bring up the cart pushing stack
Next, follow standard instructions for bringing up the PR2 robot. Make sure the robot is in an empty area with a lot of space in front of it to position the cart initially. Once the robot is ready and calibrated, you can start the cart pushing nodes using the launch file in the cart_pushing_executive stack.
roslaunch cart_pushing_executive cart_pushing_robot.launch
Now, wait. You will see a bunch of output on the screen including warning statements similar to these:
[ WARN] [1288047974.656092532, 45.700000000]: The base_scan observation buffer has not been updated for 44.30 seconds, and it should be updated every 0.40 seconds.
This will go on for about 50 seconds (this is about the time it takes the planner to pre-generate and store information about the motion primitives it will use for planning). At the end of about 50 seconds to a minute, you will see the following output:
[ INFO] [1288047980.187947340, 51.200000000]: done pre-computing action data based on motion primitives
[ INFO] [1288047980.512539984, 51.500000000]: [sbpl_cart_planner] Initialized successfully
[ INFO] [1288047980.517918998, 51.500000000]: MAP SIZE: 2332, 1825
[ INFO] [1288047980.523779320, 51.500000000]: Subscribed to Topics: base_scan
[ INFO] [1288047980.601912395, 51.600000000]: Setting up SBPL subscriber
[ INFO] [1288047980.643435447, 51.600000000]: Initialized twist recovery with twist linear:
  x: -0.3
  y: 0
  z: 0
angular:
  x: 0
  y: 0
  z: 0
 and duration 1.5
The robot's arms will go to a ready pose (like in the picture above) with the grippers open, ready for the placement of the cart in the robot's grasp.
Placing the cart
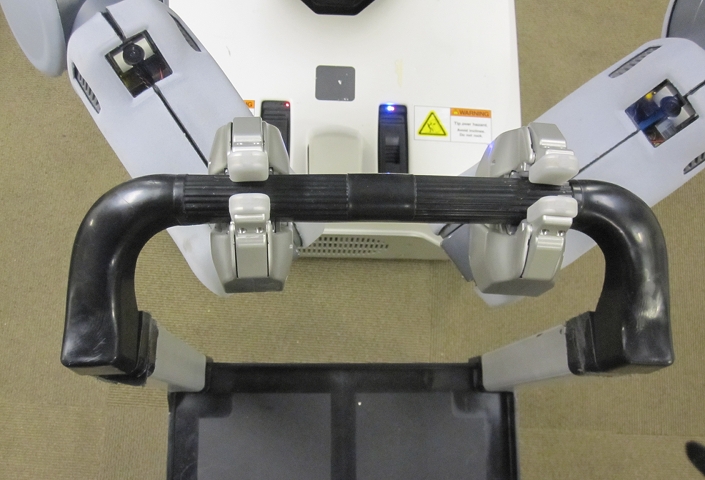
The cart pushing stack currently cannot acquire the cart on its own. Instead, you will have to manually place the cart in the robot's hands. Make sure the cart is positioned nice and symmetrical with respect to the robot. Once, you have placed the cart in the robot's grasp, giving a goal to the navstack will first cause the grippers to close. When that happens, you should see the robot grasping the cart like this:

RVIZ Visualization
To visualize the output of the cart pushing stack, launch rviz locally using a specially configured file:
roslaunch cart_pushing_executive rviz_move_base_cartpushing.launch cart_name:=wg_holonomic planner_name:=HolonomicCartPlanner
Giving goals
You can now give goals to the cart pushing stack just like you would give goals to the navigation stack. The goals are for the robot, not the cart and you have to be careful to give the robot a feasible goal. Note that the goal corresponds to a cart angle of zero. Check out this tutorial if you don't know how to use rviz with the navigation stack.
Interpreting the visualization
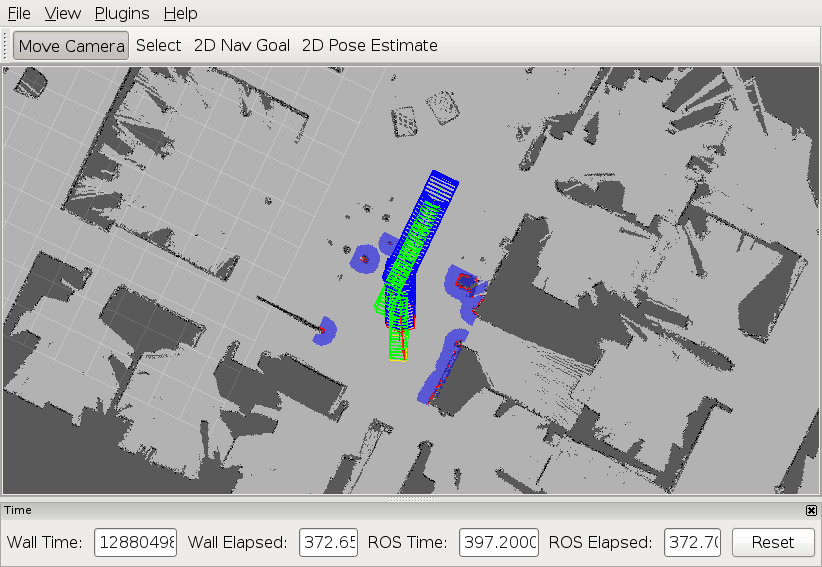
Planned path
The visualization gives you a lot of information about what is going on. The planned path for the robot and cart will be represented as a series of blue robot and green cart outlines. You can adjust the density of these outlines by changing the visualizer_skip_poses parameter. This parameter can be found in the launch/move_base/sbpl_global_planner.yaml file in the sbpl_cart_planner package. A parameter of 1 will display every waypoint in the plan while a parameter of 5 will display a waypoint every 5 waypoints.

Troubleshooting
The cart pushing stack involves an integration of new bleeding edge capabilities and can run into trouble. The most frequent source of trouble is the appearance of ghost or phantom obstacles due to grazing sensor hits off the robot body. Upcoming capabilities in calibration and sensing are directed towards resolving these issues. These issues will cause the robot and the cart to halt. The planner may be successful in planning around the phantom obstacles or the sensing may clear these out in multiple scans. However, there will also be cases where the phantom obstacles will completely surround the robot leaving no feasible path to the desired goal. To avoid these situations, it is important to have a well calibrated robot. Good calibration allows the filters applied to the sensor scans to function most effectively. In the worst cases, which should happen rarely in most indoor office-like environments, manually teleoping the robot out of stuck situations is often the only remedy.


