Deprecated
This is the documentation for the depricated, standalone version of map2djs. This version blazed the trail and helped us establish use cases and applications. However, it is now considered deprecated and is not currently supported.
For the currently maintained version of map2djs, please see ros2djs.
| |
Creating and Displaying a Basic Map Widget
Description: This tutorial shows you how to create a simple map widget and displaying the resulting image.Keywords: map2djs, web interface, rosjs, map, Robot Web Tools
Tutorial Level: BEGINNER
Map Example
In this tutorial, we show how to create and make use of a Map widget. To run the demo, it is easiest to use the map_server with the maps provided in the willow_maps package. To begin, create a new HTML document and copy the follow code sample into it.
The HTML Code
   1 <!DOCTYPE html>
   2 <html>
   3 <head>
   4 <meta charset="UTF-8">
   5
   6 <script type="text/javascript"
   7         src="https://raw.github.com/RobotWebTools/rosjs/fuerte-devel/dist/ros_bundle.min.js"></script>
   8
   9 <script type="text/javascript" src="../map.js"></script>
  10
  11 <script type="text/javascript">
  12   function start() {
  13     // connect to ROS
  14     var ros = new ROS('ws://localhost:9090');
  15
  16     // initialize the map widget
  17     var map = new Map({
  18       ros : ros
  19     });
  20
  21     // display the widget when it becomes available
  22     map.on('available', function() {
  23       var context = document.getElementById('my-map').getContext('2d');
  24       // add the image to the canvas
  25       context.drawImage(map.image, 0, 0, 400, 300);
  26     });
  27   }
  28 </script>
  29 </head>
  30
  31 <body onload="start()">
  32         <canvas id="my-map" width="400" height="300"></canvas>
  33 </body>
  34 </html>
Code Explanation
Now that we have a running example, let's look at each piece.
We first need to import all of the required Javascript files for map.js.
9 <script type="text/javascript" src="../map.js"></script>
The import statement should point to your local copy of map.js.
The first thing we need to do is create a ROS node object to communicate with a rosbridge v2.0 server. In this example, the script will connect to localhost on the default port of 9090.
This section of code creates the actual Map object. Here we provide the ROS node object created above. We keep the default map topic option ('/map').
Here we listen to the Map object until it notifies us that the map is available. Once this occurs, we execute the function defined. Within this function, we grab the context of the HTML5 canvas element that will be used to display the map. Next, we simply need the call the drawImage function on the context and provide it the internal drawing canvas from the Map object (found in its image public field).
31 <body onload="start()">
It is important to remember to call the start() function when this page is loaded. This will call the Javascript code discussed above.
32 <canvas id="my-map" width="400" height="300"></canvas>
Within the HTML <body> we create our HTML5 canvas element where we will display the resulting map. Note that the ID here matches that inside of our function described above.
Running the Example
At this point we are ready to run the example. To do so, you will need to have the navigation stack (which contains the map_server), wg_common stack, and rosbridge_suite stack installed. Refer to their respective Wiki pages for installation instructions, or simply install their latest builds from the Ubuntu repositories:
sudo apt-get install ros-fuerte-navigation ros-fuerte-rosbridge-suite ros-fuerte-wg-common
To begin, we will start a roscore:
roscore
Once this is running, we can run the map server with the following:
roscd willow_maps
rosrun map_server map_server willow-sans-whitelab-2010-02-18-0.025.pgm 0.025
Once this is running, we can launch the rosbridge v2.0 server with the following:
rosrun rosbridge_server rosbridge.py
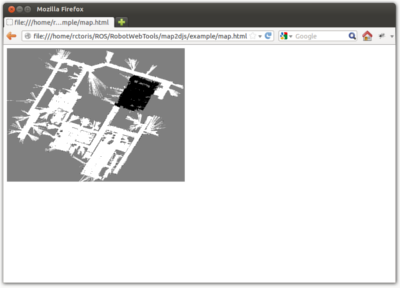
Finally, you are now ready to bring up your HTML page in a web browser. The result should be a page that looks similar to the following:

Support
Please send bug reports to the GitHub Issue Tracker. Feel free to contact me at any point with questions and comments.
|
|
|


