| Note: This tutorial assumes that you have completed the previous tutorials: Calibrating the PR2. |
| |
Using PR2 Auto Calibration (Experimental)
Description: This tutorial will show you how to use auto calibration on the PR2Tutorial Level: BEGINNER
Contents
What Does Auto-calibration do?
Auto calibration runs all of the pr2 calibration capture_data processes without any human interaction. That is to say you can set the robot up in front of a large checkerboard and with a small checkerboard in its gripper, execute:
roslaunch pr2_calibration_launch capture_data.launch
and walk away. The robot does the rest. No longer do you have to move a checkerboard around manually to get the samples, and no longer do you have to sit around doing nothing while the robot calibrates its arms, simply so you can put the checkerboard in its other gripper. Now the robot will do it all for you!
Note: This new procedure will not improve the quality of your calibration. It instead streamlines how you collect the calibration data.
Modifying the Checkerboard
Auto calibration requires a special small checkerboard to allow the robot to pass it from one hand to the other. To make this modification you will need a checkerboard and some extra grip tape. You can get the grip tape from McMaster-Carr check out part number 6970T63.
The Grip Tape
To start you will need to cut the grip tape into five pieces, each about 9cm long. Take one of the pieces and cut in half lengthwise like so:

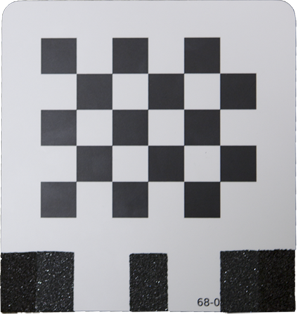
The Corners
Next wrap two pieces of grip tape around each corner of the checkerboard like so:

Once this is done you may wish to cut of the excess around the corners.
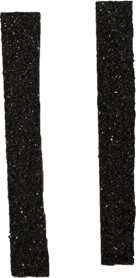
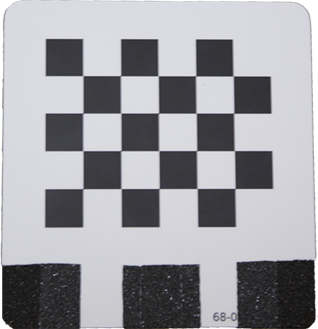
The Center Grip
The last thing to do is to widen the center grip slightly. To do this take the 2 small strips of grip tape and wrap one around each side of the center grip. You should end up with something that looks like this:

The robot can now grip the checkerboard on the sides and it now has tolerance for movement in the center.
Running Auto Calibration
Get the Code
The first thing you need to do before you are able to run auto calibration is to get the auto_calibrate branch of pr2_calibration. So first lets ssh onto the robot:
ssh prX
See ROS/Installation to install ROS on your PR2.
Now that we're setup on the robot we need to get the auto_calibrate rosinstall, and install so next we run:
rosinstall ~/ros_auto_cal /opt/ros/cturtle ~/pr2_calibration https://code.ros.org/svn/wg-ros-pkg/stacks/pr2_calibration/branches/auto_calibrate/pr2_auto_calibration.rosinstall
echo "source ~/ros_auto_cal/setup.bash" >> ~/.bashrc
source ~/.bashrc
Update caches and rosmake.
rospack profile
rosmake pr2_calibration --rosdep-install
Run It
From here everything is fairly simple. Set the robot up in front of a large checkerboard and place your new small checkerboard in the robots left hand(with the checkerboard facing backwards). Make sure that both the power and ethernet cords are unplugged, and that there is room for the robot to turn around. Now we can run the calibration as we would normally:
ssh -X prX
roslaunch pr2_calibration_launch capture_data.launch
Follow the prompts from the node and then you can just walk away! For more info on calibration you should refer to the other tutorials here.


