| Note: You should be familiar with PR2 computer configuration before attempting to duplicate this tutorial.. This tutorial assumes that you have completed the previous tutorials: urdf/Tutorials/AddingSensorsToPR2, Modifying the Diagnostic Analyzers on a PR2. |
| |
Adding a Hokuyo to the PR2
Description: Demonstrates how to add a Hokuyo to the side of the PR2. This includes modifying the URDF, and editing the robot's default launch configuration.Tutorial Level: ADVANCED
Contents
Overview
In order to add a component to the PR2 and integrate it with the rest of the robot, we need to modify the URDF, diagnostic analyzers configration, and the /etc/ros/robot.launch file of the PR2. This tutorial shows the basic steps involved in modifying the PR2's configuration to allow a new sensor.
Adding a Hokuyo to the side of the PR2 may not be very useful, but these procedures are intended to be a template for other modifications.
These modifications should only be done by experienced users of the PR2, and with communication from Willow Garage. Some procedures may need to be done by administrators.

Modifying PR2 URDF
Adding Hokuyo to URDF
The first step towards modifying the PR2's configuration is to change the URDF of the PR2. If you haven't already, please review the tutorial Adding Sensors to the PR2 URDF.
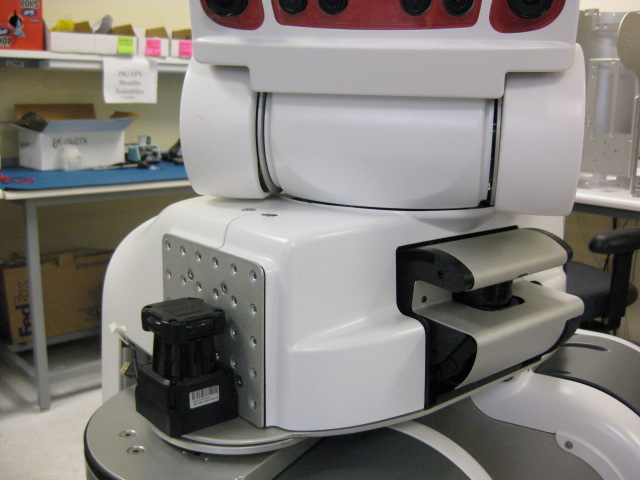
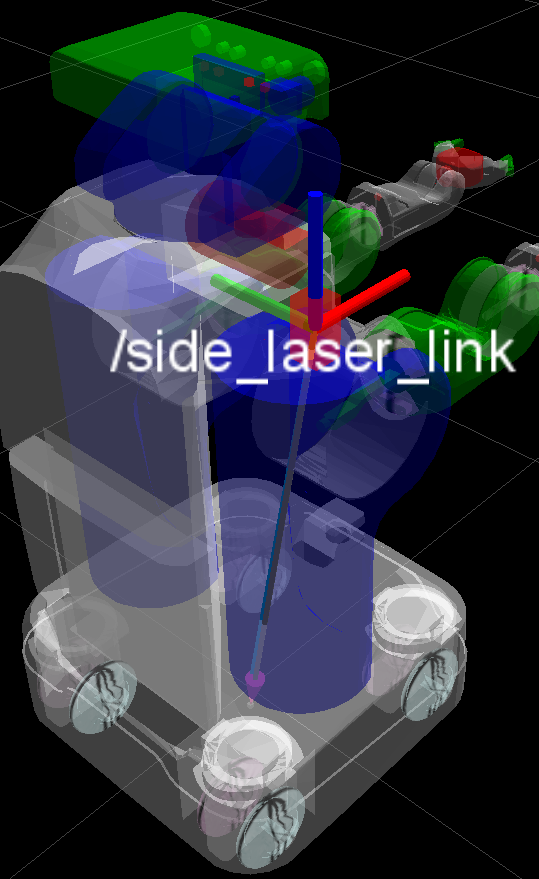
To modify the URDF, we'll add a Hokuyo macro to the urdf.xacro file. This URDF will place the Hokuyo on the side of the PR2, above the right shoulder. Add these lines to the pr2.urdf.xacro file in pr2_description.
   1   <!-- This adds the laser macro, including the scan for gazebo and link name -->
   2   <include filename="$(find pr2_description)/urdf/sensors/hokuyo_lx30_laser.urdf.xacro" />
   3   <xacro:hokuyo_lx30_laser_v0 name="side_laser" parent="torso_lift" ros_topic="side_scan"
   4                               update_rate="20" min_angle="-1.57" max_angle="1.57" >
   5       <origin xyz="0 -.220 0.200" rpy="0 0 0" />
   6   </xacro:hokuyo_lx30_laser_v0>
   7
   8   <!-- This adds a visual box to allow us to see the Hokuyo in rviz/gazebo -->
   9   <joint name="side_laser_box_joint" type="fixed">
  10     <origin xyz="0 0 0" rpy="0 0 0" />
  11     <parent link="side_laser_link" />
  12     <child link="side_laser_box_link"/>
  13   </joint>
  14   <link name="side_laser_box_link">
  15     <inertial>
  16       <mass value="0.01" />
  17       <origin xyz="0 0 0" />
  18       <inertia ixx="0.001"  ixy="0.0"  ixz="0.0"
  19                iyy="0.001"  iyz="0.0"
  20                izz="0.001" />
  21     </inertial>
  22     <visual>
  23       <origin xyz="0 0 0" rpy="0 0 0"/>
  24       <geometry>
  25         <box size="0.05 0.05 0.1" />
  26       </geometry>
  27     </visual>
  28     <collision>
  29       <origin xyz="0 0 0" rpy="0 0 0"/>
  30       <geometry>
  31         <box size="0.05 0.05 0.1" />
  32       </geometry>
  33     </collision>
  34   </link>
You can use xacro to make this XML macro into a full URDF. Save this URDF file as pr2_side_hokuyo.urdf.
Testing URDF in Gazebo
Make sure your modified file above is saved as pr2_description/robots/pr2.urdf.xacro.
To test in gazebo:
roslaunch gazebo_worlds empty_world_no_x.launch # Starts gazebo
roslaunch pr2_gazebo pr2.launch # Launches PR2
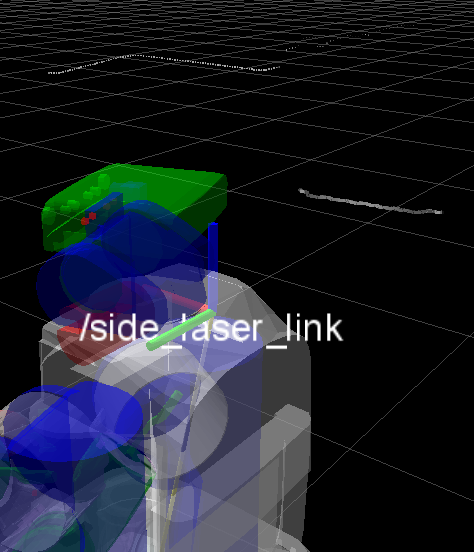
You should be able to see your laser in rviz.

Editing PR2 URDF
The URDF on the PR2 is loaded from the /etc/ros/urdf/robot.xml file on your PR2. This file is usually linked against a calibrated or uncalibrated PR2 URDF file.
pr2admin@c1:/etc/ros/urdf$ ls -l
total 748
-rw-rw-r-- 1 root rosadmin   6670 2010-04-05 10:14 pr2_1.0.2.urdf.xacro
-rw-rw-r-- 1 root rosadmin    434 2010-03-14 21:51 README
-rw-rw-r-- 1 root rosadmin 143621 2010-04-21 15:39 robot_calibrated_2010_04_19_1.0.2.xml
-rw-rw-r-- 1 root rosadmin 142829 2010-04-25 20:38 robot_uncalibrated_1.0.2.xml
lrwxrwxrwx 1 root rosadmin     42 2010-04-05 10:14 robot_uncalibrated.xml -> /etc/ros/urdf/robot_uncalibrated_1.0.2.xml
lrwxrwxrwx 1 root rosadmin     37 2010-04-19 19:33 robot.xml -> robot_calibrated_2010_04_19_1.0.2.xml
To add your new sensor to the URDF, you have two choices:
Copy the file pr2_side_laser.urdf that you made above and use symlinks to link against robot.xml
Edit the calibrated file (robot_calibrated_2010_04_19_1.0.2.xml above) to include the macro
If you copy your pr2_side_laser.urdf file, you will have to recalibrate the robot.
Both copying your URDF file and editing the existing one can only be done by the robot administrator.
Plugging in the Sensor
Important: Do not open any covers, plug in or unplug anything from the PR2 without reviewing the PR2 manual.
Review the PR2 manual and carefully follow instructions to open covers, and plug in the Hokuyo to the AUX USB port. You will need a USB extension cable and 12V power cable to plug into the sensor.
PR2 Integration
Configuring Sensor Port
Looking at documentation for the hokuyo_node, we can see that the Hokuyo will appear on the port /dev/ttyACM0. The AUX USB port is connected to c1 on the PR2.
pr2admin@c1:/etc/ros/urdf$ ls -l /dev/ttyACM0
crw-rw---- 1 root users 166, 0 2010-05-04 10:40 /dev/ttyACM0
We need to make sure this port is readable by our users. The other Hokuyo sensors on c2 have more permissions:
pr2admin@c2:~$ ls -l /etc/ros/sensors/base_hokuyo
lrwxrwxrwx 1 root root 28 2010-04-05 11:50 /etc/ros/sensors/base_hokuyo -> /dev/sensors/hokuyo_H0902632
Users should modify the permissions in /etc/udev/rules.d to make sure the device is operable.
Note that since the existing Hokuyo scanners are on "c2", so we don't have to worry about confusing them.
Adding Sensor to robot.launch
The file /etc/ros/robot.launch on the PR2 will launch the robot and bringup up the default configuration.
   1 <launch>
   2     <!-- Robot Description -->
   3
   4     <param name="robot_description"
   5
   6            textfile="/etc/ros/urdf/robot.xml" />
   7
   8     <!-- Robot Analyzer -->
   9
  10     <rosparam command="load"
  11
  12               file="find pr2_bringup/config/pr2_analyzers.yaml"
  13
  14               ns="diag_agg" />
  15
  16     <!-- Robot bringup -->
  17
  18     <include file="find pr2_bringup/pr2.launch" />
  19
  20     <!-- Web ui -->
  21
  22     <include file="find webui/webui.launch" />
  23
  24    <!-- Add Hokuyo driver -->
  25    <include file="/etc/ros/side_hokuyo.launch" />
  26 </launch>
In "side_hokuyo.launch":
   1 <launch>
   2  <!-- Side Laser -->
   3  <node machine="c1" pkg="hokuyo_node" type="hokuyo_node"
   4        name="side_hokuyo_node" args="scan:=side_scan">
   5     <param name="port" type="string" value="/dev/ttyACM0" />
   6     <param name="frame_id" type="string" value="side_laser_link" />
   7     <param name="min_ang" type="double" value="-2.2689" />
   8     <param name="max_ang" type="double" value="0" />
   9     <param name="skip" type="int" value="1" />
  10     <param name="intensity" value="true" />
  11   </node>
  12 </launch>
This sets a few key parameters:
Machine - c1 for AUX USB port
port - /dev/ttyACM0
- min/max angle : Set to allow us to scan on right side of robot.
Modifying Diagnostic Analyzers
The diagnostic_aggregator needs to be configured to look for the new hokuyo device. See Modifying Diagnostic Analyzers on a PR2.
Launching Robot
When use start the PR2 with "sudo robot start", the laser will come up automatically. You'll be able to see actual laser scans using rviz.


