| |
Creating Gestures in RCommander PR2
Description: Guides you through the process of creating new PR2 gestures.Tutorial Level: BEGINNER
Next Tutorial: Face Detection and Understanding Reference Frames
Contents
Overview
This tutorial will guide you through the process of creating gestures on the PR2 with RCommander.
Creating a Basic Arm Gesture
To create a gesture with the PR2's arm, activate the Joint Sequence tool under the Manipulation tab. This should open a large properties panel.


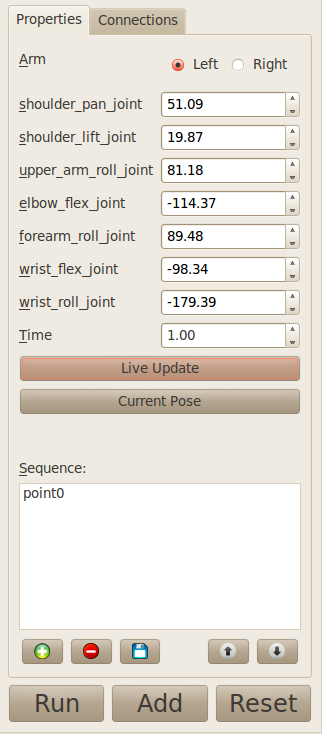
The joint sequence tool allows you to record key frames that the robot will later interpolate between to make an animation. The large panel at the bottom of the properties panel shows the current list of key frames recorded and a row of buttons which allows you to edit the ordering (moving Up or Down), add, remove, and save key frames. Above the key frames panel is a list which show which arm is being controlled, the joint angles of the currently active key frame, and how long that key frame will take to execute.
To create an animation, we will be posing the robot in a desired configuration with RViz then use this tool to add that pose to our list of keyframes.
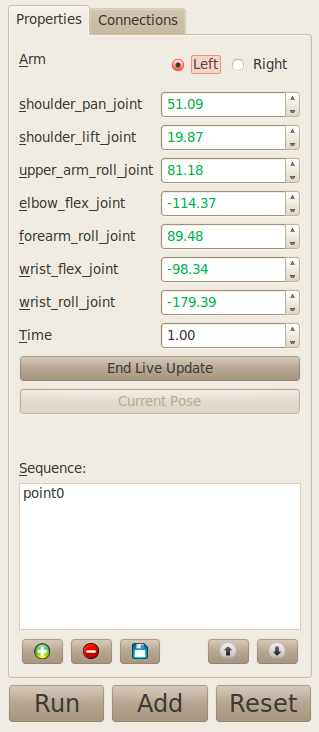
To begin creating an animation, select the Live Update button (above RIGHT). Notice that the zeros have now been replaced with the robot arm's current pose, and all fields will change color to green. The fields here are displaying the robot's current joint angles in degrees.
Switch to RViz and pose the arm that you wish to make gestures for. Notice that as the arm moves, the joint angles shown in RCommander change accordingly. After moving the arm to an acceptable pose, click on the small add button to add that current pose as a key frame. Repeat this procedure for small incremental steps of the robot's arm. After you are finished inserting key frames, uncheck the Live Update option, and click on the big Add button to insert this gesture into the robot behavior.
Please note that the arm selection box at the top of the dialog box is NOT a per keyframe option and applies to all keyframes in this node. This means that each gesture can only control one arm at a time, not both.
Editing Your Animation
After capturing the initial set of keyframes, you might want to tweak them a little bit to get the desired effect. To do so, first select the keyframe that you want to edit. To speed up or slow down the transition from the keyframe prior to this one change the values in the time box. To change the pose used by the robot, change the angles shown in each of the joint's field.

After making the changes, click on the blue disk icon to save your changes to the selected keyframe. Other buttons beneath the list of keyframes also allow you to reorder (arrow buttons), as well as add and delete the keyframes.

However, before selecting another node or tool in RCommander, you must also click the large Save button to save all your changes.
Indicators for Unfeasible Motions

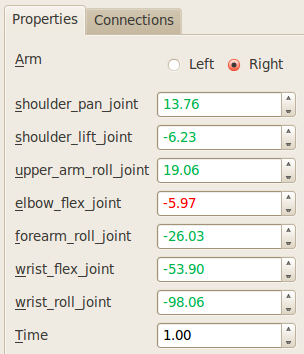
The joint angle indicators will turn RED if the given pose is unattainable by the robot due to software safety limits. In the above screenshot, the value for the elbow_flex_joint is red as the robot won't be able to execute this joint sequence. To correct this, after adding the keyframe to your list, click on it then either increase or decrease the joint angle as appropriate until it is no longer red.
Another type of limit to be aware of is that the robot's joints can only move so quickly and cannot carry out key frames that instructs it to move faster than is physically possible. When this happens, the time box will either change color to orange or red. With orange meaning that the robot will probably not be able to carry out the instruction and red meaning that it will definitely not be able to. This situation is also shown in the above screenshot. To fix it, increase the amount of time allowed.
The software tries its best to determine if a motion is feasible, however, this checking DOES NOT happen for the first keyframe (point0 in the above screenshot) as the robot can be in any arbitrary pose prior to being sent that keyframe. Normally it's safe to give the robot at least 5 seconds to go from an arbitrary pose to the initial keyframe given.
Pose Buttons
The Pose button works like Live Update but will only grab the arm's current joint angles once and not continuously.


