| Note: This tutorial assumes that you have completed the previous tutorials: ROS Tutorials. |
| |
Using SICK Laser Scanners with the sicktoolbox_wrapper
Description: This tutorial is an introduction to using a SICK laser scanner connected to a desktop. After reading this tutorial, you should be able to bring up the sicklms node and display the laser data.Keywords: SICK, laser, driver, LMS200, LMS291
Tutorial Level: BEGINNER
Contents
Compiling
Start by getting the dependencies and compiling the driver and rviz.
$ rosdep install sicktoolbox_wrapper rviz
$ rosmake sicktoolbox_wrapper rviz
Powered On and Plugged In
Make sure that your SICK laser is plugged in via USB or serial port and the green power light is on.
NOTE: The RS232 TX and RX lines on the SICK LMS200/LMS291 are reversed. You will need a crossover or null modem cable for the data connection to work properly. |
Configuring the SICK
Make sure that the sicklms node will be able to access the SICK laser scanner.
Start by listing the permissions of the SICK connection, this assumes you are using a usb to serial adapter.
ls -l /dev/ttyUSB0
You will see something similar to:
crw-rw-XX- 1 root dialout 166, 0 2009-10-27 14:18 /dev/ttyUSB0
If XX is rw: the laser is configured properly.
If XX is --: the laser is not configured properly and you need to:
sudo chmod a+rw /dev/ttyUSB0
Starting a roscore
For the sicklms node to work properly, a ros core must be running. In a new terminal:
$ roscore
Setting Parameters
Before we can run the sicklms node we need to make sure that we have the correct configurations loaded on the parameter server.
$ rosparam set sicklms/port /dev/XXX (this is the port that the SICK is connected to /dev/ttyUSB0, /dev/lms200, etc...)
$ rosparam set sicklms/baud 38400
Running the sicklms node
In a new terminal, run the sicklms:
$ rosrun sicktoolbox_wrapper sicklms
You will see something similar to:
        *** Attempting to initialize the Sick LMS...
        Attempting to open device @ /dev/ttyUSB0
SickLMS::_setTermSpeed: ioctl() failed while trying to get serial port info!
        NOTE: This is normal when connected via USB!
SickLMS::_setTerminalBaud: ioctl() failed while trying to set serial port info!
        NOTE: This is normal when connected via USB!
                Device opened!
        Attempting to start buffer monitor...
                Buffer monitor started!
        Attempting to set requested baud rate...
SickLMS::_setTermSpeed: ioctl() failed while trying to get serial port info!
        NOTE: This is normal when connected via USB!
SickLMS::_setTerminalBaud: ioctl() failed while trying to set serial port info!
        NOTE: This is normal when connected via USB!
                Operating @ 38400bps
        Attempting to sync driver...
                Driver synchronized!
        *** Init. complete: Sick LMS is online and ready!
        Sick Type: Sick LMS 291-S05
        Scan Angle: 180 (deg)
        Scan Resolution: 0.5 (deg)
        Measuring Mode: 8m/80m; fields A,B,Dazzle
        Measuring Units: Centimeters (cm)

        Requesting measured value data stream...
                Data stream started!
Variation: Setting parameters on the command-line
Instead of using rosparam to set parameters, you can set them on the command line when launching sicklms, e.g.:
$ rosrun sicktoolbox_wrapper sicklms _port:=/dev/XXX _baud:=38400
Viewing the data
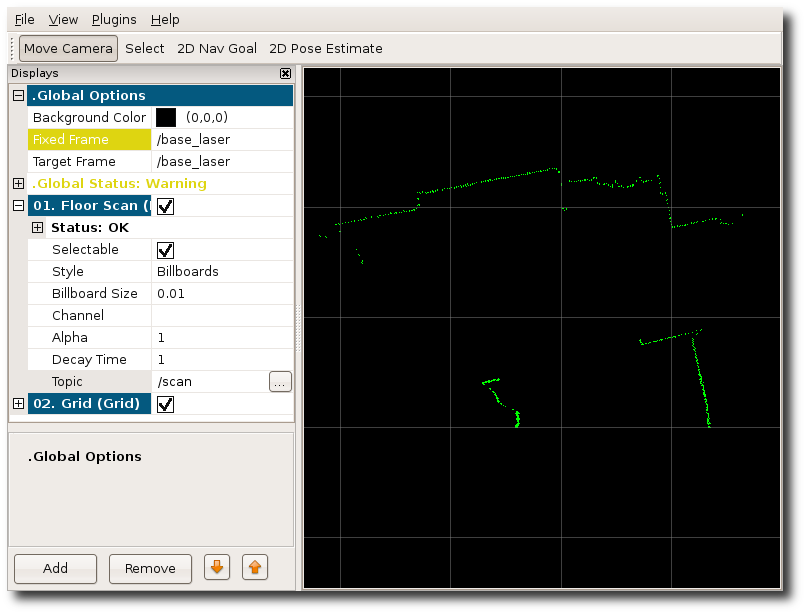
To see that everything is working and data is being published to ros, in a new terminal:
$ rosrun rviz rviz
You will see the laser scan in rviz:


