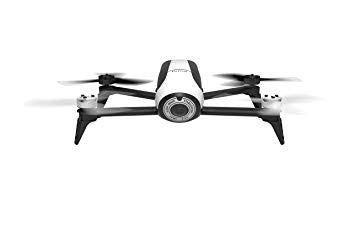
| Note: This tutorial assumes that you have completed the previous tutorials: How to build and install visp_ros. |
| |
How to do visual servoing with Parrot Bebop 2 drone using visp_ros
Description: This tutorial explains how to set up and use visp_ros package to do visual servoing with Parrot Bebop 2 drone.Keywords: visual servoing drone bebop2 parrot visp robot
Tutorial Level: BEGINNER
Next Tutorial: Detailed tutorial on Parrot Bebop 2 visual servoing using ViSP
Contents
Introduction
This tutorial explains how to use visp_ros package to do visual servoing with the Parrot Bebop 2 drone.
You can see the program in action in this video :
Prerequisites
- Parrot Bebop 2 drone
An April Tag from 36h11 family that will serve as target for the visual servoing (see this page to print one).
Modified version of bebop_autonomy package
In order to control the drone, the ROS wrapper bebop_autonomy is required. However, this wrapper doesn't implement a way to send relative move commands to the drone.
We have added the necessary modifications in this fork.
You have to install bebop_autonomy from fork manually :
$ cd ~/catkin_ws/src
$ git clone https://github.com/lagadic/bebop_autonomy.git
$ cd bebop_autonomy/
$ git checkout inria-moveby
$ cd ~/catkin_ws
$ rosdep update
$ rosdep install --from-paths src -i
$ catkin_make
$ source ~/catkin_ws/devel/setup.bash
Build visp_ros from source
Note that visp_ros package has a dependency with ros-<distro>-visp_bridge and ros-<distro>-visp packages. Since ros-<distro>-visp package corresponds to ViSP 3.2.0 that is too old for visp_ros package, you need to install ViSP from source as well as ros-<distro>-visp_bridge.
To install ViSP from source, proceed as described in this [tutorial](file:///home/fspindle/visp_ws/visp/visp-build/doc/html/tutorial-install-ubuntu.html#install_ubuntu_quick).
Create first a workspace:
$ echo "export VISP_WS=$HOME/visp-ws" >> ~/.bashrc
$ source ~/.bashrc
$ mkdir -p $VISP_WS
Install a small number of recommended 3rd parties
$ sudo apt-get install libopencv-dev libx11-dev liblapack-dev libeigen3-dev libdc1394-22-dev libv4l-dev libzbar-dev libpthread-stubs0-dev libjpeg-dev libpng-dev libdmtx-dev
Get ViSP source code
$ cd $VISP_WS
$ git clone https://github.com/lagadic/visp.git
Create a build folder and build ViSP
$ mkdir -p $VISP_WS/visp-build
$ cd $VISP_WS/visp-build
$ cmake ../visp
$ make -j4
Set VISP_DIR environment variable
$ echo "export VISP_DIR=$VISP_WS/visp-build" >> ~/.bashrc
$ source ~/.bashrc
Now get vision_visp package: ` $ cd ~/catkin_ws/src $ git clone https://github.com/lagadic/vision_visp.git `
To build visp_ros package from source run:
$ cd ~/catkin_ws/src
$ git clone https://github.com/lagadic/visp_ros.git
$ cd ~/catkin_ws
$ catkin_make -DVISP_DIR=${VISP_DIR}
$ source ~/catkin_ws/install/setup.bash
Running the program
visp_ros contains two launch files (launch/bebop_servo_node.launch and launch/bebop_servo_nodelet.launch) that allow to start the program. Both start two processes : the drone driver and the visual servoing program, with the necessary remappings. One uses regular nodes, and one uses nodelets (more efficient than nodes to transmit image data, see this page for more details on nodelets).
There are also some parameters you need to adapt to your current task :
- The tag size (default : 0.14 meters)
- The desired distance to the tag (default : 1.5 meter)
- The orientation of the camera (default : -15 degrees for tilt and 0 degree for pan)
Note: Before starting the program, the drone should be turned on and the computer connected to the drone Wifi network, as shown in the following pictures : |
CAUTION : It's is strongly recommended to use this program outside or in a large room with non-uniform flooring, as the drone uses a downward-facing camera to estimate its motion from optical flow. If the surface under the drone is uniform, its movements will be inaccurate and dangerous. |
Once everything is set up, you can launch the program :
$ roslaunch visp_ros bebop_servo_node.launch
or
$ roslaunch visp_ros bebop_servo_nodelet.launch
CAUTION : If your Bebop2 has an other IP than the default which is 192.168.42.1 you may set ip parameter. |
$ roslaunch visp_ros bebop_servo_nodelet.launch ip:=192.168.43.1
The drone driver will start, as well as the visual servoing program, that takes images from the drone camera as input, computes displacement commands, and sends them to the drone.
To make the drone take off and start the servoing, use (in another terminal) :
$ rostopic pub --once /bebop/takeoff std_msgs/Empty
To make the drone land, use :
$ rostopic pub --once /bebop/land std_msgs/Empty
Understanding the program
If you need more details on how the visual servoing program works, check the version in the open-source library ViSP : Tutorial: Visual-servoing with Parrot Bebop 2 drone.


