| Note: This tutorial assumes that you have completed the previous tutorials: Connecting the XV-11 Laser to USB, ROS Tutorials. |
| |
Running the XV-11 Laser Node
Description: This tutorial will walk you through installing and running the XV-11 Laser Node so that you get laser scans in rviz.Keywords: xv11 xv-11 neato laser rviz udev ftdi
Tutorial Level: BEGINNER
Contents
Install the Driver
Install the Driver via apt-get
You can install the xv_11_laser_driver via command line:
$ sudo apt-get install ros-<distro>-xv-11-laser-driver
Replace the <distro> with the ros distro you installed. e.g. indigo, jade or kinetic
Build Driver from Source
Hydro and later releases of this driver use the catkin build system. Groovy and earlier use rosbuild. Select the build system based on your ros version.
It is assumed you have created and initialized a catkin workspace as described in the "Create a ROS Workspace" section of this tutorial
Clone the source code from github and build it. Source the workspace environment.
cd catkin_ws/src
git clone https://github.com/rohbotics/xv_11_laser_driver.git
cd ..
catkin_make
source devel/setup.bash
We assume you have ros-cturtle-base and rosinstall installed.
- Install git (if you don't already have it installed). For example, on Ubuntu use
sudo apt-get install git-core
- Use rosinstall to get the code (replace "groovy" with "fuerte" or any earlier distribution you're using)
rosinstall ~/cwru-ros-pkg /opt/ros/groovy 'http://www.ros.org/wiki/xv_11_laser_driver/Tutorials/Running%20the%20XV-11%20Node?action=AttachFile&do=get&target=cwru-ros-pkg.rosinstall'
- Add cwru-ros-pkg to your environment
. ~/cwru-ros-pkg/setup.sh
- Build the driver
rosmake --rosdep-install xv_11_laser_driver
If the above fails, try
rosmake xv_11_laser_driver
rosdep install xv_11_laser_driver
Setup udev for FTDI devices
Note: This is an optional step. You only need to complete it if you'd like your XV-11 laser to have a constant device identifier |
Add the following to a new rule file in /etc/udev/rules.d. For example, as root:
# echo 'SUBSYSTEMS=="usb", KERNEL=="ttyUSB[0-9]*", ATTRS{idVendor}=="0403", ATTRS{idProduct}=="6001", SYMLINK+="sensors/ftdi_%s{serial}"' > /etc/udev/rules.d/52-ftdi.rulesThis will create devices in /dev/sensors/ftdi_* where * is the serial number in a particular FTDI USB-Serial chip's EEPROM. This will allow you to refer to the device accurately even if you plug multiple /dev/ttyUSB* devices in in different orders.
Startup the XV11 driver
In successive terminals that have had the cwru-ros-pkg environment setup in them:
- Startup roscore
roscore
- Startup the driver with the appropriate device path (I'm using /dev/ttyUSB0 which assumes you didn't setup the udev rules and the XV-11 laser was the first ttyUSB device you plugged into your computer)
rosrun xv_11_laser_driver neato_laser_publisher _port:=/dev/ttyUSB0
If you have a newer version of the Neato laser you need to start the XV11 driver with the _firmware_version option:
rosrun xv_11_laser_driver neato_laser_publisher _port:=/dev/ttyUSB0 _firmware_version:=2
The driver should now be running.
View the scan data using the following instructions, and if it doesn't look right, try the other way of starting the driver.
View the data in RVIZ
Show EOL distros:
There are no jade instructions yet. Please try the indigo instructions and update this page if they work.
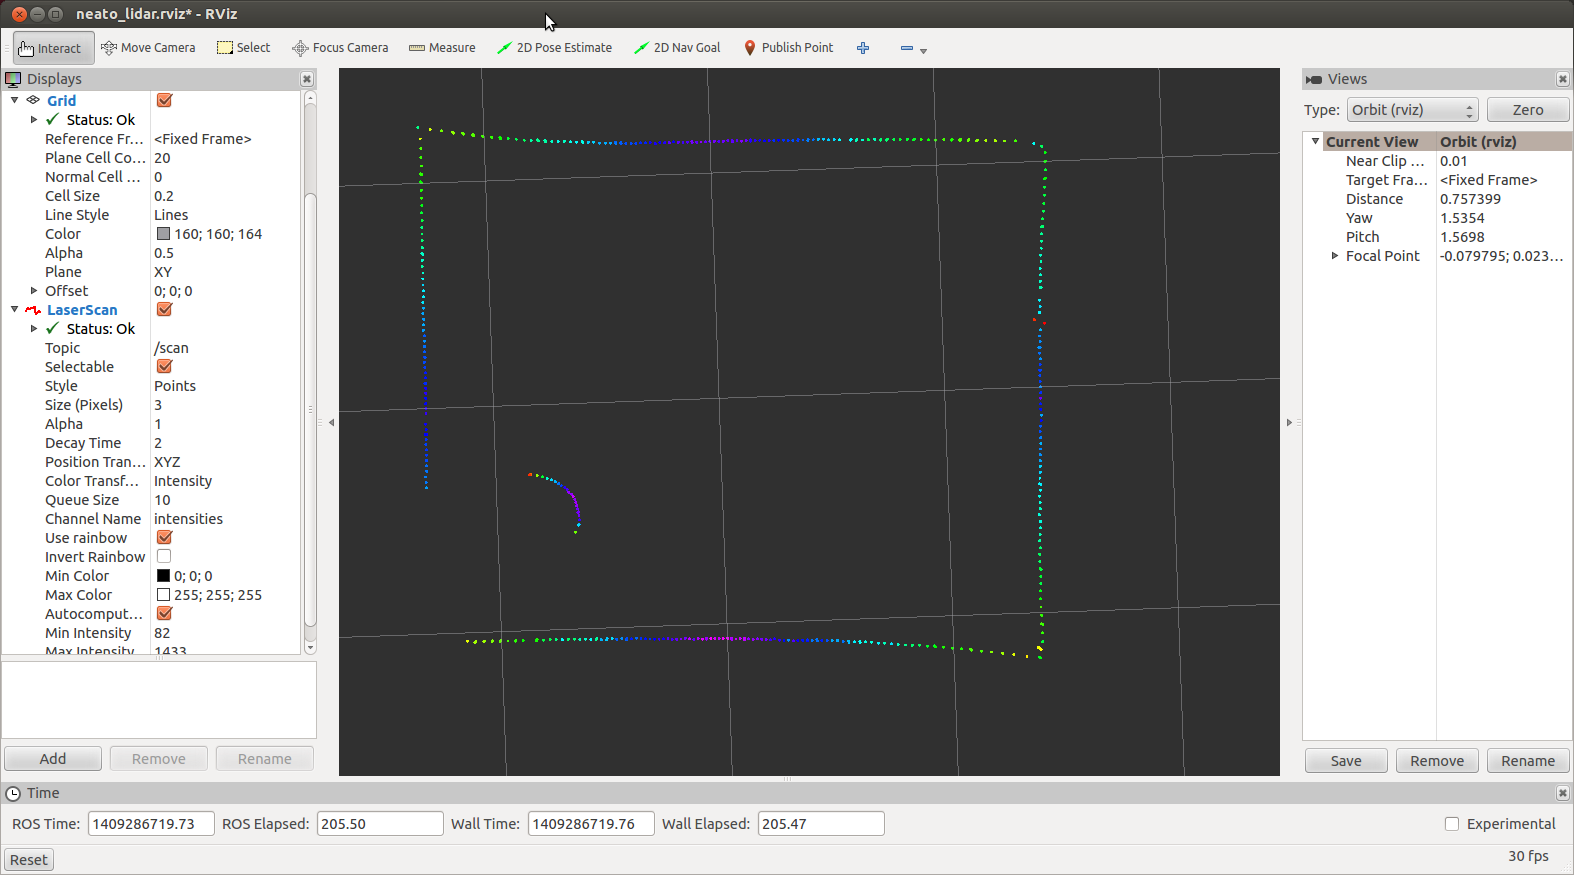
You must configure rviz to display laser scan data. You can either use the configuration file attached to this page, or configure it from scratch. In either case, the result should look something like this:
Lidar scan inside a box with a can in one corner 
Configure rviz with the attached configuration file
1. Download the rviz configuration file neato_lidar.rviz file
1. Start the rqt program
1. Launch Plugins -> Visualization -> Rviz
1. In the rviz pane, select File -> Open Config -> <navigate to downloaded neato_lidar.rviz>
You should see a grid with the lidar reflections displayed on it.
Configure rviz from scratch
1. Startup rviz
rosrun rviz rviz
2. Set fixed frame
Edit "Fixed Frame" value (top-left in rviz window). Click where it says, "map" and enter "/neato_laser" (without quotes).
3. Add laser scan
Click on the "Add" button (bottom-left in rviz window) and select "LaserScan" from the list.
4. Add scan topic
Expand LaserScan (in left pane of rviz window) and click to the right of "Topic" and select "/scan" from the drop-down list.
Download the neato_demo.vcg file
- Startup rviz in a new terminal window (this will only work for older versions of ROS)
rosrun rviz rviz -d /full/path/to/neato_demo.vcg
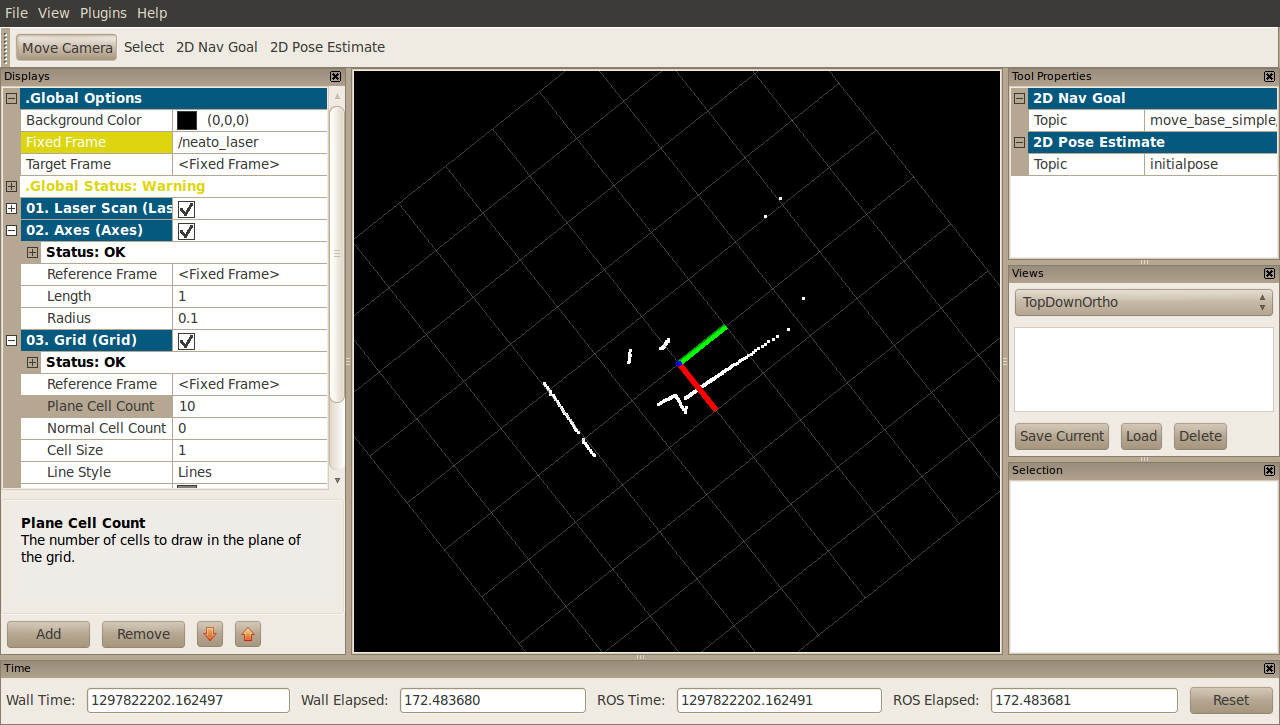
This should configure your frames and displays properly. You'll also get a handy grid where each square is 1 meter by 1 meter as well as an axis indicator. The red bar is the +X axis of the laser, the green bar is the +Y axis. The laser readings are in white.
You should now see laser scans all around the XV-11 Laser. It should look something like

Have fun playing with your XV-11 Laser!


