| |
ROS4HRI Complete walk-through
Description: Complete ROS4HRI walk-through - about one day-longKeywords: hri
Tutorial Level: INTERMEDIATE
Contents
Step-by-step tutorial, presented during the IROS22 ROS4HRI tutorial.
Important
This tutorial assumes you are already familiar with the basic ROS concepts. If not, please start with the ROS Tutorials.
In particular, you need to be able to manually compile and install ROS nodes (using eg catkin).
The tutorial relies heavily on Python 3. As such ROS noetic is required! it will not work on ROS melodic.
Part 1: First encounters
OfficeBots, our multi-player simulator for HRI
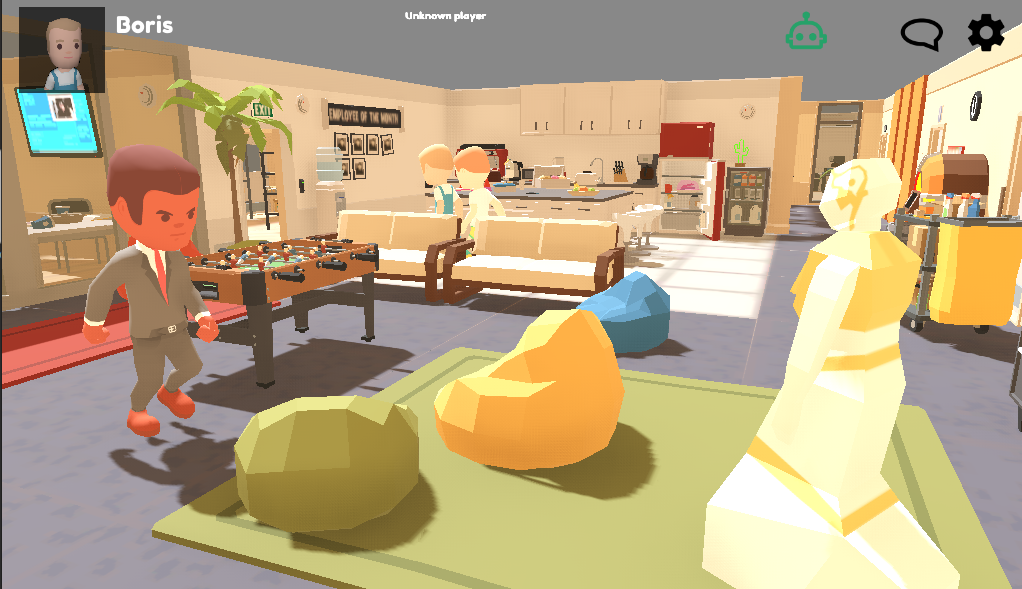
Install and start OfficeBots
Download the OfficeBots binary from its Github Releases page
- Start the game (you might need to change the permissions of the downloaded file to make it executable), choose a character and a name
- Install the ROS bridge:
$ sudo apt install python3-websockets python3-opencv ros-noetic-cv-bridge
$ pip3 install officebots
Start roscore:
$ roscore
- Install the ROS messages you might be missing:
$ sudo apt install ros-noetic-hri-msgs ros-noetic-sensor-msgs ros-noetic-geometry-msgs ros-noetic-nav-msgs
- Choose a robot name and start the bridge. For instance:
$ officebots-ros WallE
- Finally, in the game, press the blue robot icon to connect to the bridge:
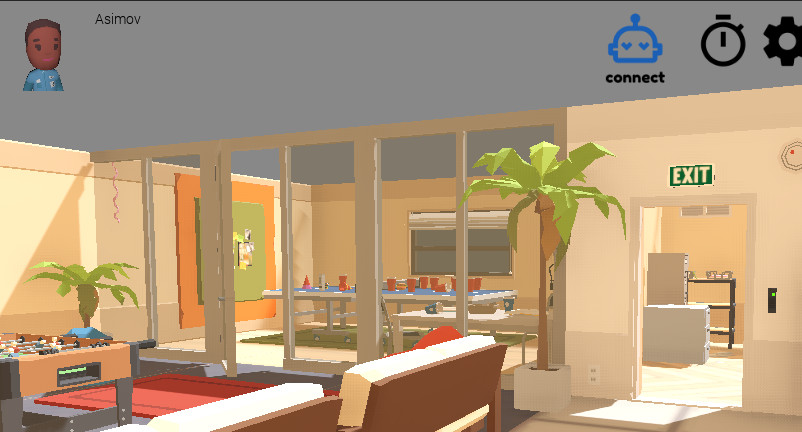
You now have a virtual robot available in OfficeBots (look around if you can not see it). Type rostopic list to see the available topics published by the robot.
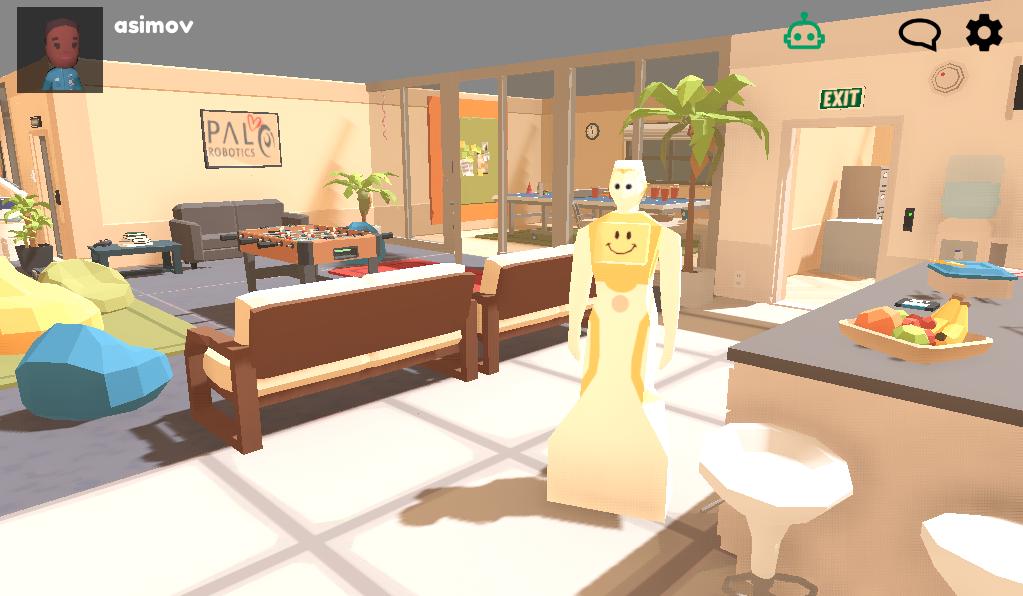
Get familiar with OfficeBots
To get a bit more familiar with Officebots and ROS:
- explore the environment with your mouse and keyboard. You should be able to open doors and pickup some objects
start rviz and display the robot's tf frames and laserscan:
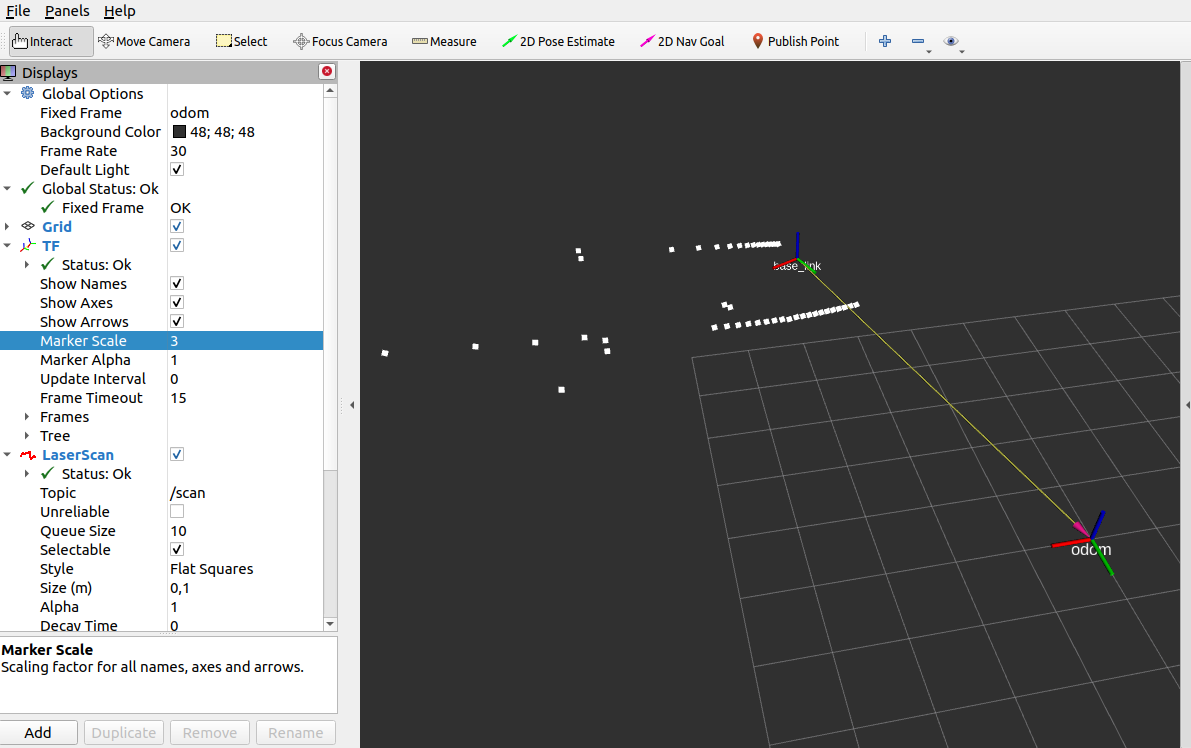
try to publish to the /cmd_vel topic to move the robot around:
$ rostopic pub /cmd_vel geometry_msgs/Twist "linear:
  x: 0.5
  y: 0.0
  z: 0.0
angular:
  x: 0.0
  y: 0.0
  z: 0.0"
First contact with the ROS4HRI API
Move to face the robot. Use rostopic list and rostopic echo to understand what topics are created by the robot.
Try to understand:
what is published on the /humans/*/tracked topics?
- what type of ids exist?
- how a person and a face (or a body) are associated?
- which ids are 'stable' in time, which ones change (and when/why do they change)
Check your answers by looking at the ROS4HRI specification: REP-155.
To see more humans, enable the NPCs ('non-playing characters') in the game settings (click the top-right cog).
First exercise: program an engagement detector
The level of 'engagement' of a person with the robot can be published on /humans/persons/<id>/engagement_status using a hri_msgs/EngagementLevel message.
One simple way of estimating engagement is by using the visual social engagement metric that computes whether the person and the robot are looking at each others (mutual gaze), and divide the result by the distance (eg, you are considered to be engaged if you are looking at each other and sufficiently close).
The algorithm is described here.
We will implement a simple engagement estimator by:
installing pyhri, the Python bindings to ROS4HRI
retrieve the gaze direction of the user using pyhri
- compute visual engagement by dividing mutual gaze by distance
- publish the resulting level of engagement in a ROS4HRI-compatible way
Install pyhri
Do not use pyhri as packaged in noetic. This version is outdated.
Instead, download the latest release from github.com/ros4hri/pyhri, and install it manually (using eg catkin build)
Once pyhri is installed, try the following script to list and display the detected persons:
   1 import rospy
   2 from hri import HRIListener
   3
   4 rospy.init_node("pyhri_test")
   5
   6 hri = HRIListener()
   7
   8 while not rospy.is_shutdown():
   9     for id, person in hri.tracked_persons.items():
  10
  11         if person.face:
  12             print("Person %s is bound to face %s" % (id, person.face.id))
  13             print(
  14                 "6D gaze orientation: %s"
  15                 % person.face.gaze_transform(from_frame="sellion_link")
  16             )
  17
  18     rospy.sleep(1)
The sellion_link is a TF frame published by the simulator, and located between the two eyes of the robot. We will use it to compute mutual gaze.
You can browse the pyhri API on ReadTheDocs.
If you are more of a C++ person, you might want to check libhri, a C++ wrapper for ROS4HRI. The C++ and Python API are actually quite similar (for instance, in both case you would start by instantiating a HRIListener), and switching from one to the other should be fairly easy.
Creates a simple `roshuman` command-line tool
Using pyhri, create a simple command-line tool that would continuously output on the console the list of persons (with their ID and whether they are currently seen), and for each of them, their associated face ID (if any).
ROS4HRI does not (yet!) feature such a tool: if you are up for building a complete and well-designed roshuman tool, pull-requests very welcome!
Compute visual social engagement
Create a script that uses pyhri to retrieve the gaze orientation of people seen by the robot, and compute the visual social engagement of the person by following the algorithm in the above paper.
You will need to:
- get the position of the person in the robot's field of view
- calculate the distance of the person to the centre of the robot's field of
view, with 1.0 meaning 'on the optical axis', and 0.0 meaning at the edge of the field of view (or outside of it)
- get the position of the robot in the person's field of view (by inversing the gaze-to-robot transform) and compute the distance to the person's optical axis
compute a metric for mutual gaze M_{RP}, defined as the product of these two distances. M_{RP}=1.0 then means the robot and the person are exactly looking at each others.
compute the metric for social engagement S_{RP} as min(1, M_{RP}/dist(R,P))
You can find here a complete, working script to estimate engagement. If you are running out of time, feel free to test it/copy-paste bits from it!
Implement a engagement estimator
Finally, wrap the computation of the engagement into a ROS node that published the person's engagement level on the /humans/persons/<id>/engagement_status topic, using a hri_msgs/EngagementLevel message.
There you go! You've just completed your first REP-155 compliant ROS node!
Part 2: Diving deeper
Using real data
In this next part of the tutorial, we are going to use real sensor data, namely, your webcam.
First step: publish your webcam video stream
If necessary, install the ROS usb_cam node (apt install ros-noetic-usb-cam).
Run it and remap the topic to simpler ones:
$ rosrun usb_cam usb_cam_node /usb_cam/image_raw:=/image /usb_cam/camera_info:=/camera_info
Check that you can indeed view the video stream (using eg rqt_image_viewer or rviz) & you are all set!
Face detection
If not done yet, install hri_face_detect. This node uses Google's mediapipe to perform face detection. As mediapipe is problematic to package on debian, it is not available as a noetic package. You need to install it manually. Follow the previous link (or head to the repo) to download it and install it.
then, start hri_face_detect:
$ rosrun hri_face_detect detect
Explore the results with rostopic echo. In particular, check /humans/faces/tracked.
Compared to what the simulator was provinding, you should get additional face data, like the cropped and aligned faces (/humans/faces/<id>/aligned) or key facial landmarks (/humans/faces/<id>/landmarks).
ROS4HRI and rviz
Several visualisation tools are part of the ROS4HRI ecosystem. Let's check first the HRI rviz plugin hri_rviz.
Make sure you have installed the ros-noetic-hri-rviz (`apt install ros-noetic-hri-rviz) and start rviz`
Enable the Humans plugin and configure it image topic parameter to point to /image. You should now see your face highlighted, along with facial landmarks.
Add as well a tf plugin, and verify that both the face and gaze tf frames are published.
...however, compared to what the simulator provided, we do not see any person_ frame. Why?
Because neither hri_face_detect nor ROS4HRI performs face recognition! We are unable to map faces to persons yet.
Associating faces to persons
Implementing a face recognition node is not particularly difficult (using, for instance, the excellent dlib face recogniser). It is however out-of-scope for today's tutorial.
Instead we are going to 'manually' associate ourselves to our faces.
But first things first, we need a node to publish /humans/persons/tracked and the various /humans/persons/<id>/ subtopics (and in particular, /humans/persons/<id>/face_id, that associate the person to her/his face).
The open-source hri_person_manager node does that (and more, as we will see in a bit).
Download and install hri_person_manager from its github repo.
- ...and run it:
$ rosrun hri_person_manager node
Immediately, hri_person_manager should pick up that a face is published, and it creates an anonymous person for it. Inspect the output of rostopic list and check in particular that /humans/persons/<id>/face_id indeed associates this anonymous person to your face.
hri_person_manager is in fact a probabilistic ID matcher: it attempts to find to best possible combination of persons, faces, bodies, voices... using match likelihoods published on the /humans/candidate_matches topic. Takes a few moments to read the corresponding sections in the REP-155.
In a typical system, a facial identification node would publish such candidate matches between faces and (identified) persons. For now, we can do it manually by publishing ourselves on /humans/candidate_matches:
rostopic pub /humans/candidate_matches hri_msgs/IdsMatch "{id1: 'your_name', id1_type: 1, id2: 'your_face_id', id2_type: 2, confidence: 1.0}"Check rosmsg show hri_msgs/IdsMatch to see the possible values for id_type.
As you can see with rostopic list (or your roshuman tool!), once you have published a likely match, hri_person_manager removes the anonymous person, and replaces it with a new, identified person.
Check as well in rviz that the person_ frame is now published.
The person_ frame should be interpreted in conjunction with the /humans/persons/<id>/location_confidence value. Check the Person Frame section of the REP-155 for details.
Are you engaged?
You should now be able to run your engagement detector with your own face.
You only need to publish a static tf transform between the webcam tf frame, and the sellion_link we have been using before. You can do so with the following command (that also ensure the right frame orientation -- Z-up, X-forward):
$ rosrun tf static_transform_publisher 0 0 0 -0.5 0.5 -0.5 0.5 sellion_link /head_camera 50
2D/3D skeleton detection
hri_fullbody is an ROS4HRI-compliant open-source 2D/3D skeleton tracker (single body, though!). Like hri_face_detect, it is based on Google mediapipe.
Download and install from its github repo.
- Run it with:
$ rosrun usb_cam usb_cam_node /usb_cam/image_raw:=/image /usb_cam/camera_info:=/camera_info
$ rosrun hri_fullbody detect
Inspect the resulting topics with rostopic list (might be as well a good time to add support for bodies to your roshuman tool!)
If a body is detect, its bounding box should appear in the rviz Humans plugin.
If you manually download and compile the latest version of `hri_rviz`, you should also see the 2D skeleton overlaid on the camera image.
What about the 3D skeleton, though?
The REP-155 specifies a complete kinematic model for humans, represented as a parametric URDF model in the `human_description` package.
The hri_fullbody nodes compute internally and publish a joint state for each detected body (check /humans/bodies/<id>/joint_states). It then relies on the standard robot_state_publisher ROS node for forward kinematics, and to publish a complete tf tree for each detected human body.
Open rviz and add a tf plugin: if hri_fullbody detects you, you should see your skeleton appear in rviz.
The hri_rviz package also includes a custom HRI-aware tf plugin. It is very similar to the regular tf plugin, but make it easy to hide people's tf frames, as they tend to clutter the 3D view, especially when several persons are tracked.
Now that we can extract our skeleton, let's try some basic gesture recognition.
Exercise 2: Simple gesture recognition
Simple gestures can be recognised by computing the distances between the joints. Depending on how complicated the gesture is, the number of joints used to detect it can vary.
For example here we will detect waving, which is a simple gesture of moving the hand from left to right.
The 2D position of the joints is represented in a hri_msgs/Skeleton2d message, published under the /humans/bodies/<id>/skeleton2d topic. In our case, we will need the joints:
RIGHT_SHOULDER [2]
RIGHT_ELBOW [3]
RIGHT_WRIST [4]
Our waving detector will therefore need to:
subscribe to the /humans/bodies/tracked topic
subscribe to the /humans/bodies/<id>/skeleton2d topic
- Detect waving gesture
Publish a message to the /humans/bodies/<id>/gestures topic
As before, pyhri will take care of Step 1 and 2 for us.
Waving detection node
Create a new waving_detection.py script that display the (normalised) 2D coordinate of eg the right elbow:
   1 import rospy
   2 from hri import HRIListener
   3 from hri_msgs.msg import Skeleton2D # for the skeleton joints indices
   4
   5 rospy.init_node("waving_detector")
   6
   7 hri = HRIListener()
   8
   9 while not rospy.is_shutdown():
  10     for id, body in hri.bodies.items():
  11
  12         # as bodies can disappear at anytime, we are checking if they are
  13         # still valid before accessing them
  14         if body.valid and body.skeleton2d:
  15             print("Right elbow: %s" % body.skeleton2d[Skeleton2D.RIGHT_ELBOW])
  16
  17     rospy.sleep(1)
Test this first script with the hri_fullbody node running.
Compute the distance between the joints
Complete the script to access the x, y coordinates of the 3 joints we want to track, and compute the Euclidian distances shoulder-elbow, elbow-wrist and should-wrist, using eg:
1 shoulder_elbow = np.sqrt((right_shoulder.x - self.right_elbow.x)**2 + (right_shoulder.y - right_elbow.y)**2)
Detecting the 'waving' gesture
These distances are the main parameters to detect the gesture, and can be thresholded to detect the gesture. For example, if the distance between the shoulder and the elbow is greater than the distance between the elbow and the wrist, then the gesture is detected. The threshold can also be set to a value that is suitable for the gesture.
In the waving case, the thresholds are set based on the average length of these joints while a person is performing the gesture. The thresholds are set as follows:
Complete your script to publish a REP-155-compliant Gesture message on the topic /humans/bodies/<id>/gestures.
Part 3: a multi-modal chatbot
In this last part of the tutorial, we are going to bridge together the different pieces (and add speech to the mix!) to build a simple multi-modal chatbot.
Integrating speech recognition to our system is out-of-scope for this tutorial (but fairly easy to achieve with open-source ASR solutions like vosk). So we will use the OfficeBots environment an its chat functionality to implement the chatbot.
Preparation: writing a chatbot with rasa
We are going to use rasa, one of the leading open-source tool to design and implement chatbots.
install Rasa using pip install rasa
create a new folder for your chatbot, and cd into it
run rasa init to create an initial chatbot skeleton. At the end of the init process, rasa will offer to train and test the sample chatbot. Say 'yes' and have a go at it!
For now, the three important files for you to play with are:
domain.yml: list here the intents you want to recognise, and the responses you might want to provide
data/nlu.yml: provide here examples of sentences that correspond to each of your intents
data/stories.yml: describe here the sequencing of questions/responses (or stories) that you want the chatbot to follow.
Create a new go_to intent to tell the robot to go to some location (like the kitchen, etc).
To do so, you will need to create a location entity, that can be extracted by Rasa.
To create the new intent and the corresponding entity:
add them to domain.yml:
intents:
    - [...]
    - go_to
entities:
    - location
provide examples in nlu.yml like:
nlu:
- intent: go_to
  examples: |
    - go to [kitchen](location)
    - I would like you to go to the [dinning room](location)
    - Can you go to the [lounge](location), please?
You can test that the entities are properly extracted by telling Rasa to respond for instance: ok, going to <kitchen>.
To do so, you need to declare slots (variable where Rasa stores the value of entities) that you can re-use in your responses. In domain.yml:
slots:
  location:
    type: text
    mappings:
    - type: from_entity
      entity: location

[...]

responses:
  utter_go:
  - text: "Ok, going to {location}"

[...]
Finally, create a story in data/stories.yml to put together all the pieces:
stories:

- story: go somewhere
  steps:
  - intent: greet
  - action: utter_greet
  - intent: go_to
    entities:
    - location
  - action: utter_go
More documentation on the Rasa website.
Every time you modify your chatbot, type rasa train to re-train it, and rasa shell to test it interactively.
Integration with ROS4HRI
To integrate with ROS4HRI, we need to send the speech heard on /humans/voices/<id>/speech to the Rasa server. And to integrate nicely with the robot in the simulator, we need to publish the chatbot output on the /say topic, so that the robot 'says' it in the game (note that the /say topic is not part of the ROS4HRI standard).
The following script uses the Python's requests library to interact with the Rasa server:
   1 import rospy
   2 from hri import HRIListener
   3 from hri_msgs.msg import LiveSpeech
   4 from std_msgs.msg import String
   5
   6 import requests
   7
   8 sender = "user"
   9
  10 rasa_endpoint = "http://localhost:5005/webhooks/rest/webhook"
  11
  12 speech_subscribers = {}
  13
  14 speech_pub = rospy.Publisher("/say", String, queue_size=1)
  15
  16
  17 def subscribe_to_speech(voice):
  18
  19     speech_subscribers[voice.id] = rospy.Subscriber(
  20         voice.ns + "/speech", LiveSpeech, send_to_rasa
  21     )
  22
  23
  24 def send_to_rasa(msg):
  25
  26     text = msg.final
  27     rospy.loginfo('Heard message: "%s"  -- sending it to Rasa...' % text)
  28
  29     results = requests.post(
  30         rasa_endpoint, json={"sender": sender, "message": text}
  31     ).json()
  32
  33     for r in results:
  34         msg = String()
  35         msg.data = r["text"]
  36         speech_pub.publish(msg)
  37
  38
  39 if __name__ == "__main__":
  40
  41     rospy.init_node("rasa_bridge")
  42
  43     hri = HRIListener()
  44     hri.on_voice(subscribe_to_speech)
  45
  46     rospy.spin()
(you can also find it here).
Create a simple_ros_bridge.py script with this code, and test it:
start rasa run (not rasa shell this time!)
start the script: python3 simple_ros_bridge.py
start OfficeBots and the officebots-ros bridge
- get close to the robot, and use the chat window to talk to the robot
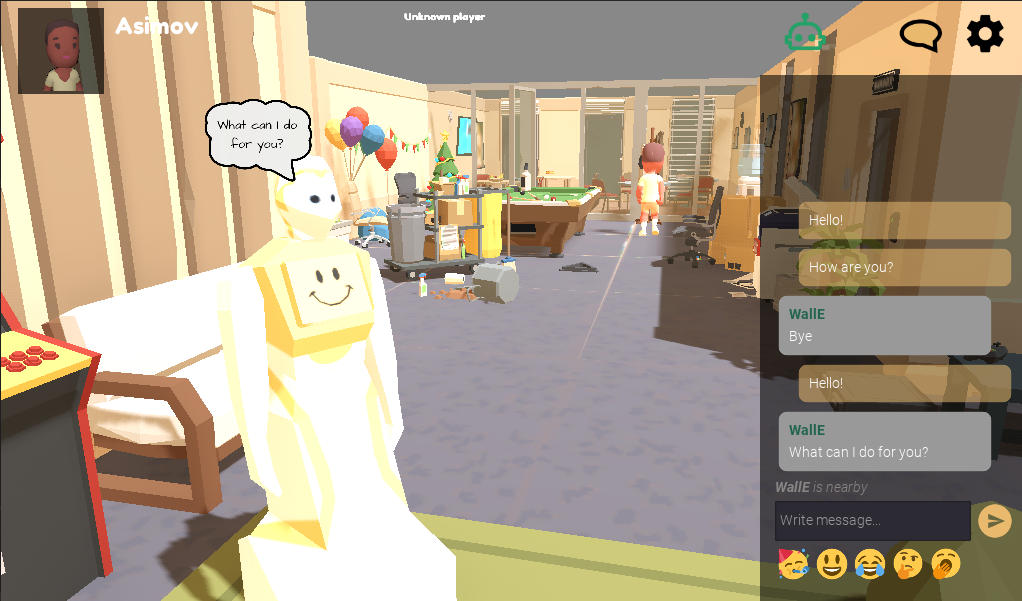
If things do not work, you can inspect the /humans/voices/<id>/speech and /say topics to better understand what fails.
Play a little with the chatbot, and enrich the domain as much as you want.
Triggering actions
In stories.yml, we have associated intents to actions. Until now, we have been using the most simple type of actions: responses (that we have directly created in domain.yml. Let see how we can create more complex actions (eg to trigger actions on the robot).
First, declare a new custom action action_go_to in domain.yml:
responses:
  utter_go:
  - text: "Ok, going to {location}"

[...]

actions:
    - action_go_to
and add that action to our story:
stories:

- story: go somewhere
  steps:
  - intent: greet
  - action: utter_greet
  - intent: go_to
    entities:
    - location
  - action: utter_go
  - action: action_go_to
You can already test this configuration: it will work, but Rasa will complain that it can not execute the action with an error message like: Failed to execute custom action 'action_go_to'.
Indeed, we need to create a Rasa action server (not to be confused with ROS action servers!), that Rasa will call to execute the action.
Action servers are REST endpoint, and can be written in any language permitting to create them. In our case, we are going to add it directly to our previous script, using the Python Flask framework to quickly create a REST endpoint:
   1 import rospy
   2 from hri import HRIListener
   3 from hri_msgs.msg import LiveSpeech
   4 from std_msgs.msg import String
   5
   6 import requests
   7 from flask import Flask, request, jsonify
   8
   9 app = Flask(__name__)
  10
  11 sender = "user"
  12
  13 rasa_endpoint = "http://localhost:5005/webhooks/rest/webhook"
  14
  15 speech_subscribers = {}
  16
  17 speech_pub = rospy.Publisher("/say", String, queue_size=1)
  18
  19 def subscribe_to_speech(voice):
  20
  21     speech_subscribers[voice.id] = rospy.Subscriber(
  22         voice.ns + "/speech", LiveSpeech, send_to_rasa
  23     )
  24
  25 def send_to_rasa(msg):
  26
  27     if not msg.final:
  28         return
  29
  30     text = msg.final
  31     rospy.loginfo('Heard message: "%s"  -- sending it to Rasa...' % text)
  32
  33     results = requests.post(
  34         rasa_endpoint, json={"sender": sender, "message": text}
  35     ).json()
  36
  37     for r in results:
  38         msg = String()
  39         msg.data = r["text"]
  40         speech_pub.publish(msg)
  41
  42 @app.route("/webhook", methods=["POST"])
  43 def rasa_action():
  44     data = request.json
  45
  46     destination = data["tracker"]["slots"]["location"]
  47
  48     rospy.logwarn("Got destination: %s" % destination)
  49
  50     res = {"events": [], "responses": [{"text": "Going now to the %s" % destination}]}
  51     return jsonify(res)
  52
  53 if __name__ == "__main__":
  54
  55     rospy.init_node("rasa_bridge")
  56
  57     hri = HRIListener()
  58     hri.on_voice(subscribe_to_speech)
  59
  60     # use same port as default RASA action server
  61     app.run(host="0.0.0.0", port=5055)
The main difference is the new rasa_action function (that Flask transforms into a REST endpoint via the magic @app.route decorator). In this function, we extract the location slot, and print it out on the console.
Before testing this new code, you need to edit the endpoints.yml file, and put those two lines:
action_endpoint:
  url: "http://localhost:5055/webhook"
Then restart Rasa (rasa run) and start this new script. If you ask to robot to go somewhere, you should see the destination displayed on the console.
The complete script and Rasa configuration can be found here: gitlab.com/pal-robotics-workshops/ros4hri_iros_2022_tutorial.
Completing the chatbot
Up to you now!
A few ideas:
instead of simply print out the destination, get the robot to move (hint: try to publish a position to /move_base_simple/goal!)
you can display any image on the robot's tablet by publishing on the /screen/raw_image topic: try to create a chatbot interaction where the robot display an image of something you ask for.
Try rosrun usb_cam usb_cam_node /usb_cam/image_raw:=/screen/raw_image!
- integrate the engagement detector with the chatbot, so that the robot greets you when you are engaged.
There we go! If you have followed the tutorial to this point, you are now officially a ROS4HRI expert! Congratulations!
Do not forget:
if you write open-source, ROS4HRI compliant nodes, do not forget to add them to the wiki: https://wiki.ros.org/hri
the REP-155 is still under public review. Your feedback is valuable! If you have suggestions/comments, open an issue on https://github.com/ros-infrastructure/rep/


