| |
Calibrate the PID velocity controllers
Description: This tutorial will guide you through the process of calibrating the PID velocity controllers on the LSE miniQ.Keywords: miniQ, PID, velocity
Tutorial Level: BEGINNER
Next Tutorial: Test your LSE miniQ
Contents
Overview
For this tutorial you'll need the following items:
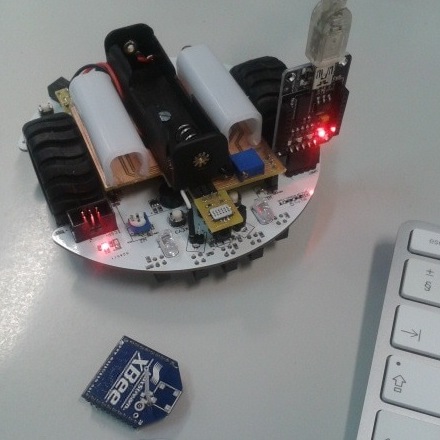
- LSE miniQ robot (without XBee module)
- miniQ USB adapter connected to a computer running ROS
- 18650 battery or power supply

Note: You must power the LSE miniQ from a 18650 battery or a power supply in order for the motors to actually move! The USB adapter will only power the Arduino on the LSE miniQ!!! Also make sure the wheels of the LSE miniQ are off the ground or you'll have to chase it around. |
Understanding the LSE miniQ PID velocity controllers
The LSE miniQ robot is a differential drive robot with two wheels. The motors on the miniQ have very low torque and are thus difficult to control, particularly at low speeds. A single PID velocity controller proved to be unreliable since the gains that would allow the motor to start running would not be able to maintain the velocity stable once inertia was countered. On the other hand a set of gains that would maintain the velocity stable once the motor was running was not able to counter the inertia and get the motor running from a stopped state.
It was thus necessary to use a simple adaptive PID velocity controller for each motor. When the motor is stopped the starting PID gains are used, when the motor starts moving a second set of PID gains are used to control the velocity of the motor.
So how important is it to calibrate each motor on each LSE miniQ? Very important!!! If you set any miniQ with a fixed PWM for both motors you'll notice that the robot will most likely turn heavily to one side. The motors display very different behaviors thus proper calibration is important to ensure good movement control.
The miniq_pid_server
The miniq_pid_server was created to help you calibrate the PID velocity controllers on the LSE miniQ.
Step 1
Connect the LSE miniQ to a computer running ROS.
Step 2
Run a roscore and start a miniq_pid_server:
rosrun lse_miniq_driver miniq_pid_server
If everything is ok you should see the following output:
[INFO]: miniQ PID Server -- Successfully connected to the miniQ!
Step 3
Next run the dynamic reconfigure GUI:
rosrun dynamic_reconfigure reconfigure_gui
Select /miniq_pid_server from the menu.
Step 4
Plot the measured and reference wheel velocities using rxplot:
rxplot /right_wheel_velocity/measured,/right_wheel_velocity/reference /left_wheel_velocity/measured,/left_wheel_velocity/reference
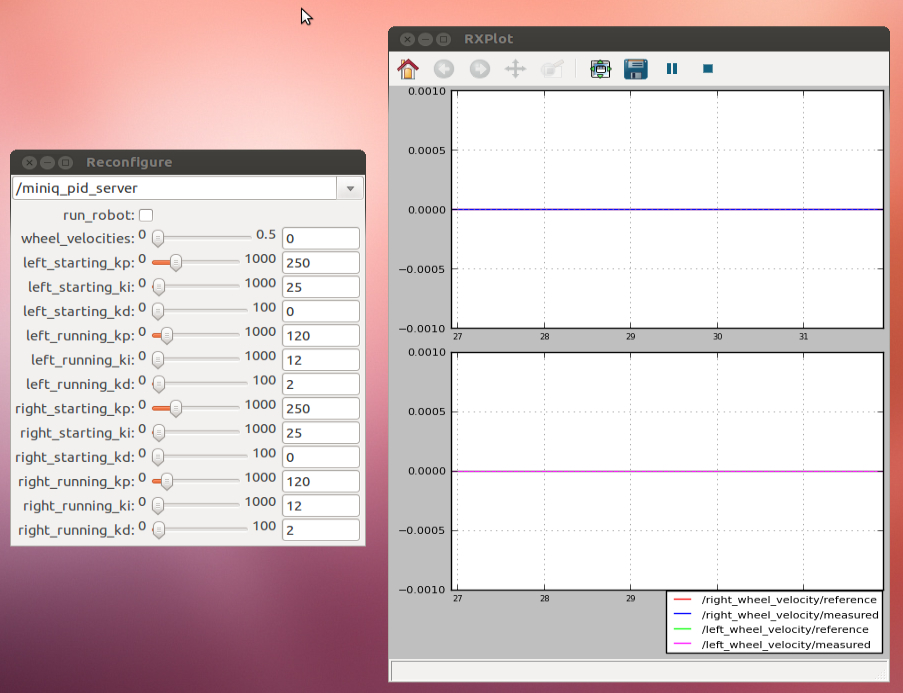
You should now have the following windows:

And that's it! You're ready to calibrate the your LSE miniQ PID velocity controllers!
How to use the software?
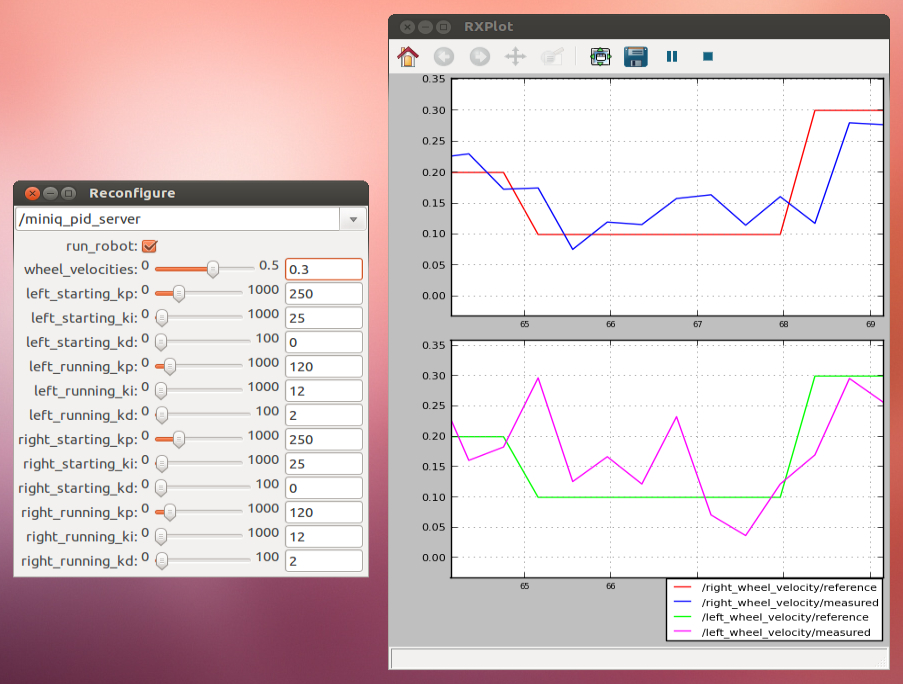
You can adjust the gains of each PID using the sliders.
The velocity of both wheels can be controlled using the first slider. The velocity can be set between 0m/s and 0.5m/s.
The wheels will only move if the "run_robot" checkbox is checked.
Have fun calibrating those LSE miniQs!

You are now ready to test your LSE miniQ!


