Contents
Package Summary
Realuex is a basic package for Robot Reachability and Base Placement. It provides tools for creating various types of robot reachability maps and finding optimal base locations for a given task specified by poses through those reachability maps.
Maintainer: Abhijit Makhal <makhabhi AT isu DOT edu>
Author: Abhijit Makhal <makhabhi AT isu DOT edu>
- License: Apache
Source: git https://github.com/ros-industrial-consortium/reuleaux (git)
Overview
- This video summarizes the capability of Realueax:
Installation
Inside you catkin workspace clone the Reuleaux package. Navigate to your existing src folder for workspace:
$ cd location_of_workspace/src
$ git clone https://github.com/ros-industrial-consortium/reuleaux
$ cd ..
$ rosdep install -r -y --from-paths src --ignore-src
$ catkin_make
Setting everything up for your robot
- If you are interested in creating workspace (TODO needs elaborated what the "workspace" is) and utilize reuleux for your own robot, continue following this section.
If you already have an ikfast solution for your robot, you are already saved from all the troubles. please go directly to the section 3.3.
Else you can skip this part and directly go to section 4 to start creating reachability maps with a motoman_mh5 robot as an example.
Setting up Ikfast
Reuleux is highly dependent of ikfast package which can be obtained from http://openrave.org/. All the Inverse Kinematics solutions of the workspace are obtained by ikfast. There is a detailed instruction on how to create ikfast solver from urdf here http://docs.ros.org/indigo/api/moveit_ikfast/html/doc/ikfast_tutorial.html. You can obtain moveit_ikfast from here: https://github.com/ros-planning/moveit_ikfast.git .
Install Openrave
To install openrave in ubuntu please follow these commands:
sudo add-apt-repository ppa:openrave/release
sudo apt-get update
sudo apt-get install openrave0.8-dp-ikfast
More detailed instructions are available at openrave.org
Create collada file for OpenRave
Openrave does not recognize traditional robot formats in ros such as urdf or xacro. You have to create a collada or openrave robot format to work in openrave. You can use collada_urdf package to convert your urdf to collada file. You can get collada_urdf package here: http://wiki.ros.org/collada_urdf
If you have only xacro file for your robot, it can be easily changed to urdf by
rosrun xacro xacro.py model.xacro > model.urdf
When you have the urdf file for your robot, run
rosrun collada_urdf urdf_to_collada <myrobot_name>.urdf <myrobot_name>.dae
where <myrobot_name> is the name of your robot. There is a script in moveit_ikfast package which rounds all the numbers to a fixed decimal places in the dae file. If the default dae file takes long time for generating Ikfast solution, it is encouraged to round up the numbers to 5 decimal places or lower.
rosrun moveit_ikfast round_collada_numbers.py <input_dae> <output_dae> <decimal places>
rosrun moveit_ikfast round_collada_numbers.py <myrobot_name>.dae <myrobot_name>.rounded.dae 5
To see the links in the newly generated Collada file
/usr/bin/openrave-robot.py <myrobot_name>.dae --info links
To test the newly generated robot in Openrave
openrave <myrobot_name>.dae
Identify links
You need the link index numbers for the base_link and end_lin between which Ik would be calculated. By running this command you can count the number of links from a model:
openrave-robot.py <myrobot_name>.dae --info links
Generate Ik Solver
To generate an Ik solution for the robot manipulators base and tool frame
python `openrave-config --python-dir`/openravepy/_openravepy_/ikfast.py --robot=<myrobot_name>.dae --iktype=transform6d --baselink=1 --eelink=8 --savefile=<ikfast_output_path>
where <ikfast_ouput_path> is path where you want to save the robot ikfast file. Base link is defined as 1 and tool link is defined as 8
Setting up Kinematics for the robot
Now as you already have an ikfast file for you robot, we can link it to reuleaux. copy your ikfast solution file and paste it in the map_creator/include folder:
sudo cp -r file_location/<file> <map_creator include folder location>
For example, suppose funny_robot_ikfast files is at ~/Desktop:
sudo cp -r ~/Desktop/funny_robot_ikfast.cpp /catkin_ws/src/reuleaux/map_creator/include/map_creator
Note you may also need to copy header files that your *.cpp includes.
After copying the file, we have to link it in the map_creator/include/map_creator/kinematics.h header file and block the previuos defined filename (in the case in the link, "mh5_ikfast.cpp"). You have to have at least a single ikfast mentioned in the header, otherwise the package won't build.
- Concrete example of what's explained above:
1 #ifndef KINEMATICS
2 #define IKFAST_HAS_LIBRARY // Build IKFast with API functions
3 #define IKFAST_NO_MAIN

4 #define IK_VERSION 61
5 #include "mh5_ikfast.cpp"
6 #include <stdio.h>
7 #include <stdlib.h>
8 #include<vector>
9 #include<ros/ros.h>
10 #include <geometry_msgs/Pose.h>
Include your robots ikfast filename at line 5 and block the motoman_mh5 ikfast filename5 //#include "mh5_ikfast.cpp" 5 #include "funny_robot_ikfast.cpp"
(please do not put more than 1 ikfast filename here, otherwise the system will generate error). Saving the kinematics.h file, go to your catkin workspace and run catkin_make once:
$ cd %TOPDIR_YOUR_CATKINWS%
$ catkin_make
The most difficult part is done. Now you can start creating workspace maps and visualizing them.
Creating maps
Now as the kinematics is set up for reauleaux, we can start creating reachability maps for the robot. Reuleaux map_creator package creates three types of maps. (You don’t have to create all the maps, it is per your needs):
Reachability Maps

The Reachability map describes the reachability of a given robot model by discretizing its environment, creating poses in the environment and calculating valid IK solutions for the poses. The poses which are reachable by robot are associated with discretized spheres. The reachability of each sphere in the environment are parameterized by a Reachability index. The output is saved as an hdf5 file https://www.hdfgroup.org/HDF5/ which has details about all the reachable poses and discretized spheres. There are mainly two user arguments:
- Resolution parameter: The first step of the map generation process is discretization of the environment by voxelization. The resolution determines how much small the boxes would be. The smaller voxels, the higher the number of poses per spheres. (Believe me, it grows exponentially. Please do not try to go too low with the resolution. The safe threshold is 0.05. Less than that, can take hours, or your system may stop responding). If the user does not provide any resolution, the default resolution is 0.08
- Map filename: The second argument decides the output filename. If the user does not provide an ouput filename, it will automatically decide an ugly map name with the robot name and provided resolution.
To create a reachability map, run:
rosrun map_creator create_reachability_map
with arguments:
rosrun map_creator create_reachability_map funny_robot.h5 0.05
When the process finishes, the output reachability map will be stored in map_creator/maps folder. If you do not have the existing maps folder, do not worry. It will create a map folder in the map_creator package and store the output there. (Good Job!! You have created a reachability map of your robot, wasn’t that easy??)
Capability Map (optional)[Not currently Supported]
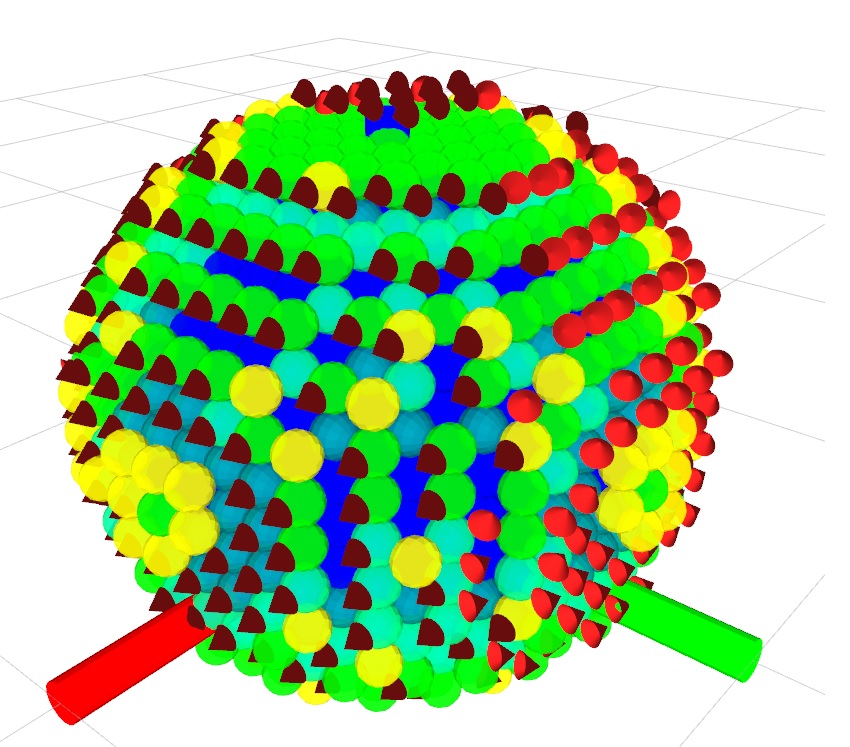
Capability map is an extension of reachability map (I guess you have already done that), where the outer spheres of the reachability map, is set as cones. So the reachability limit of the robot is well visualized. All the outer spheres are decided for a principal axes and iterates over different values for opening angles for cones. The suitable opening angle that correctly accumulates all the poses on that sphere, is set up for that sphere. The command for creating capability map is same as creating reachability map:
rosrun map_creator create_capability_map
The ouput map file will also be stored in map_creator/maps folder. ( As for all the outer spheres, the algorithm tries to fit different opening angles, the generation process of capability map may take upto hours with low resolution)
Inverse Reachability Map
The purpose of Inverse Reachability map is to find suitable base positions for a robot with given task poses. The inverse reachability map is a general inverse transformation of all the reachable poses of the reachability map of the robot. The user have to provide the reachability map as an argument. The desired name of the ouput file can also be provided. If no output file name is provided, the system will automatically generate a map file with the robot name and resolution provided in the reachability map. To create an inverse reachability map:
rosrun map_creator create_inverse_reachability_map motoman_mh5_r0.08_reachability.h5
Here provided reachability map is of motoman_mh5 robot and resolution is 0.08. The outout of inverse reachability map will be stored in map_creator/Inv_map folder unless specified otherwise.
(OK.Enough of the maps. Lets go and visualize the created map)
Visualizing the maps
To visualize the created maps from section 4, First in a terminal start rviz:
rosrun rviz rviz
visualize reachability map
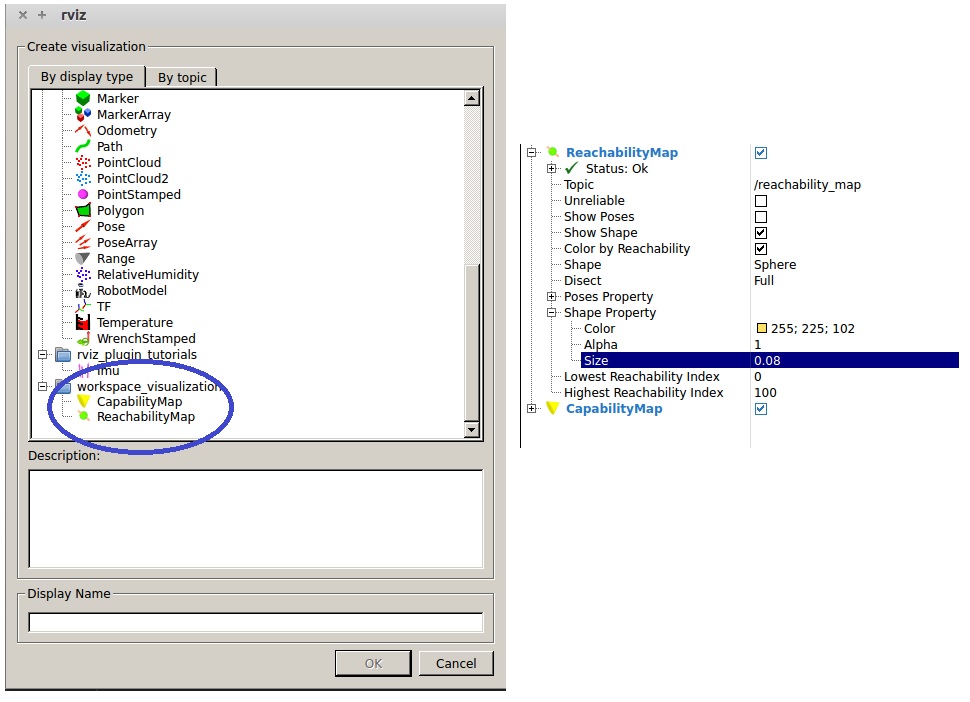
Add a new display. Find the workspace_visualization tab (most probably at the lower section). Add a reachability panel. Set the topic to /reachability_map
In a second terminal load the map file(load any one map at a single time, otherwise it may lock up the system).
To load reachability map:
rosrun map_creator load_reachability_map motorman_mh5_r0.08_rechability.h5
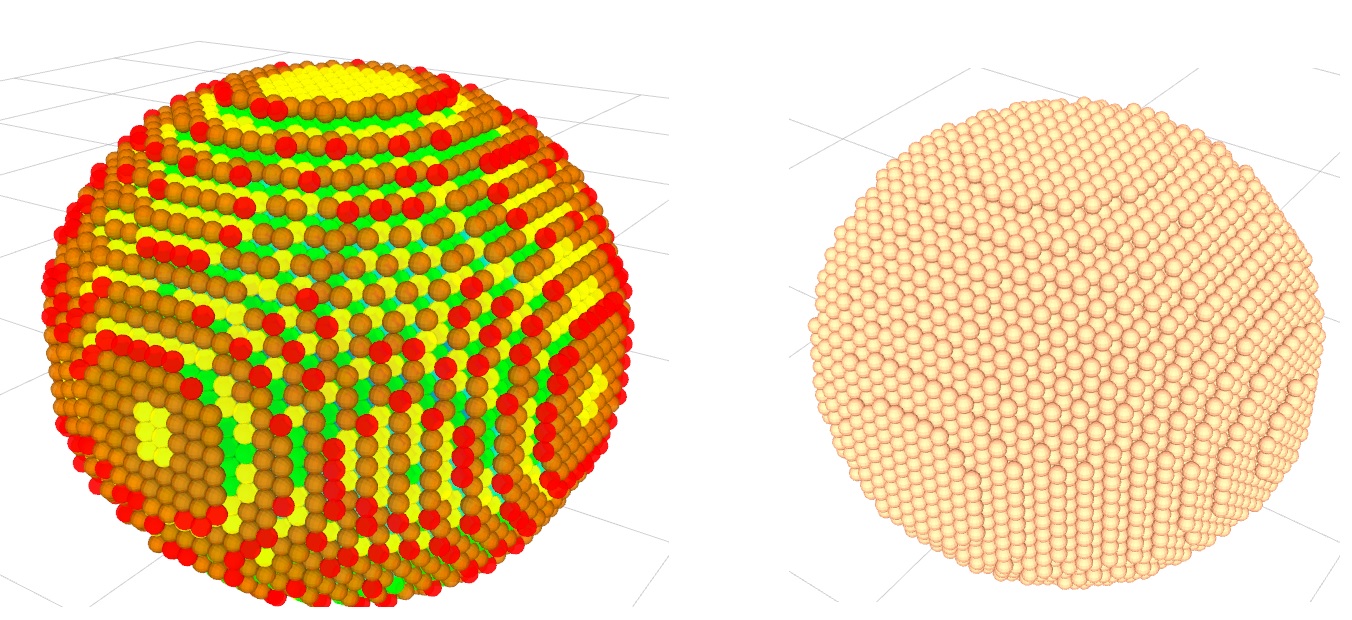
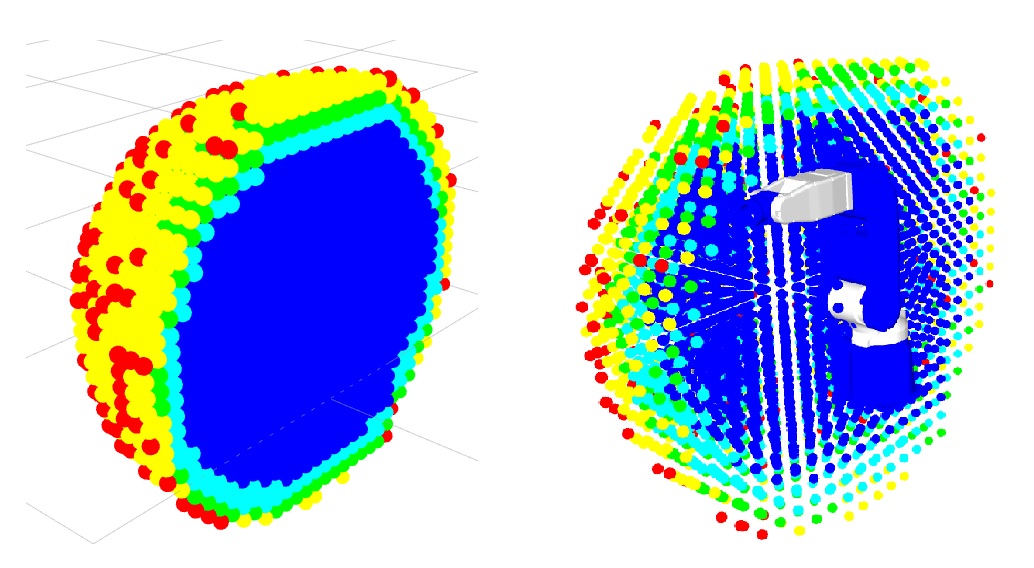
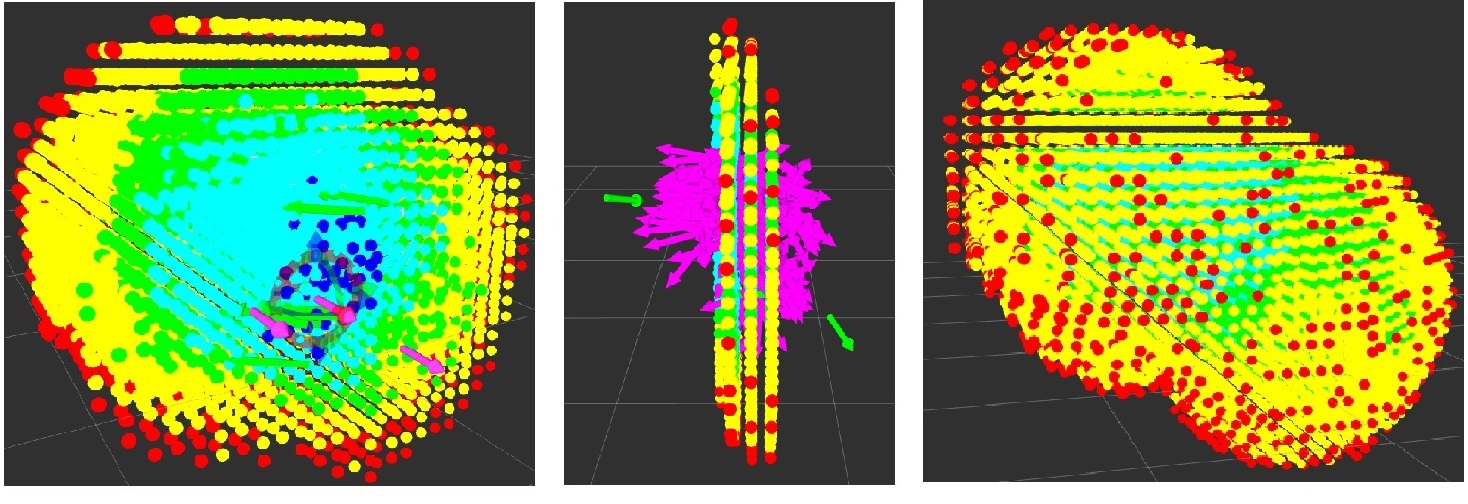
The map may take some time to show up. The load_reachability_map commands run through the whole database file, searches for all the spheres and associated poses and then renders them. When the map shows up, the whole workspace would most likely show up as sphere with variation of colors ranging from blue to red. The blue spheres are indicating the most reachable sections in the workspace, while the red ones are sections where the robot can hardly reach (mostly in the outer spheres).
If you dont like the colors, you can change it by checking the box checkbox "color by reachability"
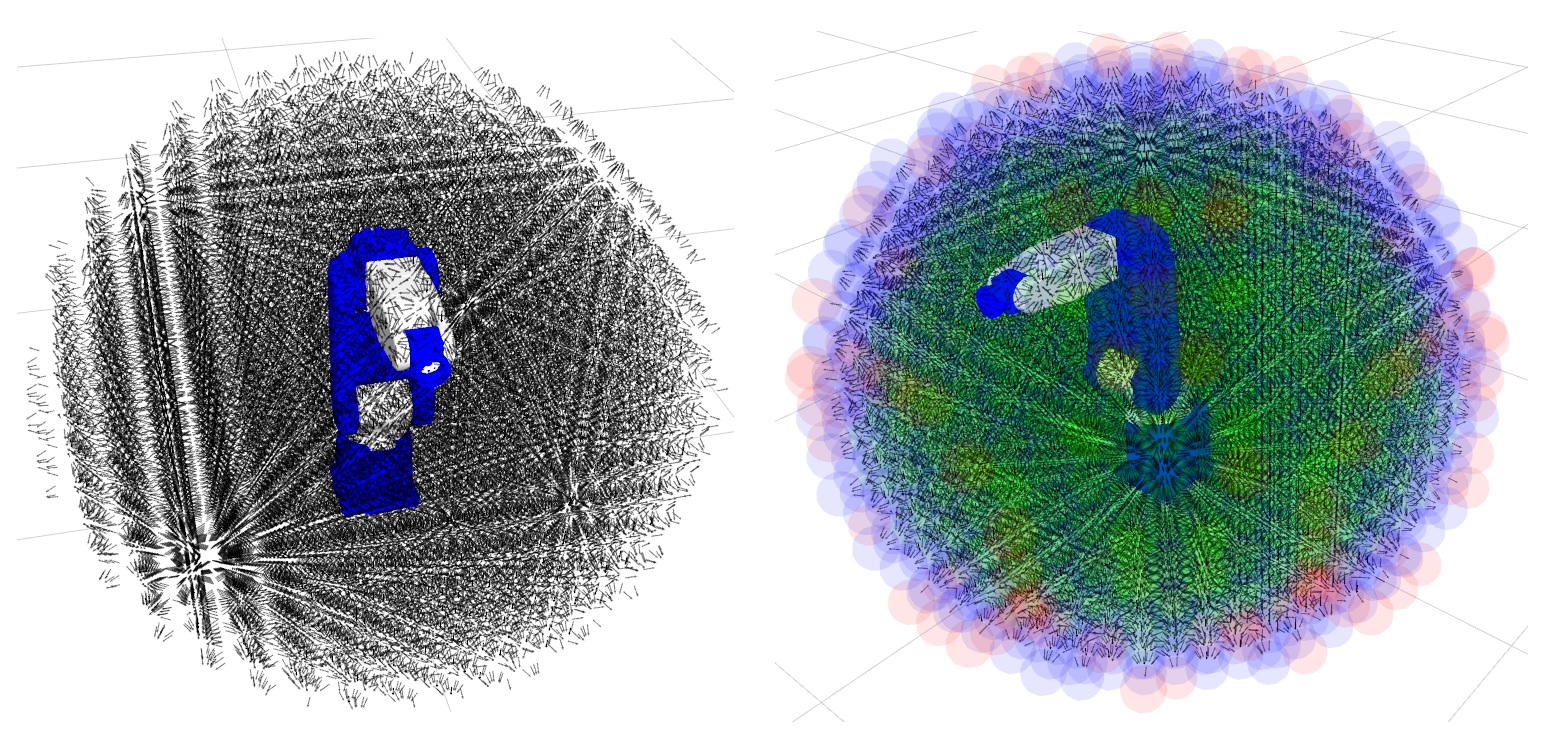
By checking the "show poses" checkbox , you can visualize all the reachable poses by arrows. But the poses can be upto 8 digits, so the system may lock up.
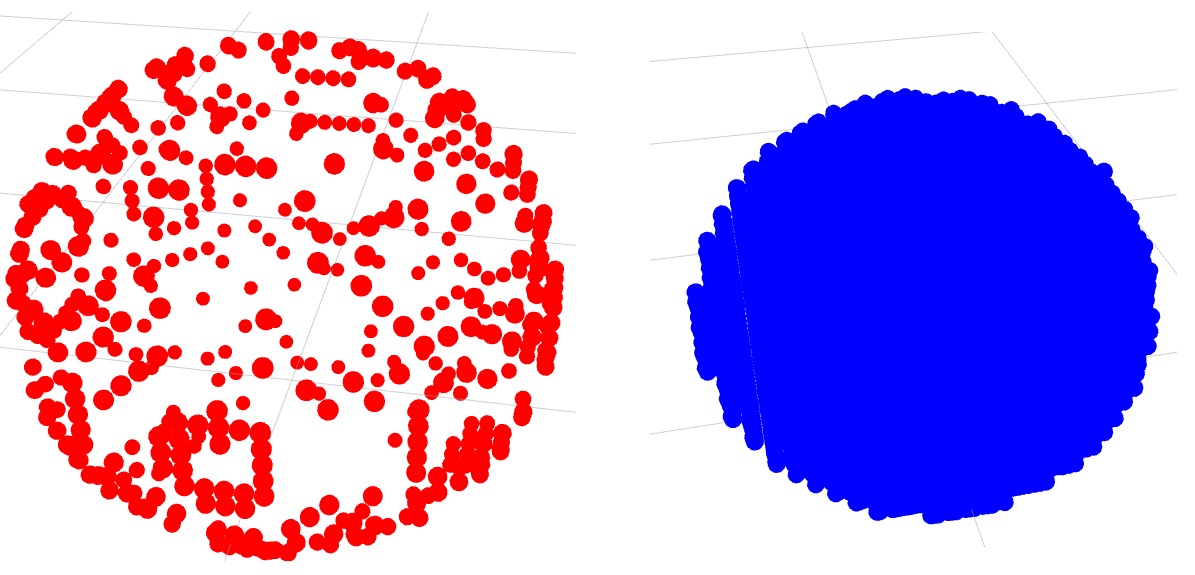
You can change the sphere and poses properties from their dedicated tabs. If you want to visualize a densed map, set the size of sphere in the shape property to the resolution of your map (which is by default 0.05) The spheres can also be shown based on their reachability index which ranges from 1 to 100. If the value is near 100, then the sphere is highly reachable(blue). if it is lower than 5, then the sphere is hard to reach (it is not absolutely reachable, otherwise it would not show up in the map. It should have one or two poses that are reachable) By visualizing the workspace based on reachability, you can set up the values "lowest reachability index" and "highest reachability index". For example, if you set the lowest reachability index to 1 and highest reachability index to 10, then the workspace would look like a hull, where the outer spheres will only show up, as they have the lowest values.
You can also disect the workspace, if you want to visualize the inner spheres of the workspace. It can be done by changing the values in disect drop down arrow.
The inverse reachability map has the same internal structure as reachability map. So it can also be visualized by the same procedure as showing reachability map.
visualize capability map
To load capability map:
rosrun map_creator load_capability_map motorman_mh5_r0.08_capability.h5
There are no poses section in the capability map. Only the spheres will be visualized.
Sometimes the changes in the visualization of the maps do not instantly take action. Pressing the reset button will bring back changes.
Base Placement Plugin
The base placement plugin finds optimal base locations for the robot for a given task. A task can be defined by several task poses.
Setting up Rviz enronment
To start base placement plugin, start by running rviz
rosrun rviz rviz
- From Panels add a new panel. Select Base Placement Plug-in
Add a MarkerArray display. Set the topic to default /visualization_marker_array
Add an InteractiveMarker. Se the topic to /base_placement_plugin/update
Add a ReachabilityMap display. Set the topic to /reachability_map
- Set the Fixed frame to base_link
Make Task Plan
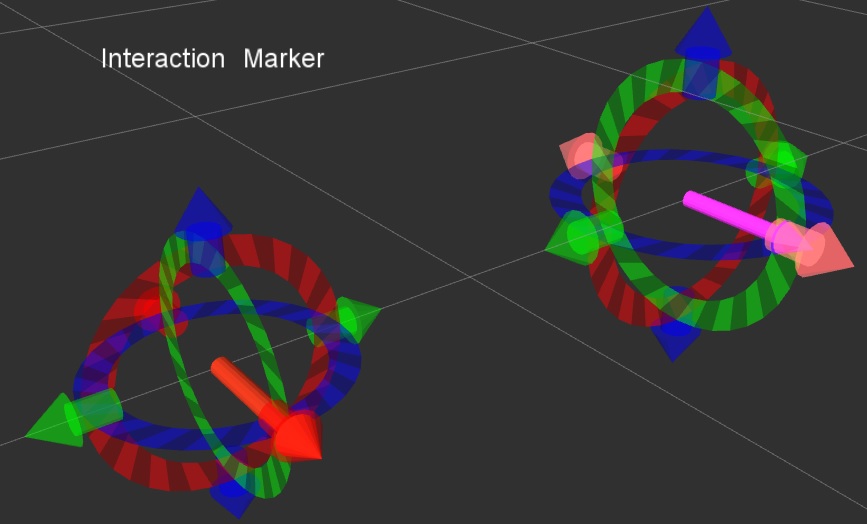
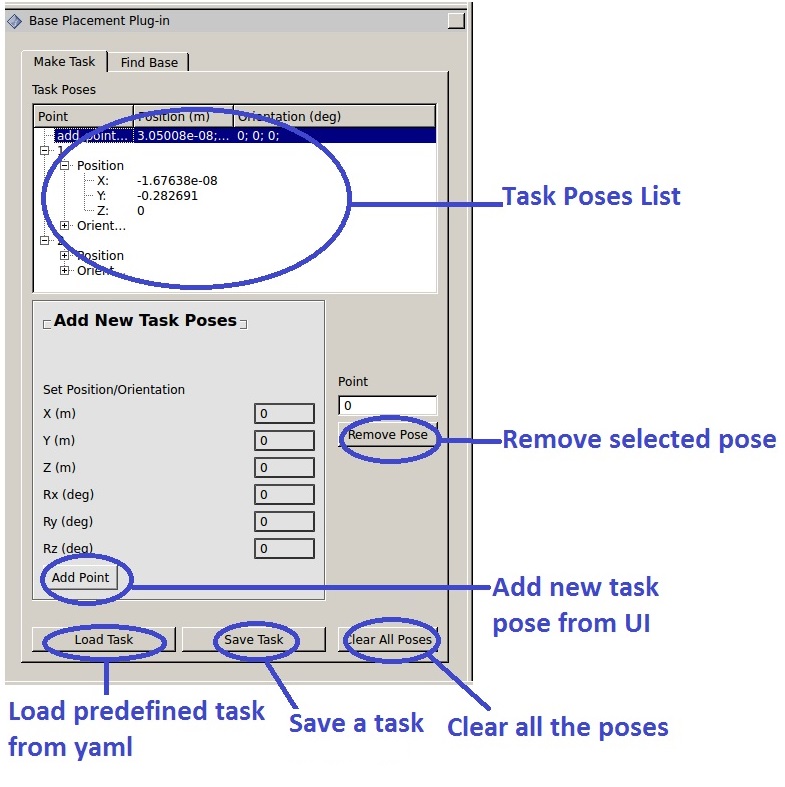
Upto this point an interactive marker should show up with a red arrow. The red marker is at the origin. You can drag it to your desired location. While you are dragging the position of the marker will change in the Task Poses window. You can also change the orientation by using the 6-DOF marker control.
You can click the arrow to set a task pose. After clicking a magenta arrow will appear describing a task pose. The position and orientation of the task pose will also show up the Task pose window. If you are not satisfied with the position and orientation you can start fine tuning it righ clicking on the task pose. A panel will appear indicating "fine adjustment". Clicking on the fine adjustment button will bring a 6DOF contol for the task pose.
If you do not want this task pose, you can delete it by indicating its number and press the remove pose button. Also a new pose can be added by indicating its position and orientation by changing the values and pressing the add point button.
A task of several task poses can be saved by the save task button. A saved task can also be loaded by load task button.
Base Placement Setup
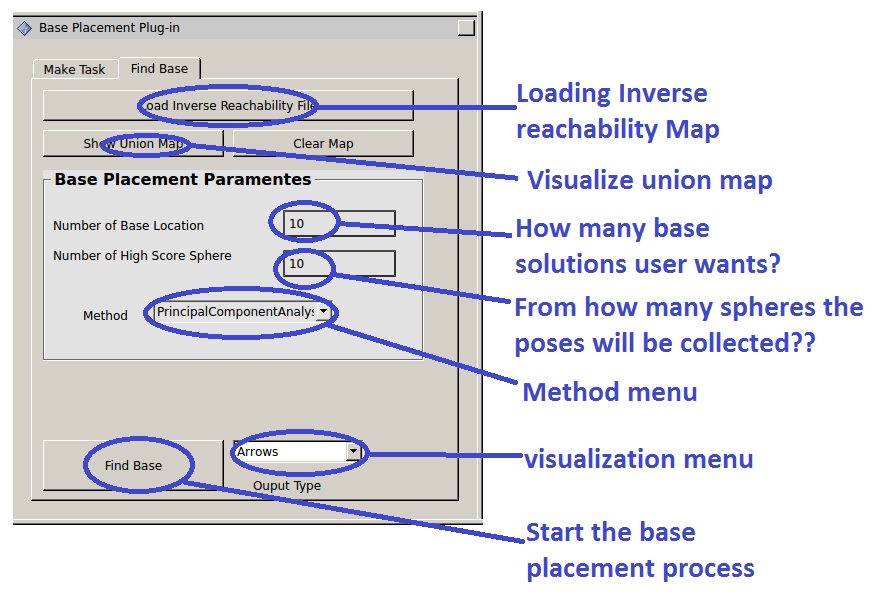
Reuleaux searches for two types of bases based on user needs: Robot arm base and Robot base. The first argument for the planner is an inverse reachability map file which can be loaded by "Load Inverse Reachability Map" button. Navigate to the location where the inverse reachability map is stored and load the map you want to work with. The other parameters for the planner are :
- Number of Base locations: How many base locations you want to calculate
- Number of High Score Sphere: Some of the planning methods require to set the number of high scoring spheres from where all the poses will be considered for optimal base locations.
It also creates an union map based on the inverse reachability solution of all the grasp poses. To visualize the union map press the show union map button.
Find Arm Locations
To search for only robot arm base, there are 3 base placement methods which can be changed by the dropdown arrow in the method menu.
- Principal Component Analysis: The planner takes desired number of high scoring spheres and implements PCA for finding optimal orientations from all the poses correspond to that sphere. One pose from one sphere.
GraspReachabilityScore Method: The planner takes desired number of high scoring spheres and collects all the poses from them. Then calculates reachability of that poses with all the grasp points. The poses that can reach all the grasp poses can be considered as optimal base locations.
- IKSolutionScore Method: The planner takes desired number of high scoring spheres and collects all the poses from them. Then calculates number of Ik solutions of that poses with all the grasp points. The poses that have the highest score can be considered as optimal base locations.
When all the parametes are setup. Press the Find Base button which will find optimal base locations for the given task.Based on your selected visualization output, the output can be shown as an arrow or robot manipulator.

Find Robot Base Locations on the Ground
To search for robot bases, the VerticalRobotModel method can be used. It slices up the newly created union map at the ground and searches for the spheres that has the highest inverse reachability index. The visualization should be only the robot model or the arrows, not the manipulator.

This method also works nicely for mobile manipulators. For visualizing more that one base placement location, just change the "number of base placement location", but the IK solutions different base locations also increases with the number of base locations.
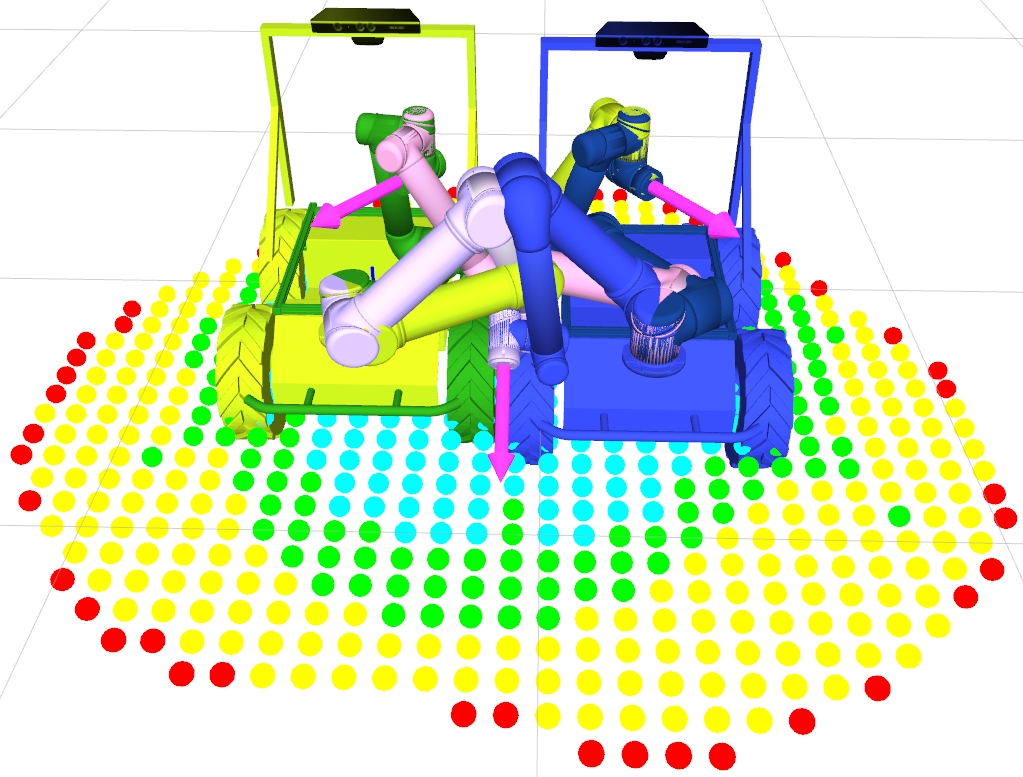
The husky robot with an UR5 arm. Two base locations are searched for 3 task poses(magenta arrow). The manipulator configurations from the the left robot model(green) are :a)Dark green, b)green c)white and from the right robot model(blue) are:1)Dark blue, 2)blue 3)pink
There is also a fun method called userIntuition method, where the user can challenge their own intuition of placing base with the algorithms in Reuleaux. Go crazy.
If you like this package and want to use Reuleaux in your work, Please cite our arXiv paper:
@ARTICLE{2017arXiv171001328M,
   author = {{Makhal}, A. and {Goins}, A.~K.},
    title = "{Reuleaux: Robot Base Placement by Reachability Analysis}",
  journal = {ArXiv e-prints},
archivePrefix = "arXiv",
   eprint = {1710.01328},
 primaryClass = "cs.RO",
 keywords = {Computer Science - Robotics},
     year = 2017,
    month = oct,
   adsurl = {http://adsabs.harvard.edu/abs/2017arXiv171001328M},
  adsnote = {Provided by the SAO/NASA Astrophysics Data System}
}


