| Note: This tutorial assumes that you have completed the previous tutorials: Setting up ROSOSC. |
| |
Loading TouchOSC Layouts with ROS
Description: Basics of TouchOSC and loading custom layouts to iOS devices.Tutorial Level: BEGINNER
Next Tutorial: Using the Default Handler
Contents
Background and Terminology
TouchOSC is a flexible application for iOS devices that allows users to create touch-interactive control surfaces. The customized control surfaces are stored in a layout file. Each layout is composed of up to 25 tabpages, and each tabpage has a set of controls that the user can interact with.
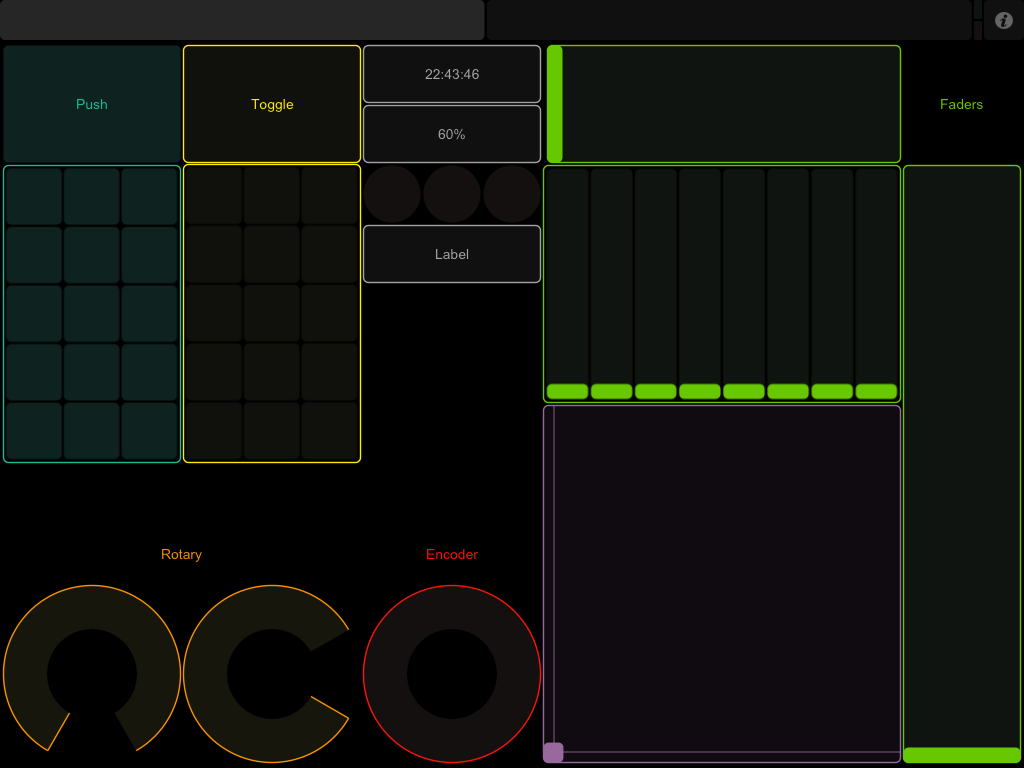
Below is an example layout that we will use for some of the tutorials to follow.
Layouts can be sized for either the iPhone/iPod Touch or the iPad devices. Layouts may also be either horizontally or vertically aligned. The example image shows a horizontal iPad-sized layout. Included in the tutorials directory is the same layout for iPhone-sized devices.

At the top of the screen, there are two tabpage tabs, with the leftmost tab highlighted to show that it is selected. At the rightmost corner of the screen, there are two indicator LEDs to show message traffic to and from the device: the green (top) indicator shows send traffic, and the red (bottom) indicator shows receive traffic. Also, the "i" icon opens the settings menu.
Transferring Layouts to a Device
Layouts can be transferred to a device in one of two ways. The first is to use the TouchOSC Editor's sync function, explained in Hexler's TouchOSC Documentation.
Alternatively, rososc includes a utility for loading TouchOSC layouts via a ROS node. This is useful for starting a layout server when your robot starts up, allowing users to add layouts at a later date.
Transferring via rososc
Transferring layouts to TouchOSC with rososc can be done in one of two ways.
A command line script layoutserver.py
A ROS node: layoutserver_node
Command Line
To load a layout from the command line, use the following:
rosrun pytouchosc layoutserver.py ~/tutorials/layouts/ROS-Demo-iPad.touchosc
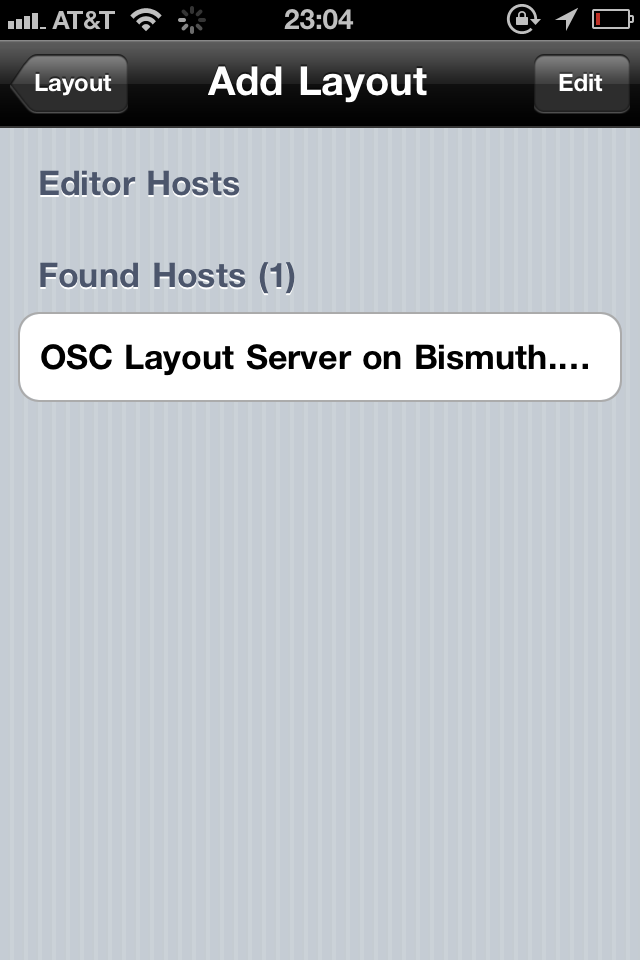
Once the server is running, open the TouchOSC application settings, tap the Layout menu, then tap Add. Under the Add Layout screen, you should see the following:

Layout servers are found via the Bonjour protocol. If a layout server is not showing up, then you may want to troubleshoot your setup.
ROS Node
To load a layout programmatically from a ROS node, you can either use the layout_file parameter or the layout_path and layouts parameters in conjunction.
The touchosc_bridge node also uses these parameters, so that the layout server may host the layout files that the bridge is written for.
To use the node, we will use a launch file.
Single File
Launch file: using the layout_file parameter. This file can be found in rososc_tutorials/02loadinglayouts/layout_file_launch.launch
<launch>
    <param name="layout_file"
           value="$(find rososc_tutorials)/layouts/ROS-Demo-iPad.touchosc" />
    <node pkg="pytouchosc" type="layoutserver_node" name="layoutserver">
</launch>
Which can then be launched with:
roslaunch rososc_tutorials layout_file_launch.launch
Multiple Files
Additionally, multiple TouchOSC files may be loaded simultaneously by using the layout_path and layouts parameters. This will spawn a separate layout server for each layout specified. This file can be found in rososc_tutorials/02loadinglayouts/layout_path_launch.launch
<launch>
    <param name="layout_path" value="$(find rososc_tutorials)/layouts"/>
    <rosparam param="layouts">
        [ "ROS-Demo-iPad.touchosc", "ROS-Demo-iPod.touchosc" ]
    </rosparam>
    <node pkg="pytouchosc" type="layoutserver_node" name="layoutserver"/>
</launch>
Which can then be launched with:
roslaunch rososc_tutorials layout_path_launch.launch
Congratulations! Now that you can load layouts to your device, it is time to start interacting with ROS. Move on to the next tutorial, Basic Interaction with ROS


