!
| |
Tango ROS Streamer
Description: Tutorial to get Tango ROS Streamer working with rtabmap_rosKeywords: BeginnerCategory
Tutorial Level:
Contents
Introduction
This tutorial shows how to get rtabmap to work with the outputs sent by Tango ROS Streamer on a Tango enabled device. This tutorial is based on this post.
rtabmap_ros >=0.12.1 required
Description
- Make sure the computer and Tango are on the same network. You can also use the hotspot mode on the Tango phone/tablet for convenience.
- Start the ROS master on the computer.
$ roscore
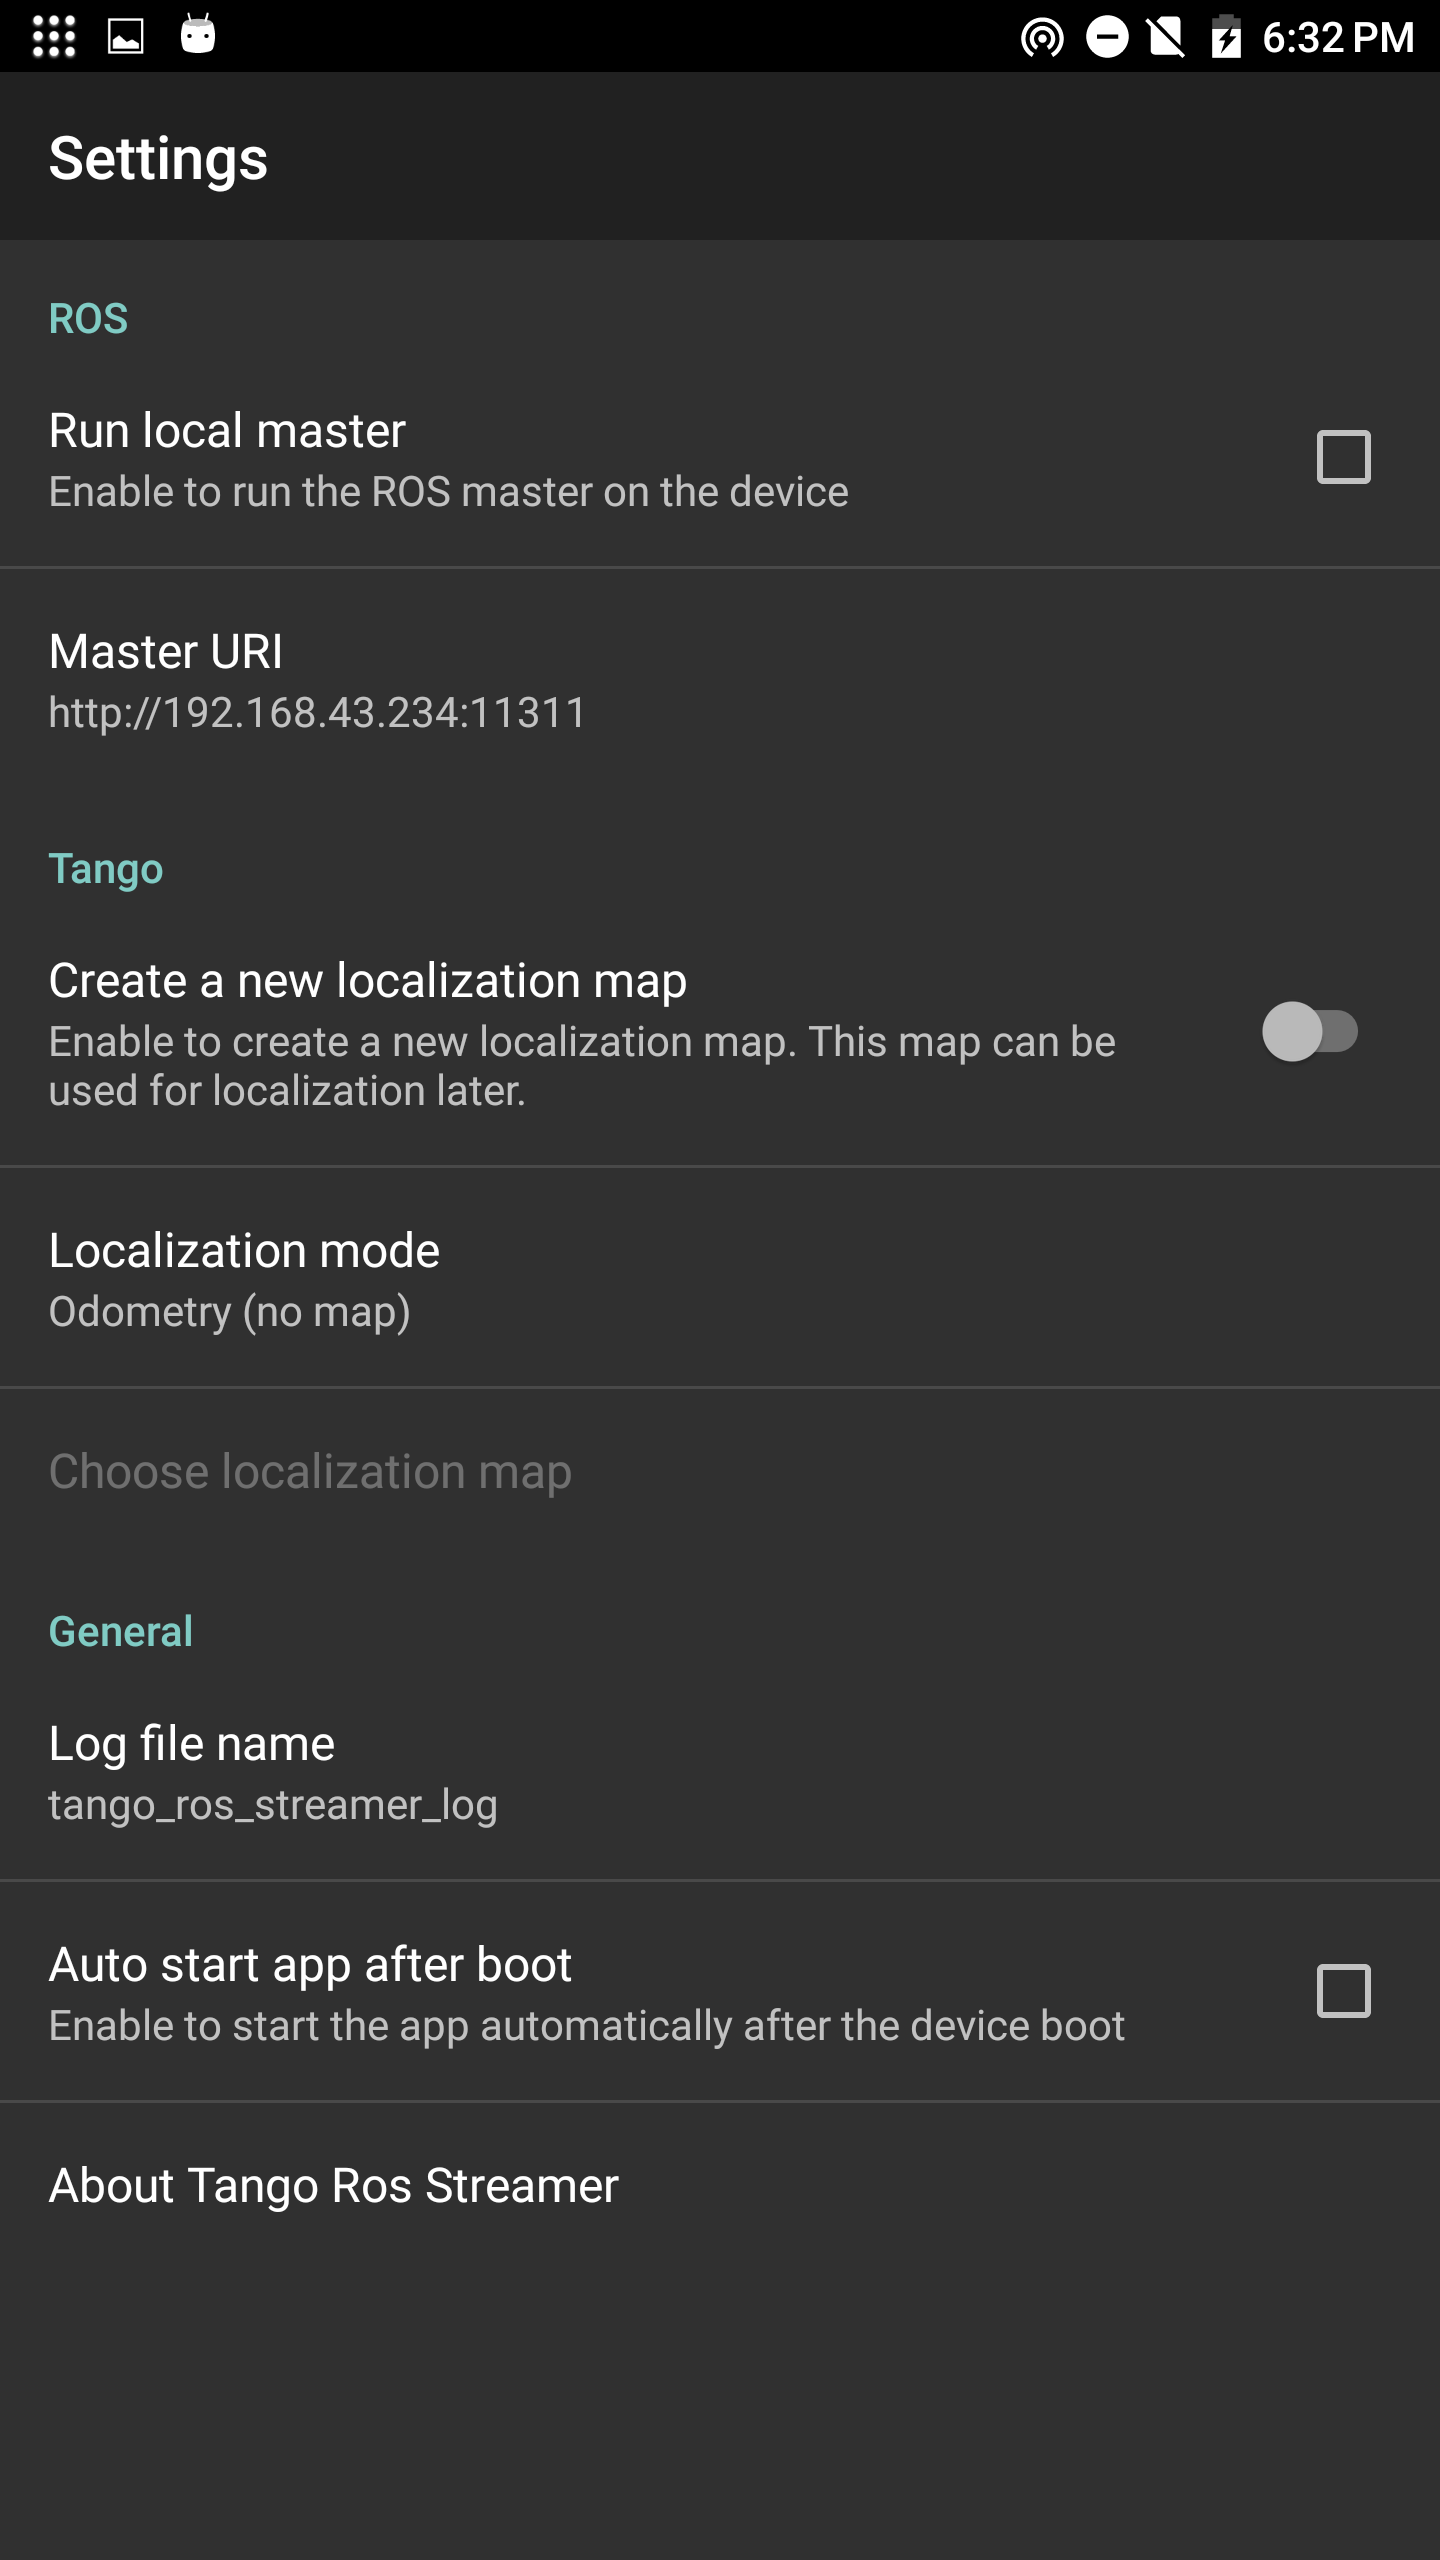
Start Tango ROS Streamer app on the Tango device. In options menu, set Localization mode to Odometry:
- Verify on the computer if it can receive the topics, example:
$ rostopic hz /tango/point_cloud
- The following does registration of the point cloud to color camera to create the required registered depth image. As the point cloud has a lot less points than pixels in the RGB image (1920x1080), we set the depth image as 8 times smaller (240x135) than RGB and fill the remaining holes:
$ rosrun rtabmap_util pointcloud_to_depthimage cloud:=/tango/point_cloud camera_info:=/tango/camera/color_1/camera_info _fixed_frame_id:=start_of_service _decimation:=8 _fill_holes_size:=5
Launch rtabmap. RGB image is decimated by 2 to save computation time (960x540), for feature extraction (Mem/ImagePreDecimation) and saving in database (Mem/ImagePostDecimation). We don't use visual odometry as it is already computed by Tango through TF, so we set odom_frame_id to use it. We use compressed topic only for the RGB image, as the depth is computed on the computer. Exact synchronization is used to get depth image corresponding exactly to RGB image that we registered earlier:
$ roslaunch rtabmap_launch rtabmap.launch rtabmap_args:="--delete_db_on_start --Mem/ImagePreDecimation 2 --Mem/ImagePostDecimation 2" visual_odometry:=false odom_frame_id:="start_of_service" frame_id:="device" rgb_topic:=/tango/camera/color_1/image_raw depth_topic:=/image camera_info_topic:=/tango/camera/color_1/camera_info compressed:=true depth_image_transport:=raw approx_sync:=false odom_tf_linear_variance:=0.0001 odom_tf_angular_variance:=0.000001
In term of performance, it would be better to decimate the RGB image (x2) on the phone, so we could save a lot of bandwidth (here we are on WiFi). Make sure to adjust camera_info too if so. While the depth registration looks okay with pointcloud_to_depthimage, doing it on the phone may be more convenient. We could subscribe to compressedDepth to save even more bandwidth (in contrast to not compressed point cloud).
Another output examples:
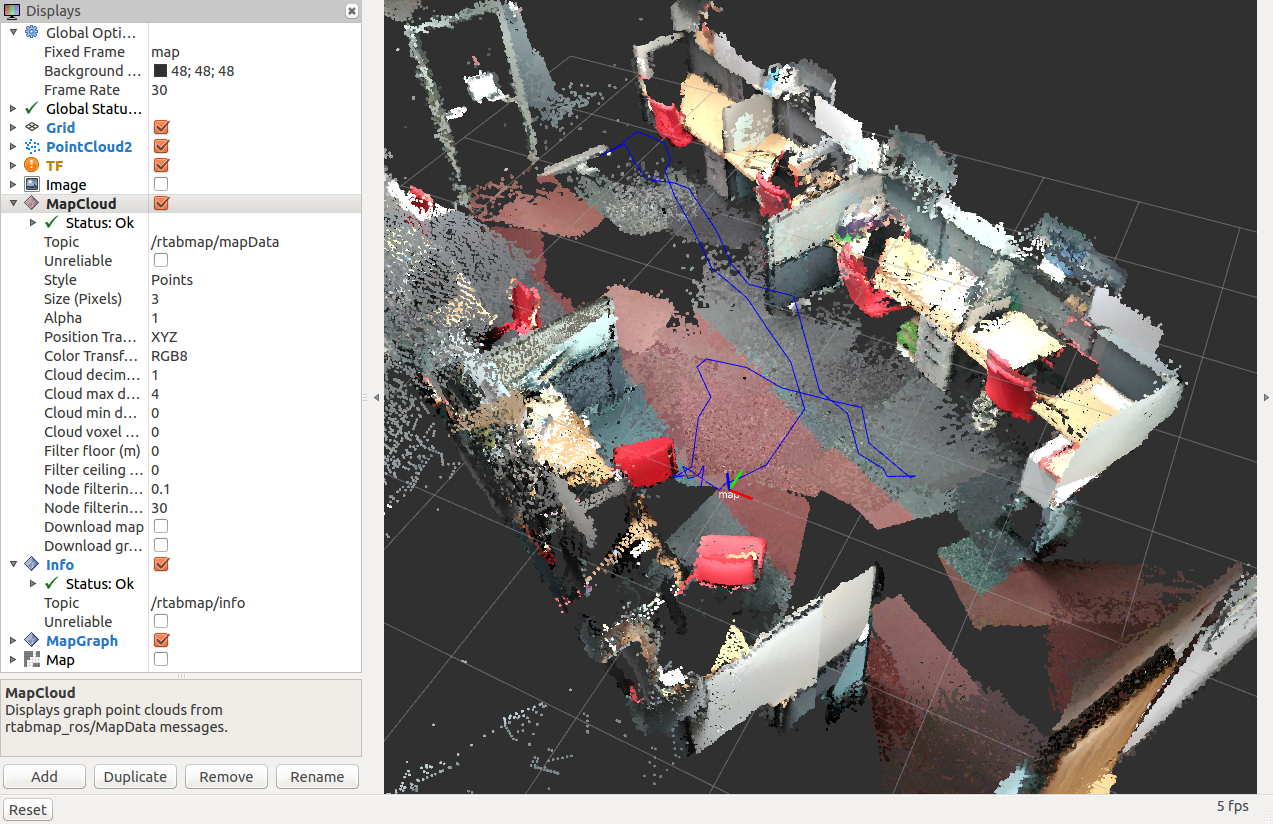
- High density cloud

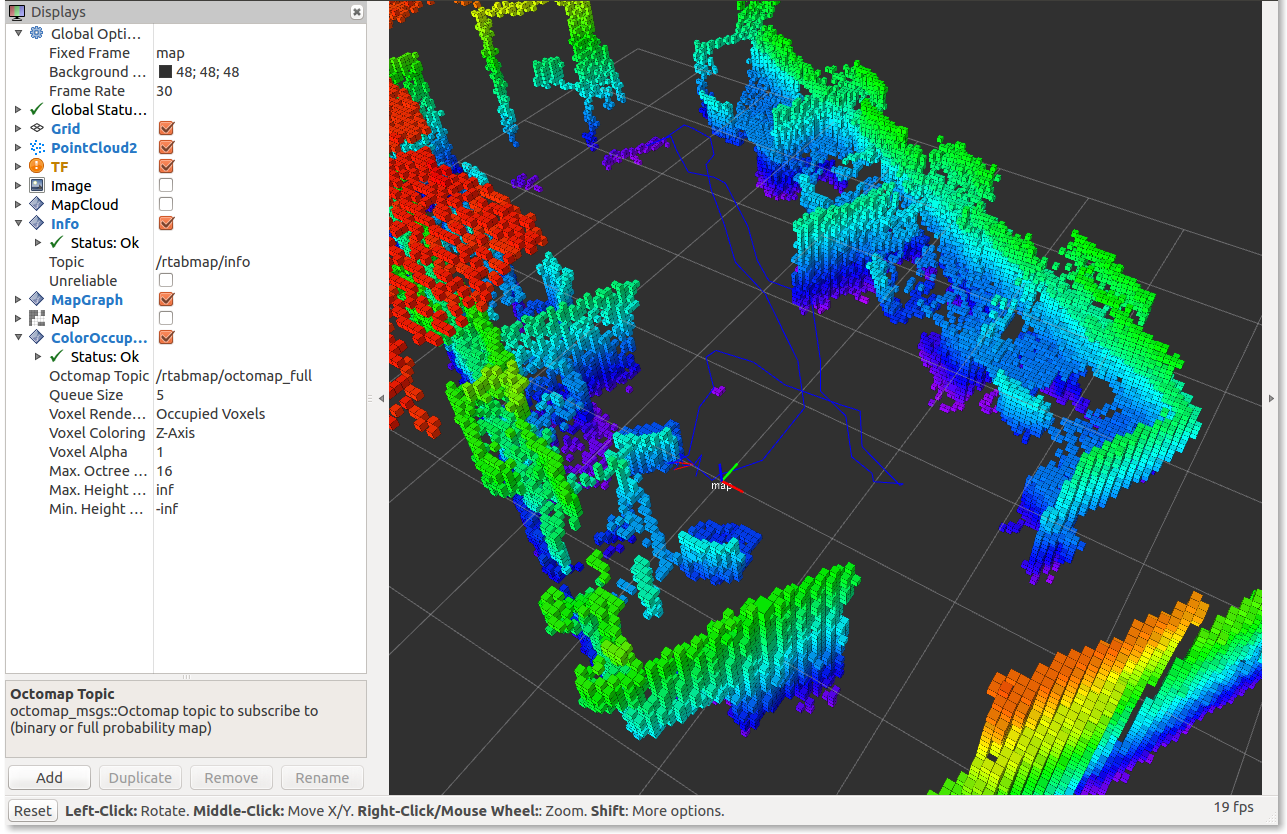
OctoMap (ground is not shown as it is not an obstacle, Grid/GroundIsObstacle=False)

Turtlebot
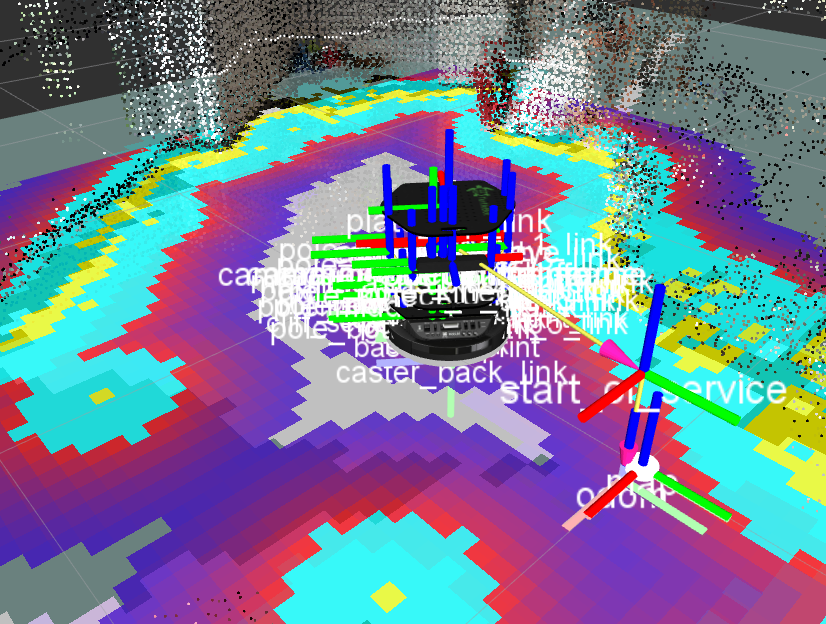
Based on the Mapping And Navigation On Turtlebot tutorial, we can use Tango instead of Kinect/Asus to generate the map. Tango can also be used to provide odometry for Turtlebot. In this demo, make sure to disable all odometry stuff on the robot before starting (e.g., TF /odom -> /base_footprint should not exist). We also assume that Tango is fixed in landscape position, and not tilted so that laser scans from Tango ROS Streamer are parallel to ground (white dotted line in the screenshot below). If you look at demo_turtlebot_tango.launch, adjust the position of the sensor on these lines (here assuming 30 cm over /base_footprint).
- Bringup Turtlebot:
$ roslaunch turtlebot_bringup minimal.launch
- Mapping:
$ roslaunch rtabmap_demos demo_turtlebot_tango.launch
- Visualization:
$ roslaunch rtabmap_demos demo_turtlebot_rviz.launch
Please refer to original Turtlebot tutorial for more options (e.g., restart in localization mode, sending goals). As you can see in the screenshot below, the "hack" of the added /odom -> /start_of_service is to make Tango starts with a z offset, otherwise the ground would be at the height of the Tango device. TF tree should look like this when everything is started:
/map -> /odom -> /start_of_service -> /device -> /base_footprint -> /base_link -> ...


