| Note: This tutorial assumes that you have completed the previous tutorials: Using roslaunch and rxconsole. |
| |
Running a calibration using visp_camera_calibration's experimental camera
Description: This tutorial explains how to calibrate a camera using the experimantal camera shipped with visp_camera_calibration. You don't need to own any external camera nor do you need a pattern. It is a good first step towards using the package.Keywords: camera calibration visp
Tutorial Level: BEGINNER
Next Tutorial: Calibration of an external camera using the ViSP library
Contents
Compiling
Start by getting the dependencies and compiling the package.
rosdep install visp_camera_calibration
catkin_make -DCMAKE_BUILD_TYPE=Release --pkg visp_camera_calibration
rosdep install visp_camera_calibration
rosmake visp_camera_calibration
Configuring a camera using a point-based grid
This tutorial demonstrates how to use the camera simulator to broadcast images of a point-based planar sample grid and calibrate the camera accordingly. There are four example images shipped with this package. They are located in launch/images.
Launching nodes
You need to launch the following node combination:
- the camera simulator
- the image processing interface
- the calibrator
- the console (rxtools/rxconsole)
All this has already been written into the roslaunch file located in vision_visp/visp_camera_calibration/launch/lagadic_grid.launch. You only need to launch:
roslaunch visp_camera_calibration lagadic_grid.launch
Image processing initialisation interface
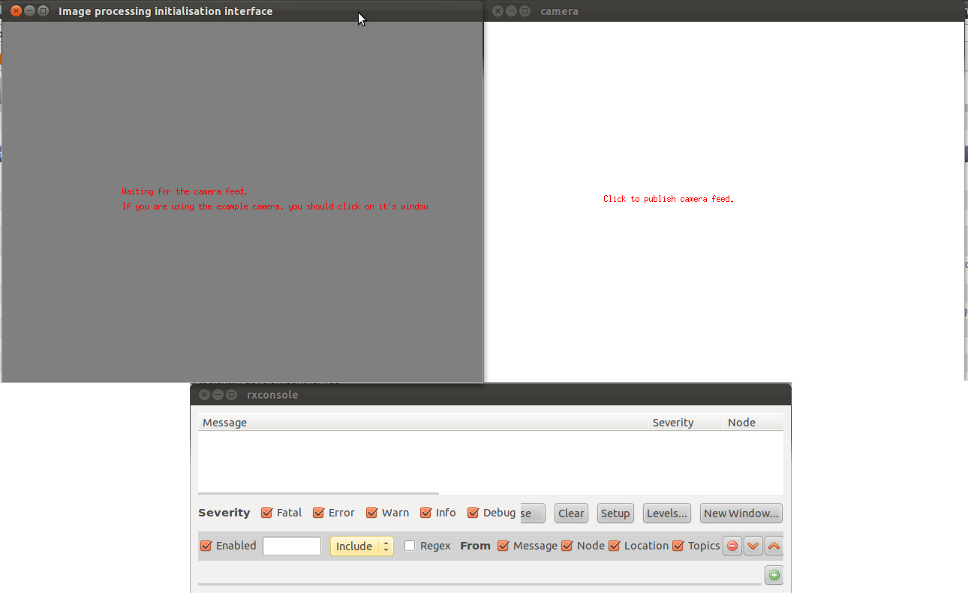
Several windows will appear:

In the rxconsole, you will see instructions about how to proceed and information about the calibration process. Some information will also be shown as red text over the images. You may choose to filter the messages by excluding the camera node.
Calibration process
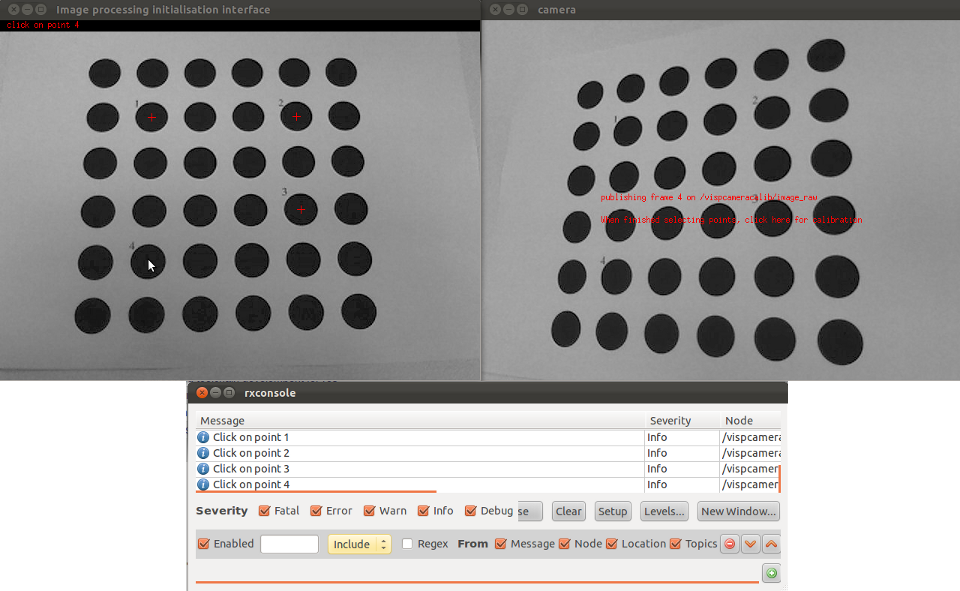
Start by clicking on the camera window. This will start streaming the camera feed from start to end. Chances are the streaming will be finished before you start selecting points. This is perfectly normal, no data is lost and it will be displayed to the image processing interface, image by image.
Once you have clicked on the camera window, you need to select points in the window called "Image processing initialisation interface".

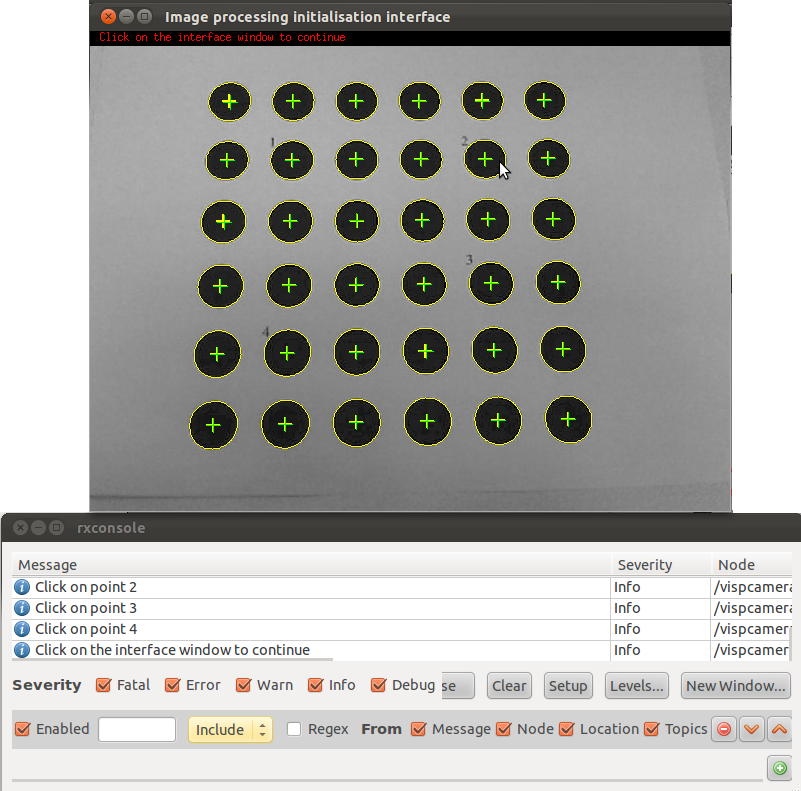
When the four points are selected, the image processing initialisation interface will try to detect the rest of the points. Your grid should look like this:

Then, click on the interface window again and repeat the process until the image displayed by the image processing initialisation interface window is the same as the one displayed by the camera window.
The calibrator node now has enough information to compute the new camera parameters. Click once on the *camera window* to call the camera calibration service. You should also make sure the camera node is enabled on the console.
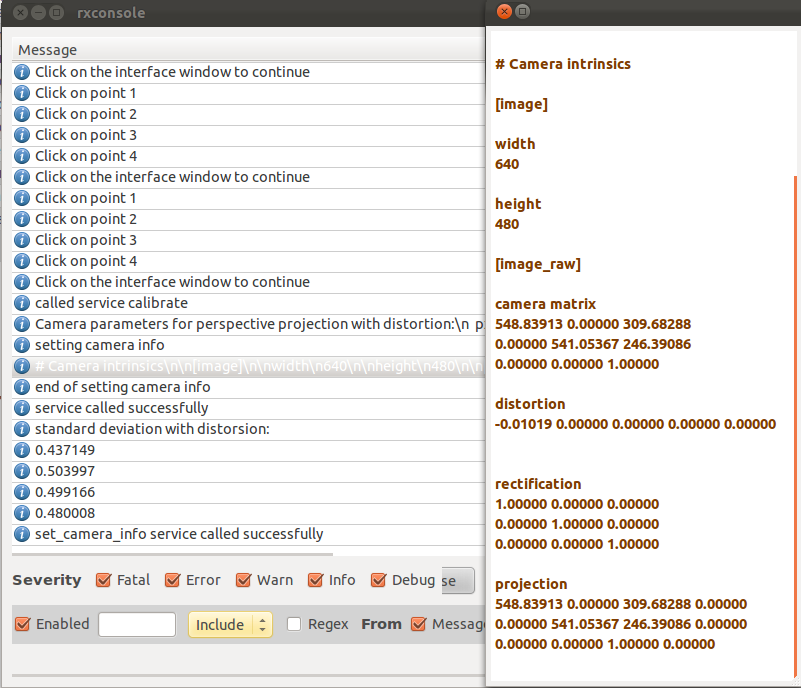
Your console should look like that:

In fact, the calibrator node calls the sensor_msgs/SetCameraInfo service advertised by the camera node. The camera simulator merely logs this output so you can display it in the ROS format.
Let's have a look at the console. The output includes information about standard deviations. These errors may serve as an indicator of your calibration's quality. They should be reasonably low (not more than a few pixels). Otherwise you should think about using more or different image samples.
The node will also write a calibration.ini file (in your $HOME/.ros directory) containing the calibration parameters in the INI format, similiary to the console log:
# Camera intrinsics

[image]

width
640

height
480

[image_raw]

camera matrix
548.83913 0.00000 309.68288
0.00000 541.05367 246.39086
0.00000 0.00000 1.00000

distortion
-0.01019 0.00000 0.00000 0.00000 0.00000

rectification
1.00000 0.00000 0.00000
0.00000 1.00000 0.00000
0.00000 0.00000 1.00000

projection
548.83913 0.00000 309.68288 0.00000
0.00000 541.05367 246.39086 0.00000
0.00000 0.00000 1.00000 0.00000
If you want to change the location of that file, you can set the calibration_path parameter or just run
roslaunch visp_camera_calibration lagadic_grid.launch calibration_path:="/path/to/calibration.ini"


