Author: Job van Dieten
Maintainer: Jordi Pages < jordi.pages@pal-robotics.com >, Job van Dieten < job.1994@gmail.com >, Thomas Peyrucain < thomas.peyrucain@pal-robotics.com >
Support: < tiago-support@pal-robotics.com >
Source: https://github.com/pal-robotics/tiago_tutorials.git
| |
Find Keypoints (C++/Python)
Description: OpenCV has a multitude of Feauture detectors, and in this tutorial you will be able to go through most of them, and seeing how image sharpening and contrast affects the detection of featuresKeywords: OpenCV
Tutorial Level: BEGINNER
Next Tutorial: Matching

Contents
Show EOL distros:
This tutorial requires the opencv_xfeatures2d package to be compiled
Purpose
In order to track objects more effectively, or against a dynamic background, a method is to detect keypoints in a static image of the target object, create a keypoint profile, and match this against a feed of images. In this tutorial the keypoint detectors available in OpenCV 2.4 will be shown, along with some simple image manipulation in the form of contrast and sharpness.
Pre-Requisites
First, make sure that the tutorials are properly installed along with the TIAGo simulation, as shown in the Tutorials Installation Section.
Execution
Open three consoles and source the catkin workspace of the public simulation
cd /tiago_public_ws/
source ./devel/setup.bash
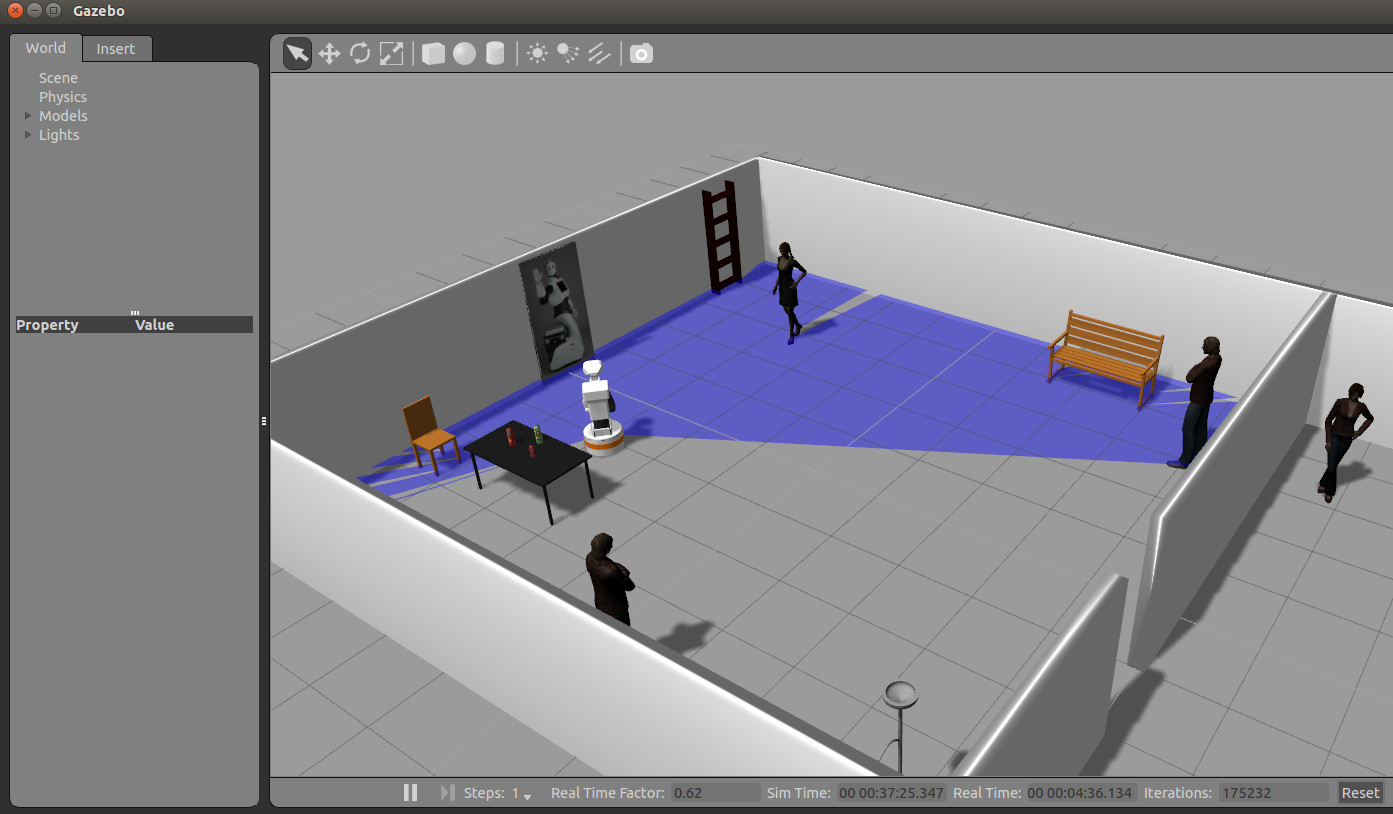
Run the following simulation which spawns TIAGo in front of a textured poster in one of the walls
roslaunch tiago_gazebo tiago_gazebo.launch public_sim:=true end_effector:=pal-gripper world:=tutorial_office gzpose:="-x 1.13 -y -2.79 -z -0.003 -R 0.0 -P 0.0 -Y -2.3"

On the second console run the keypoint extractor node
roslaunch tiago_opencv_tutorial keypoint_tutorial.launch
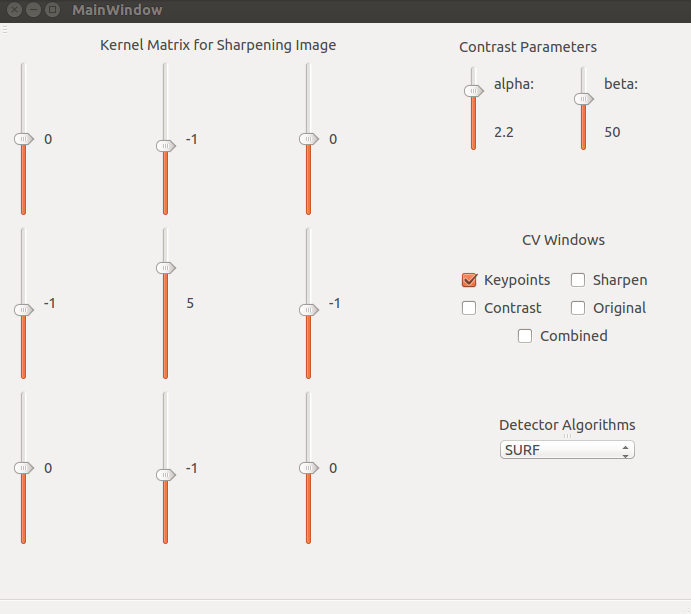
This launches a GUI window with which to manipulate the types of detectors, sharpness and brightness of the image.

The gui is divided into 4 parts. The Kernel Matrix for Sharpening Image allows the user to manipulate the values present in the kernel used by the OpenCV filter2D() method.
The contrast parameters influence the alpha and beta values used by the saturate_cast<uchar>() method.
As there are multiple variables affected in this tutorial, several windows have been created to allow the user to see the effect of the parameters changed individually and as a whole. The CV Windows section allows the user to open and close certain windows.
Detector Algorithms is the selection list of the keypoint detector used in this tutorial. The list contains the following entries:
- ORB
- BRISK
- MSER
- GFTT
- Harris
Dense (Removed in OpenCV 3)
- FAST
You cannot use those detectors if you have the free version of OpenCV :
- STAR
- SURF
- SIFT
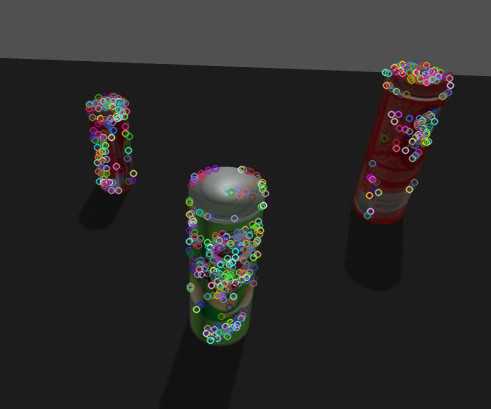
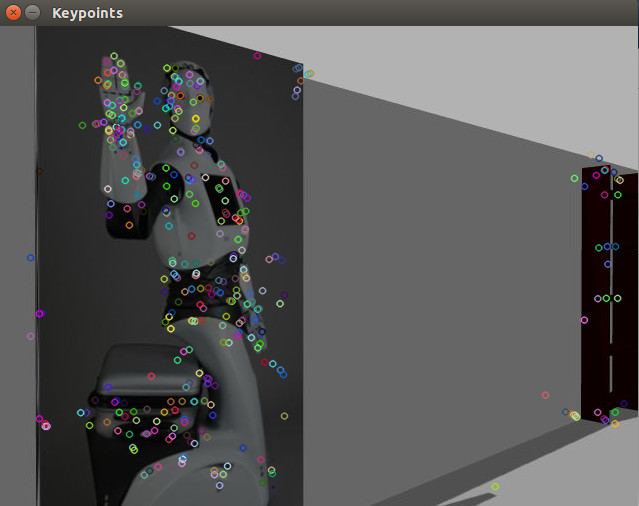
Another window is launched where the image processed with the keypoints detected is overlaid

Concepts & Code
Contrast
The contrast change makes simple iterative use of the OpenCV saturate_cast<uchar>() method.
These for loops iterate through every element in the matrix, which in turn contains three values for BGR. These values are altered using the alpha and beta values, causing the intensity to increase or decrease. The saturate reference in the function refers to fact that the method only outputs values within the limits of the target type. If the value is outside the limits, the value is set to the closest limit.
Sharpness
The sharpness of the image is affected by the filter2d() OpenCV method. This takes in the target image and a 3x3 matrix kernel, and convolves the image. The initial kernel is the kernel for sharpening an image, however by changing the kernel the image can be adapted for edge detection, blur and unsharp images.
Detectors
The detectors used are all part of OpenCV, with the most notable being SURF, SIFT and ORB (SURF, SIFT, STAR and BRIEF detectors have become private as of version 3 of OpenCV, and as such are not offers as part of the basic tutorials). These detectors all function in different ways, with ORB being one of the most reputable of detectors. They return a vector of KeyPoints, which are then drawn onto the original image.


