| |
Dynamixel workbench torque controller with joint command
Description: This tutorial describes how to running torque controllerKeywords: robotis, dynamixel, torque, pan, tilt
Tutorial Level: BEGINNER
Next Tutorial: Dynamixel workbench multi port
Contents
IF YOU ALREADY CREATE my_dynamixel_workbench_tutorial PACKAGE, THEN YOU JUMP TO STEP 2. NOTE: THIS TUTORIAL ONLY SUPPORT M430-W350-R
Step 1: Create a package
$ cd ~/catkin_ws/src
$ catkin_create_pkg my_dynamixel_workbench_tutorial std_msgs roscpp
Step 2: Prepare two Dynamixels
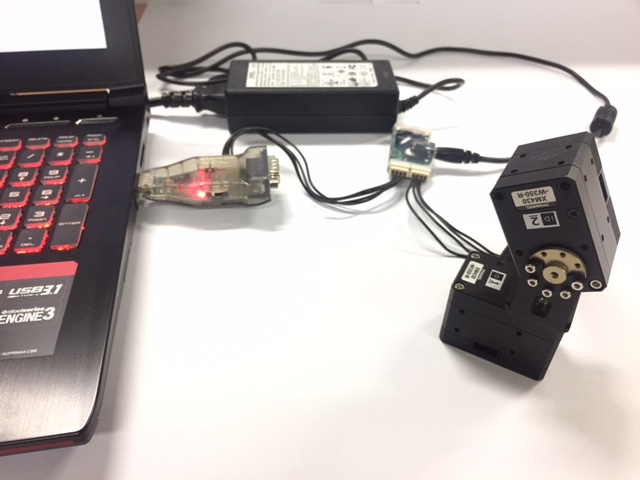
We need to prepare connected Dynamixels which are set same baudrate. In this tutorial shows pan tilt example.

Step 3: Create a launch file for the torque control node
First we need a launch file in launch folder in my_dynamixel_workbench_tutorial package. This launch file connects to the dynamixel_workbench_controller package and sets device name and baudrate of a Dynamixel. We assume that the Dynamixel is connected to /dev/ttyUSB0 and baudrate 57600. If not, make sure you set your device name and baudrate correctly. NOTE: IN THIS TUTORIAL, WE USE XM430-W210
1. Make a launch file in ros package which we created
$ cd my_dynamixel_workbench_tutorial
$ mkdir launch
$ cd launch
$ gedit torque_control.launch
2. Type or copy&paste code below to connect dynamixel_workbench_controllers packages and set parameters
<launch>
<arg name="device_name"      default="/dev/ttyUSB0"/>
<arg name="baud_rate"        default="3000000"/>

<arg name="pan_id"           default="1"/>
<arg name="tilt_id"          default="2"/>

<arg name="p_gain"           default="0.003"/>
<arg name="d_gain"           default="0.00002"/>

<param name="device_name"    value="$(arg device_name)"/>
<param name="baud_rate"      value="$(arg baud_rate)"/>

<param name="pan_id"         value="$(arg pan_id)"/>
<param name="tilt_id"        value="$(arg tilt_id)"/>

<param name="p_gain"         value="$(arg p_gain)"/>
<param name="d_gain"         value="$(arg d_gain)"/>

<node name="torque_control" pkg="dynamixel_workbench_controllers" type="torque_control" required="true" output="screen"/>
</launch>
3. Before we operating this package, we need to access permission for USB device
$ sudo chmod a+rw /dev/ttyUSB0
4. Now we can run tutorial package:
$ cd ~/catkin_ws && catkin_make
$ roslaunch my_dynamixel_workbench_tutorial torque_control.launch
If torque_controllers find linked Dynamixels, we could show state of it and command list and set torque on:
-----------------------------------------------------------------------
dynamixel_workbench controller; torque control example
-----------------------------------------------------------------------

MODEL   : XM430-W350
ID      : 1

MODEL   : XM430-W350
ID      : 2

-----------------------------------------------------------------------
Step 4: Check state of Dynamixel
Now, we can check a state of linked Dynamixels through /dynamixel_state topic:
$ rostopic echo /dynamixel_state
For example:
dynamixel_state:
-
    model_name: "XM430-W350"
    id: 1
    torque_enable: 1
    goal_current: 0
    goal_velocity: 350
    goal_position: 2049
    present_current: 0
    present_velocity: 0
    present_position: 2049
    moving: 0
-
    model_name: "XM430-W350"
    id: 2
    torque_enable: 1
    goal_current: -375
    goal_velocity: 350
    goal_position: 1967
    present_current: -19
    present_velocity: -90
    present_position: 2328
    moving: 1
Step 5: Run pan & tilt
We run the two linked Dynamixels using rosservice call or dynamixel_workbench_operators with different unit radian or raw value.
$ rosservice call /joint_command -- [unit] [id] [goal_position]
or
$ rosrun dynamixel_workbench_operators joint_operator [unit] [id] [goal_position]
Example
$ rosservice call /joint_command -- rad 1 2.0
or
$ rosrun dynamixel_workbench_operators joint_operator raw 1 3000
The pan & tilt is running!! If you have a question about running torque_controller, please make anew issue.


