Note: This Tutorial is designed for use only with robots purchased before June 2014. The current packages are in ric
| |
Beginners guide - stand alone single Lizi robot operation
Description: This tutorial aims to instruct the beginner user how to operate the robot in its first use.Tutorial Level: BEGINNER
Next Tutorial: Calibrating the Lizi robot IMU
Opening the box
Check that you have the following items in the box: The included hardware in the box is:
1. Lizi Robot.
2. Wifi USB dongle.
3. 12V battery charger.
The battery comes from the factrory already charged. However, it is recommended that after completing this tutorial one should connect the robot to the charger and the charger to an electric outlet for overnight charging.
For this tutorial one needs the following hardware (not included in the box):
1. PC monitor
2. USB Keboard
3. USB Mouse
The first step for operating the robot is to connect the Wifi USB dongle to a USB port on the back pannel of the robot. Next, connect the Monitor keyboard and mouse to the same panel.
Before turning the robot on, we recommend placing the robot on a large box or piece of wood to prevent the wheels from touching the ground. Thus, we could safely command the robot to drive (and turn the wheels) without any concern of the robot pulling the monitor, keyboard, and mouse cables.
Turning the robot on
On the back of the robot turn the power switch to ON position. The blue LED should be lit.
Turn the computer ON (this is the button just under the power switch), a short push is enough.
Log into the robot computer using:
Username: lizi
Password: a
Open the a terminal window and launch the main robot launch file using:
$ roslaunch lizi lizi.launch id:=1
You can choose any desired id number.
Basic operation of the robot
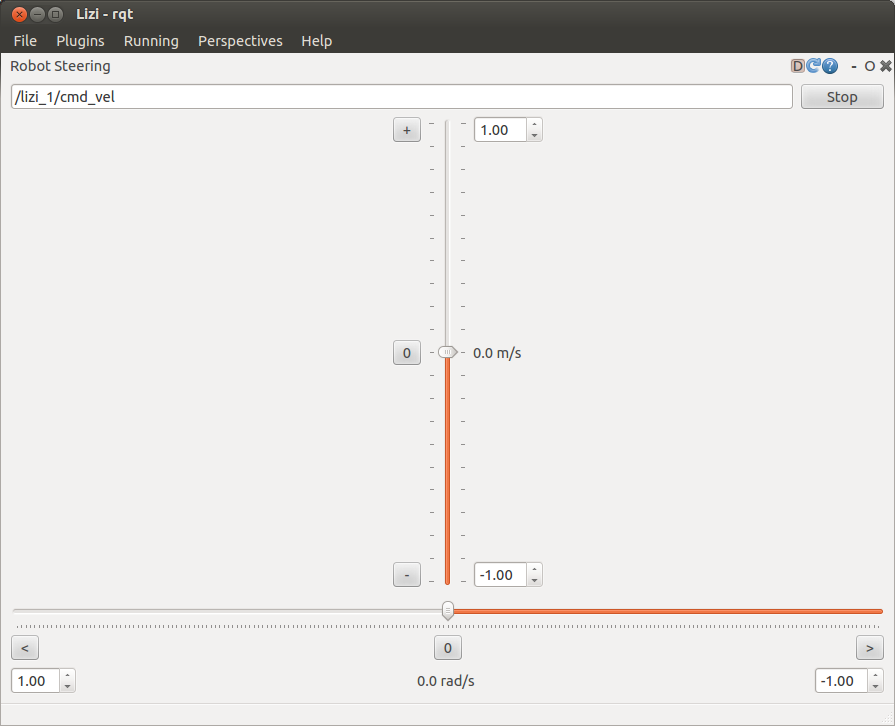
Now we can operate the robot using the basic "rqt" tool included in ROS. The first step is to start the "rqt" using:
$ rqt
In the new rqt window select from the menue:
Plugins -> Robot Tools -> Robot Steering
Then type at the topic textbox:
/lizi_1/cmd_vel
The screen should look like the following picture: 
To move the pan tilt system of the Asus RGB-D sensor we have to publish a lizi_pan_tilt message to the /lizi_1/pan_tilt topic. to do this manually one can use again the 'rqt' tool. in the rqt window select from the menue:
Plugins -> Topics -> Message publisher
Select topic: /lizi_1/pan_tilt
type: lizi/lizi_pan_tilt
and frequency: 5 Hz
Change the angles to the desired angle. Note that the units are in radians. Next mark the check box to the left of the topic to send the message and move the pan_tilt. See for example:

Note that after the pan tilt system moved, you should uncheck the box in order to stop the message from being sent.
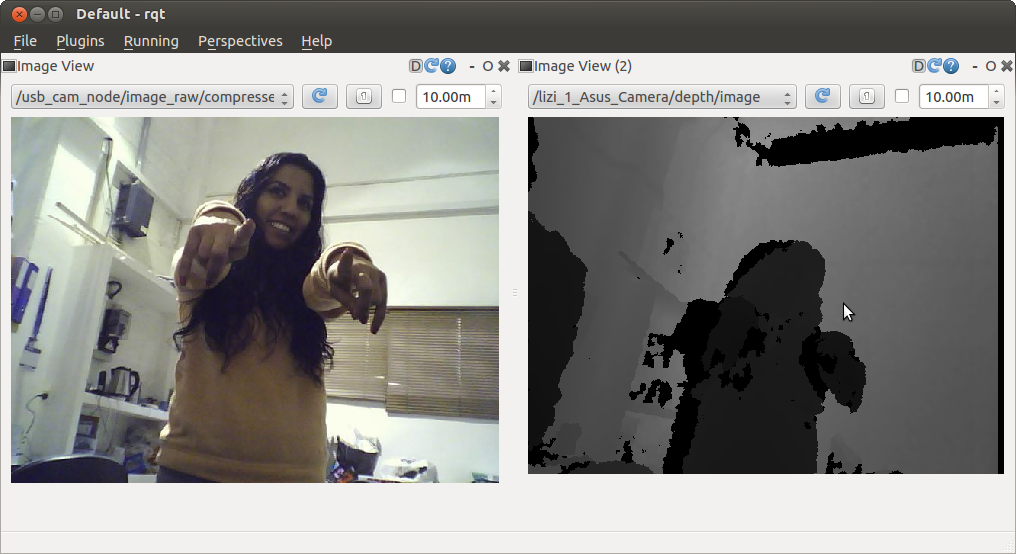
To view the camera image from the 'rqt' select from the menue:
Plugins -> Visualisation -> Image view
and select the image you want to see. In the following example we present the camera view and the depth image in two parallel windows:


