| |
Setup MultiMapper to generate a map while driving.
Description: This will show to setup the graph-based SLAM (Simultaneous Localization and Mapping) for map generation.Keywords: mapping slam karto
Tutorial Level: BEGINNER
Next Tutorial: Build a map with multiple robots: DistributedMapping
Goal description
In the last tutorial we used a static map to navigate the robot in a known environment. Now we will use the graph-based SLAM from the nav2d_karto package to create a map as the robot drives around. With an exploration plugin loaded into the Navigator the robot will even be able to autonomously explore the complete map on its own.
The launch file for this tutorial can be found here: [nav2d_tutorials/launch/tutorial3.launch]
Sarting the Mapper
As the name SLAM (Simultaneous Localization and Mapping) states, this node will both generate a map for navigation and track the robots position within this map. So before adding it to the launch file, we remove the static map server and the monte-carlo localizer. These will be replaced by the mapper node:
<node name="Mapper" pkg="nav2d_karto" type="mapper">
    <remap from="scan" to="base_scan"/>
    <rosparam file="$(find nav2d_tutorials)/param/mapper.yaml"/>
</node>
The scan topic is remapped to match Stage's "/base_scan" and a parameter file is loaded from the tutorials-package.
Driving the robot around
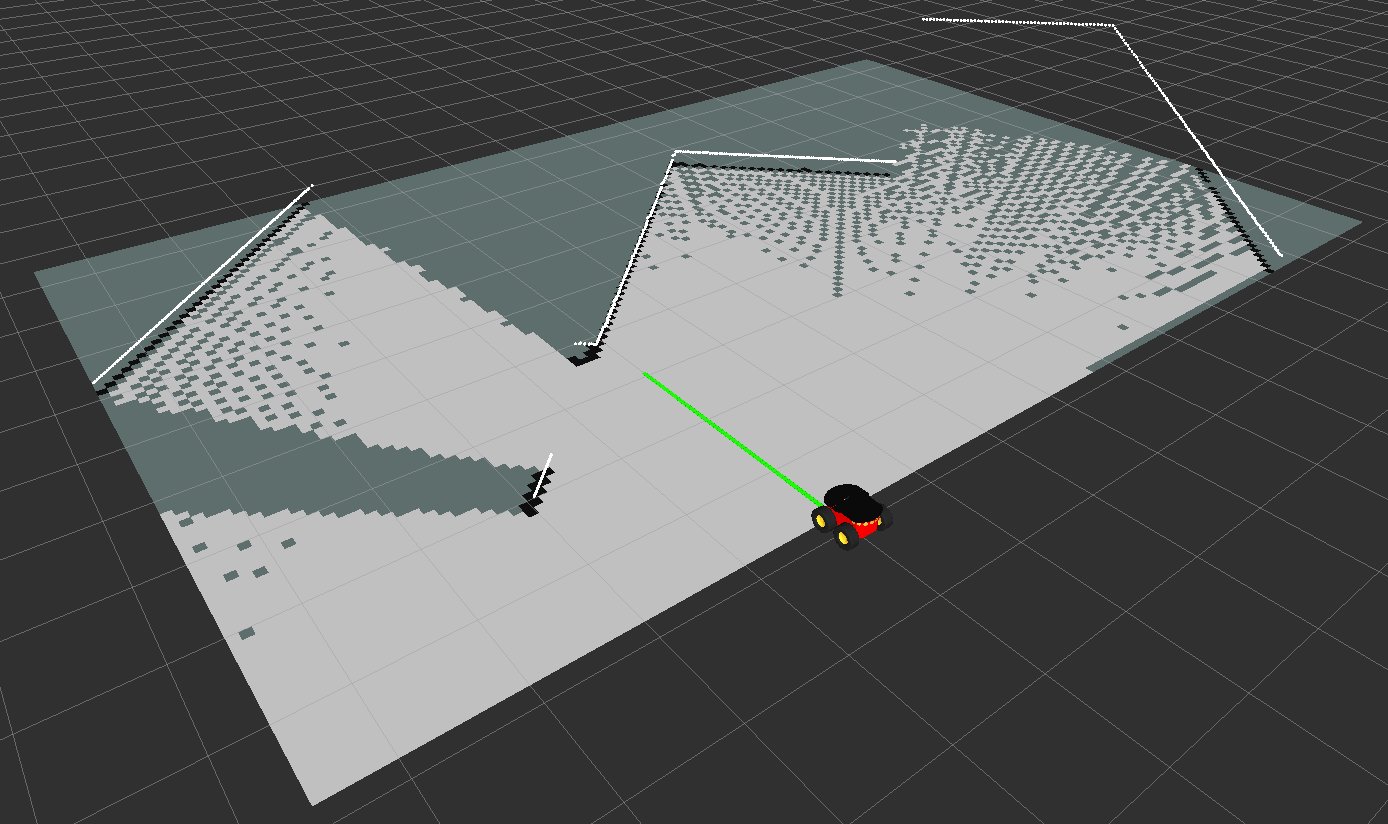
If you start the launch file, you should already see a map generated from the very first scan recorded when the robot was switched on. Note that because this is a graph-based SLAM, we do not have to provide an initial map size. The grid map you see in RVIZ is generated from the underlying pose graph and will continually grow as more scans are collected. 
You can add two Marker-Topics to RVIZ: "/Mapper/vertices" and "/Mapper/edges". This way the underlaying pose graph will be overlayed over the generated grid map.
Autonomous Exploration
If you also build the package nav2d_exploration, a simple nearest-frontier strategy will be loaded into the Navigator by default. The exploration is also available via an actionlib-interface. However, the robot cannot start exploration just after switch-on, because it will not be located within the map initially. (See picture above) For this there is another Action GetFirstMap, which will safely drive the robot forward followed by a 360° turn.
Like in the previous tutorial, while being a flexible interface for communication between nodes, there are also two small wrappers for these Actions to have them started by simple service calls. To use it add these to the launch file:
<node name="GetMap" pkg="nav2d_navigator" type="get_map_client" />
<node name="Explore" pkg="nav2d_navigator" type="explore_client" />
If you added a Joystick in the previous tutorials, you can start and stop actions with it (Buttons numbered from 1-10)
- Button 4: Start Mapping
- Button 1: Start Exploration
- Button 2: Stop
If you have no joystick available, you can start the mapping and exploration with
rosservice call /StartMapping 3
rosservice call /StartExploration 2


