| |
Hand-eye calibration
Description: This tutorial describes how the rc_visard's on-board hand-eye calibration routine can be used to calibrate its position with respect to a robot manipulator.Keywords: rc_visard, hand-eye calibration
Tutorial Level: BEGINNER
Contents
Overview
Calibration Grid
For hand-eye calibration a calibration grid is required which is available for purchase in Roboception's online shop.
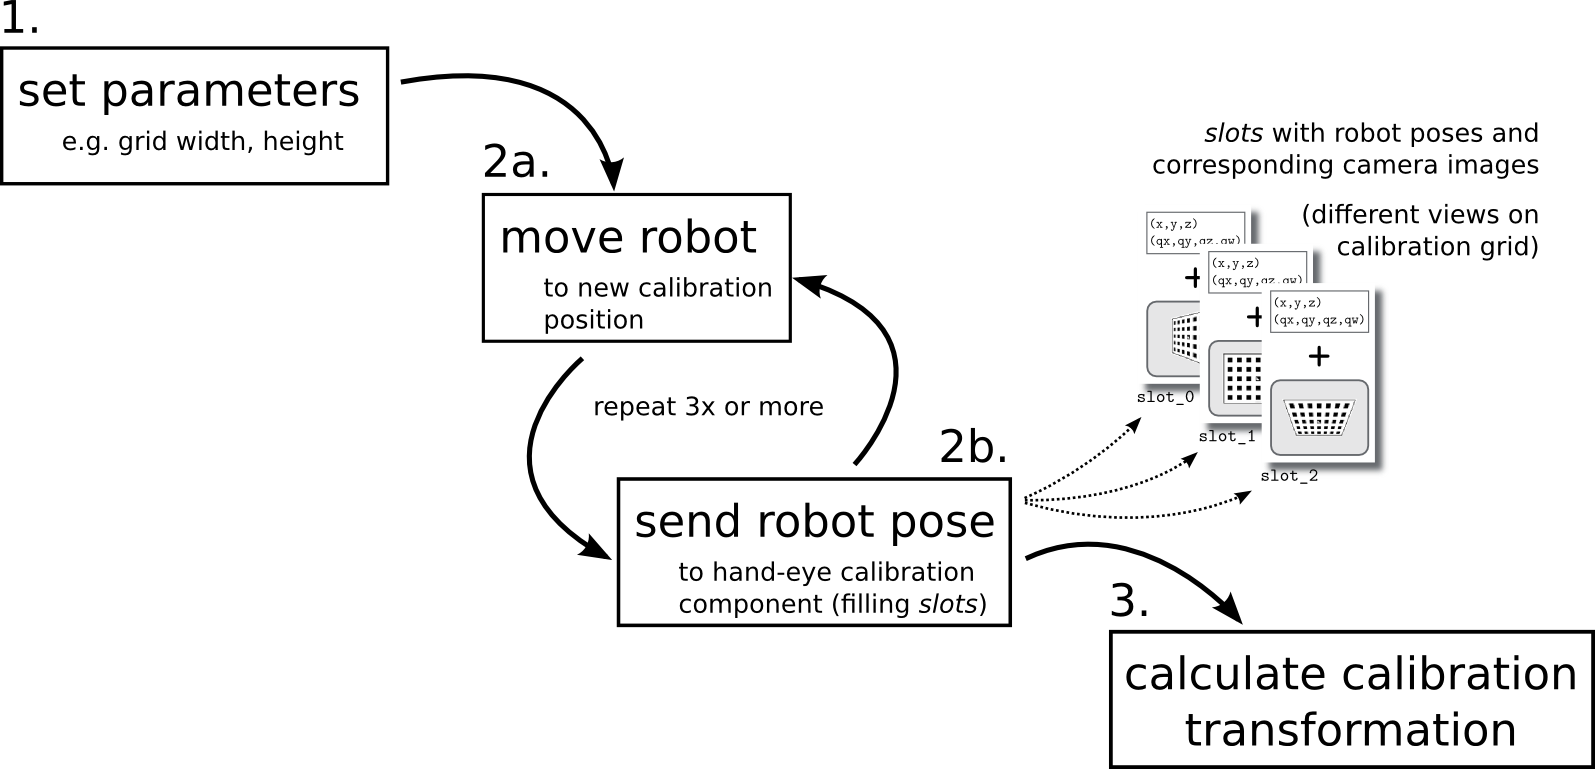
The rc_visard can be used either as external sensor or mounted on the robot manipulator. For performing the calibration, the following steps should be followed:

The required steps can be conducted either programmatically via the rc_visard's REST-API, or manually via its user-friendly Web GUI. For a detailed description, please refer to the rc_visard's complete user manual.
When using REST-API calls, the procedure requires the following service calls:
Set grid width and height with 'set_parameters' REST-API service call

for ( calibration_position in teached_calibration_positions)
  move the robot to calibration_position
  save the pose of the robot with 'set_pose' REST-API service call

Calculate calibration result with 'calibrate' REST-API service call

if (calibration_succesfull):
  Permanently store results with 'save_calibration' REST-API service call
Calibration routine
Setting calibration parameters
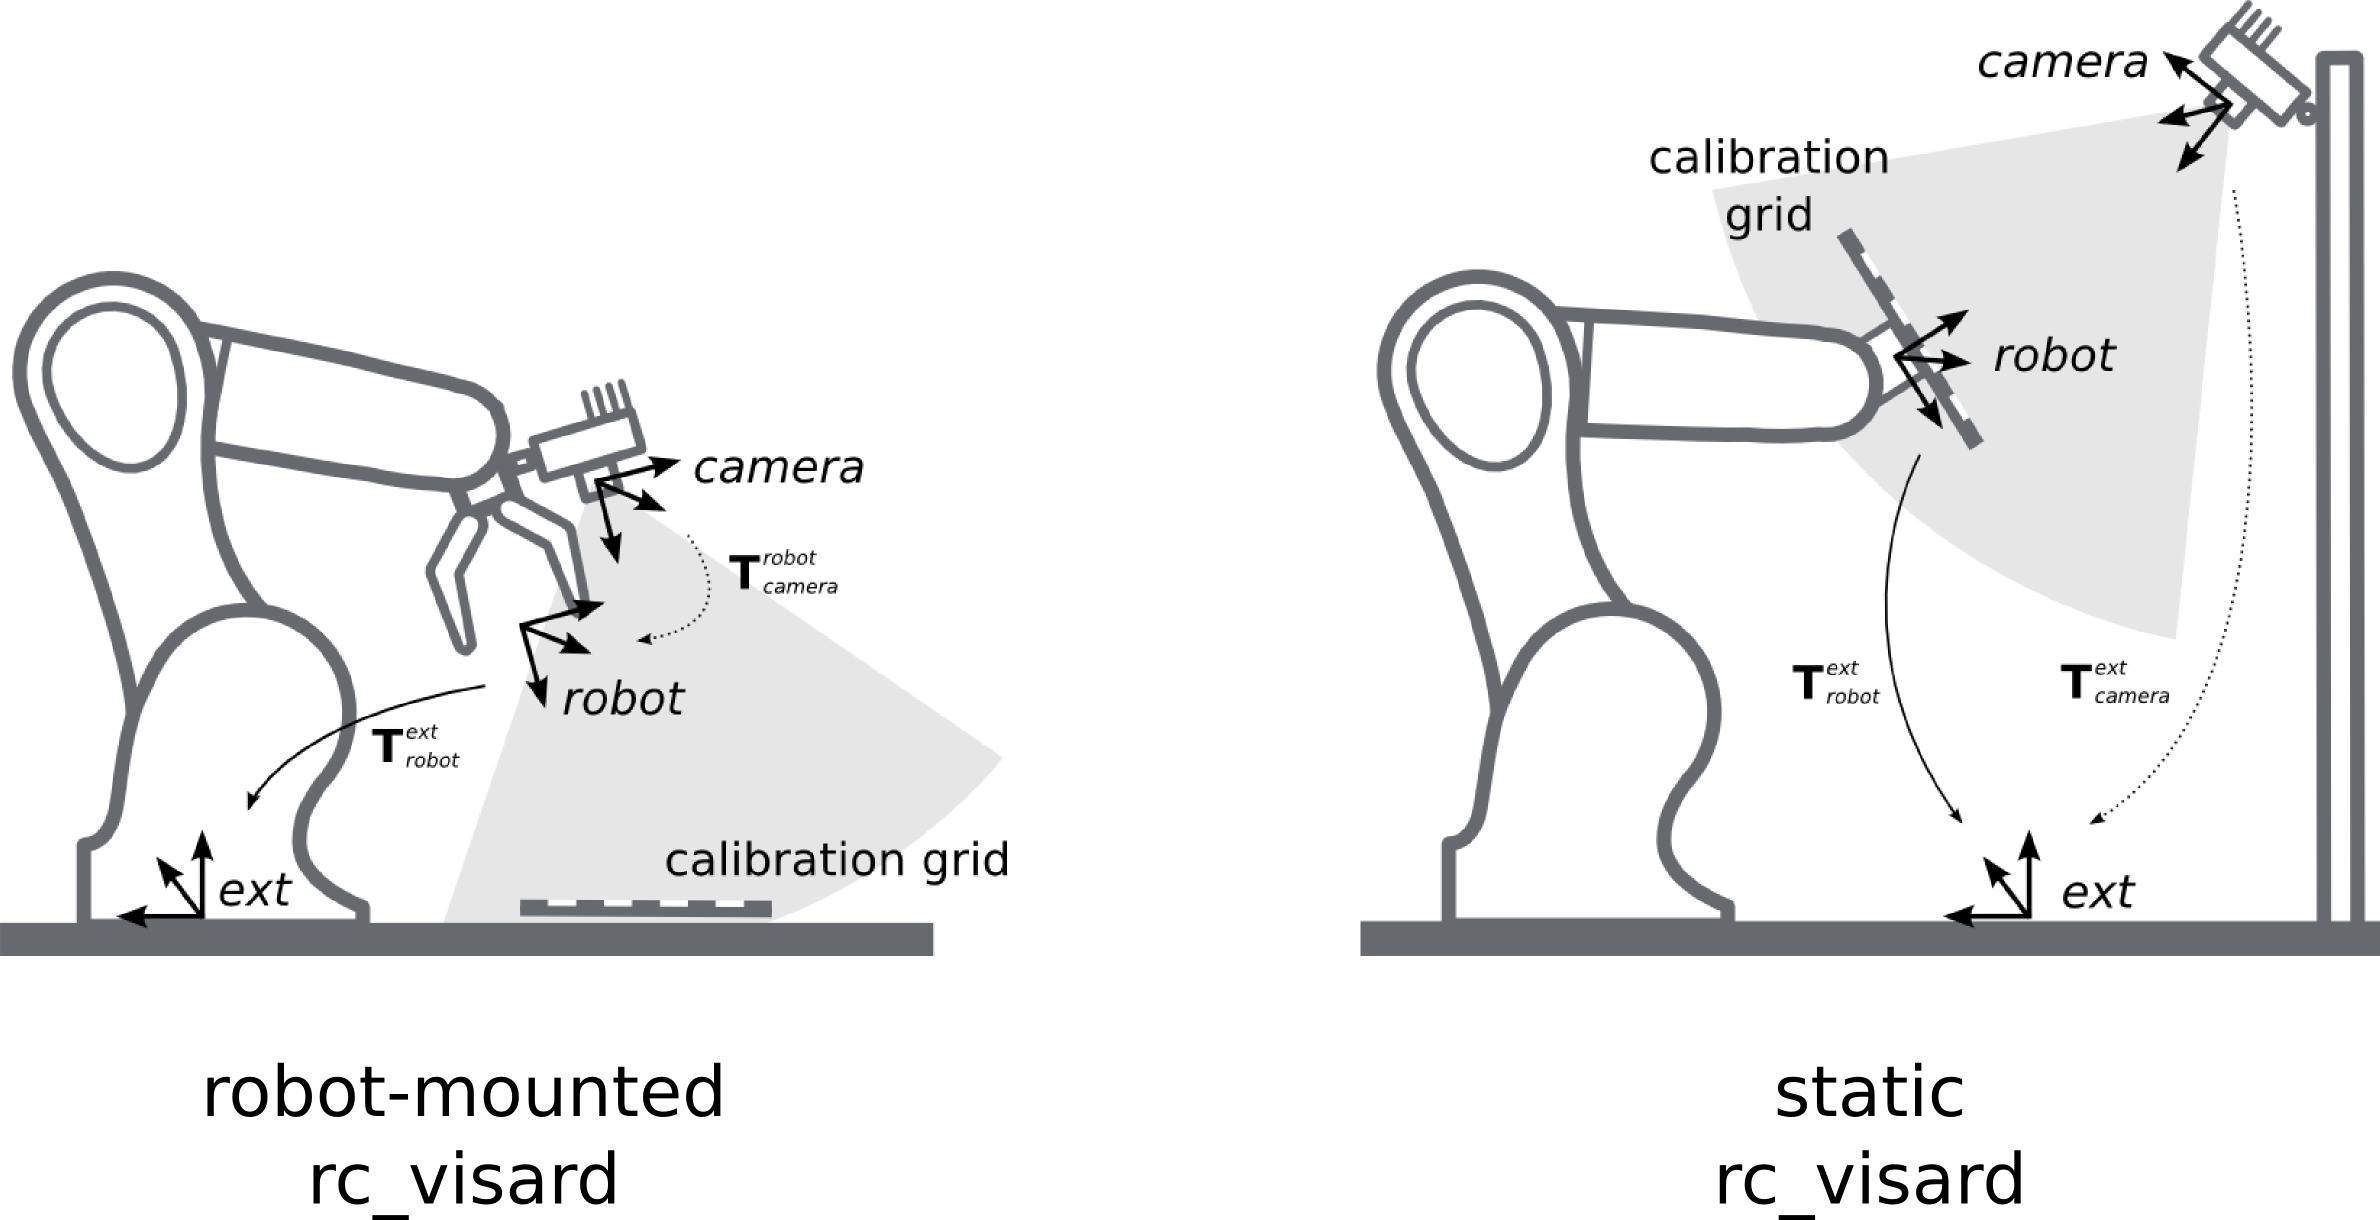
First, the calibration grid must be mounted according to the desired robot setup, as illustrated below. The rc_visard can be mounted either on the robot, e.g., at its flange (hence the sensor moves with the robot), or it is mounted statically in the robot's workspace. Then, the calibration grid needs to be placed either mounted on the robot (for a static rc_visard) or placed in a static position (for a robot-mounted rc_visard).
Second, the calibration grid size, i.e. width and height, needs to be specified.

Moving robot to calibration positions
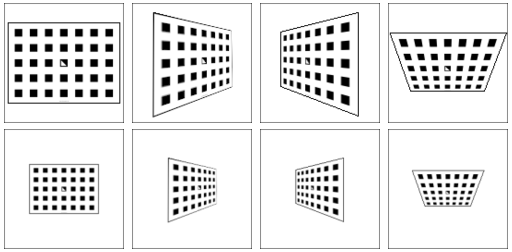
During the calibration process, the robot needs to approach several user-defined calibration positions and report its corresponding pose to the rc_visard. At least eight significantly different calibration poses are recommended, as illustrated below. Each pose must ensure that the calibration grid is completely visible in rc_visard’s left camera image.

The following video shows a full calibration routine, parametrized and triggered automatically from a KUKA Sunrise.OS application via the rc_visard's REST-API.
(If the video doesn't show up, click here)
Calculating the calibration transformation
The final step consists in triggering the calculation of the calibration transform. The result contains the corresponding transformation (position and orientation of rc_visard's left camera) and a re-projection error for users to judge the quality and correctness of the calculated hand-eye calibration.
If the calibration result matches the user's expectations, it needs to be stored permanently on the sensor using either the respective button in the Web GUI or the corresponding REST-API service.


