| |
Programming Hiro / NEXTAGE OPEN (MoveIt Python Commander)
Description: Default programming API of Hiro (Open) / NEXTAGE OPEN for ROS is explained. It is based on MoveIt!.Keywords: MoveIt!, RobotCommander
Tutorial Level: INTERMEDIATE
Next Tutorial: rtmros_nextage/Tutorials/Write a client program by mixing ROS and RTM APIs
Contents
NOTE: All the tutorials available under the URL http://wiki.ros.org/rtmros_nextage/Tutorials are applicable to the multiple products of Kawada Industries; Hiro (only with the one that opensource software is installed) and NEXTAGE OPEN. To simplify the notation in the rest of the tutorials, we use HiroNXO to appoint the aforementioned robots.
Introduction
Since rtmros_hironx software verion 1.1.4 (both Hironx and NEXTAGE Open users), default recommended programming interface is ROS_Client. ROS_Client is derived from RobotCommander, python programming interface that MoveIt! provides.
MoveIt! provides state-of-art manipulation capability and is becoming a de-facto standard manipulation module in ROS, which means its programming interface RobotCommander has been tested and maintained well. Since HiroNXO is very well integrated with MoveIt!, it is chosen to be the programming facade.
This tutorial covers ONLY the Hironxo specific operation of ROS_Client, and the very basic commands. MoveIt! has its own, thoroughly explained tutorial set. You're advised to work on that tutorial as well should you plan to write any intermediate/advanced tasks.
Using ROS_Client requires MoveIt! server to be running
I said "server" in the section title to give you an idea, but actually in MoveIt! it's called Move Group. Anyway, we need some MoveIt! node(s) to be running in order to run your ROS_Client-based code. Open a new terminal then run:
$ roslaunch hironx_moveit_config moveit_planning_execution.launch   (HIRO)
$ roslaunch nextage_moveit_config moveit_planning_execution.launch  (NEXTAGE OPEN)
With this command run, generally you might be seeing on your desktop 2 terminals, regardless if you're working with a real robot, or on simulation. One is the one from MoveIt! you just started above, and the other is ros bridge (between OpenRTM. Review for simulation | for actual robot about how to run it).
Get MoveIt! Python I/F ready
moveit_commander package offers a capability to write a MoveIt! client in Python (API doc).
To utilize it, you might want to install MoveIt!'s python client interface if you already haven't done so.
$ apt-get install ros-%YOUR_ROS_DISTRO%-moveit-commander
Operate robot via moveit in Python
You can find an example of how to operate hironxo robot via Python, in test_hironx_moveit.py file in hironx_ros_bridge, which looks like:
   1 #!/usr/bin/env python
   2 ##########################################
   3 # @file         nextage_moveit_sample.py         #
   4 # @brief        Nextage Move it demo program #
   5 # @author   Ryu Yamamoto                                 #
   6 # @date         2015/05/26                                       #
   7 ##########################################
   8 import moveit_commander
   9 import rospy
  10 import geometry_msgs.msg
  11
  12 def main():
  13         rospy.init_node("moveit_command_sender")
  14
  15         robot = moveit_commander.RobotCommander()
  16
  17         print "=" * 10, " Robot Groups:"
  18         print robot.get_group_names()
  19
  20         print "=" * 10, " Printing robot state"
  21         print robot.get_current_state()
  22         print "=" * 10
  23
  24         rarm = moveit_commander.MoveGroupCommander("right_arm")
  25         larm = moveit_commander.MoveGroupCommander("left_arm")
  26
  27         print "=" * 15, " Right arm ", "=" * 15
  28         print "=" * 10, " Reference frame: %s" % rarm.get_planning_frame()
  29         print "=" * 10, " Reference frame: %s" % rarm.get_end_effector_link()
  30
  31         print "=" * 15, " Left ight arm ", "=" * 15
  32         print "=" * 10, " Reference frame: %s" % larm.get_planning_frame()
  33         print "=" * 10, " Reference frame: %s" % larm.get_end_effector_link()
  34
  35         #Right Arm Initial Pose
  36         rarm_initial_pose = rarm.get_current_pose().pose
  37         print "=" * 10, " Printing Right Hand initial pose: "
  38         print rarm_initial_pose
  39
  40         #Light Arm Initial Pose
  41         larm_initial_pose = larm.get_current_pose().pose
  42         print "=" * 10, " Printing Left Hand initial pose: "
  43         print larm_initial_pose
  44
  45         target_pose_r = geometry_msgs.msg.Pose()
  46         target_pose_r.position.x = 0.325471850974-0.01
  47         target_pose_r.position.y = -0.182271241593-0.3
  48         target_pose_r.position.z = 0.0676272396419+0.3
  49         target_pose_r.orientation.x = -0.000556712307053
  50         target_pose_r.orientation.y = -0.706576742941
  51         target_pose_r.orientation.z = -0.00102461782513
  52         target_pose_r.orientation.w = 0.707635461636
  53         rarm.set_pose_target(target_pose_r)
  54
  55         print "=" * 10," plan1 ..."
  56         rarm.go()
  57         rospy.sleep(1)
  58
  59         target_pose_l = [
  60                 target_pose_r.position.x,
  61                 -target_pose_r.position.y,
  62                 target_pose_r.position.z,
  63                 target_pose_r.orientation.x,
  64                 target_pose_r.orientation.y,
  65                 target_pose_r.orientation.z,
  66                 target_pose_r.orientation.w
  67         ]
  68         larm.set_pose_target(target_pose_l)
  69
  70         print "=" * 10," plan2 ..."
  71         larm.go()
  72         rospy.sleep(1)
  73
  74         #Clear pose
  75         rarm.clear_pose_targets()
  76
  77         #Right Hand
  78         target_pose_r.position.x = 0.221486843301
  79         target_pose_r.position.y = -0.0746407547512
  80         target_pose_r.position.z = 0.642545484602
  81         target_pose_r.orientation.x = 0.0669013615474
  82         target_pose_r.orientation.y = -0.993519060661
  83         target_pose_r.orientation.z = 0.00834224628291
  84         target_pose_r.orientation.w = 0.0915122442864
  85         rarm.set_pose_target(target_pose_r)
  86
  87         print "=" * 10, " plan3..."
  88         rarm.go()
  89         rospy.sleep(1)
  90
  91         print "=" * 10,"Initial pose ..."
  92         rarm.set_pose_target(rarm_initial_pose)
  93         larm.set_pose_target(larm_initial_pose)
  94         rarm.go()
  95         larm.go()
  96         rospy.sleep(2)
  97
  98 if __name__ == '__main__':
  99     try:
 100         main()
 101     except rospy.ROSInterruptException:
 102         pass
- Here goes cody-by-code explanation:
    import moveit_commander
    import rospy
    import geometry_msgs.msg
Python API of MoveIt! is provided via moveit_commander.MoveGroupCommander.
rospy.init_node("moveit_command_sender")We need to run a ROS Node (by calling rospy.init_node()) in order to use MoveGroupCommander from this script.
robot = moveit_commander.RobotCommander()
Instantiate a RobotCommander object.
    print "=" * 10, " Robot Groups:"
    print robot.get_group_names()
We can get a list of all the groups in the robot.print "=" * 10, " Printing robot state" print robot.get_current_state()Sometimes for debugging it is useful to print the entire state of the robot.rarm_current_pose = rarm.get_current_pose().pose larm_current_pose = larm.get_current_pose().poseGetting current positions.rarm_initial_pose = rarm.get_current_pose().pose print "=" * 10, " Printing Right Hand initial pose: " print rarm_initial_pose larm_initial_pose = larm.get_current_pose().pose print "=" * 10, " Printing Left Hand initial pose: " print larm_initial_poseGetting initial positions. Next,run the planning motion.Excute Plan 1
    target_pose_r = geometry_msgs.msg.Pose()
    target_pose_r.position.x = 0.325471850974-0.01
    target_pose_r.position.y = -0.182271241593-0.3
    target_pose_r.position.z = 0.0676272396419+0.3
    target_pose_r.orientation.x = -0.000556712307053
    target_pose_r.orientation.y = -0.706576742941
    target_pose_r.orientation.z = -0.00102461782513
    target_pose_r.orientation.w = 0.707635461636
    rarm.set_pose_target(target_pose_r)

    print "=" * 10," plan1 ..."
    rarm.go()
    rospy.sleep(1)
Excute Plan 2
    target_pose_l = [
        target_pose_r.position.x,
        -target_pose_r.position.y,
        target_pose_r.position.z,
        target_pose_r.orientation.x,
        target_pose_r.orientation.y,
        target_pose_r.orientation.z,
        target_pose_r.orientation.w
    ]
    larm.set_pose_target(target_pose_l)

    print "=" * 10," plan2 ..."
    larm.go()
    rospy.sleep(1)
Excute Plan 3
    rarm.clear_pose_targets()

    #Right Hand
    target_pose_r.position.x = 0.221486843301
    target_pose_r.position.y = -0.0746407547512
    target_pose_r.position.z = 0.642545484602
    target_pose_r.orientation.x = 0.0669013615474
    target_pose_r.orientation.y = -0.993519060661
    target_pose_r.orientation.z = 0.00834224628291
    target_pose_r.orientation.w = 0.0915122442864
    rarm.set_pose_target(target_pose_r)

    print "=" * 10, " plan3..."
    rarm.go()
    rospy.sleep(1)
Go Initial
    print "=" * 10,"Initial pose ..."
    rarm.set_pose_target(rarm_initial_pose)
    larm.set_pose_target(larm_initial_pose)
    rarm.go()
    larm.go()
    rospy.sleep(2)
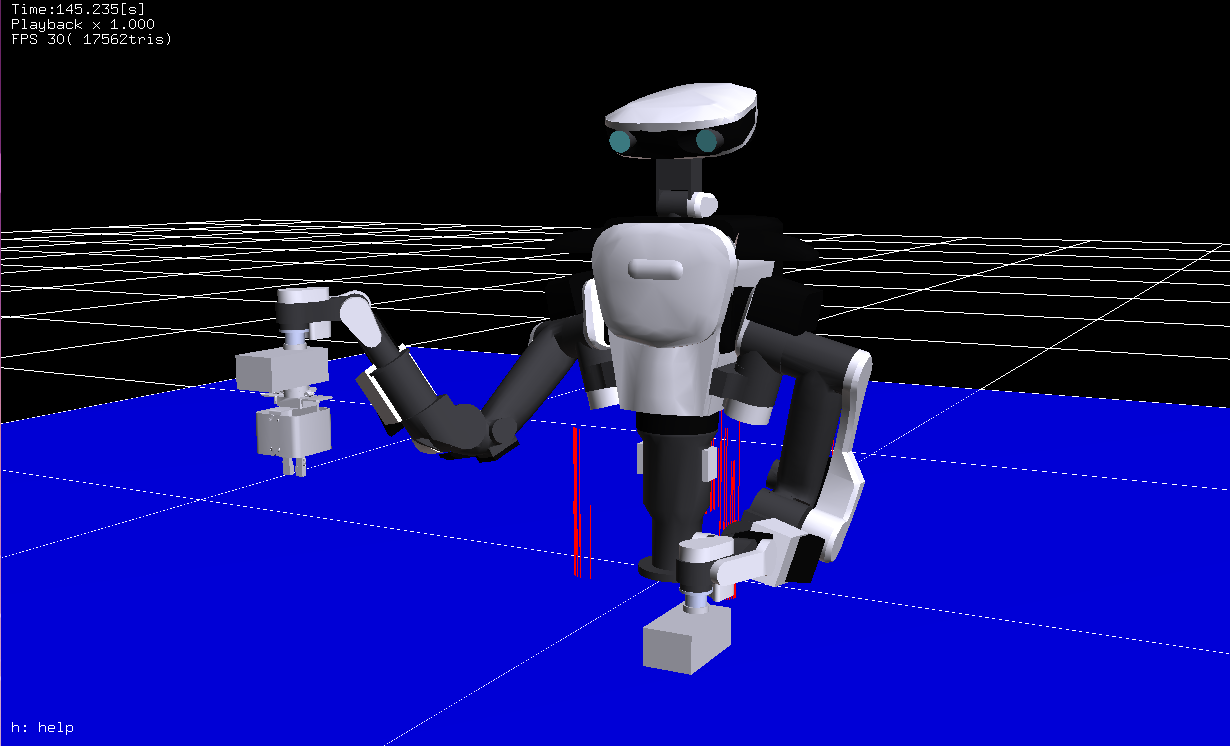
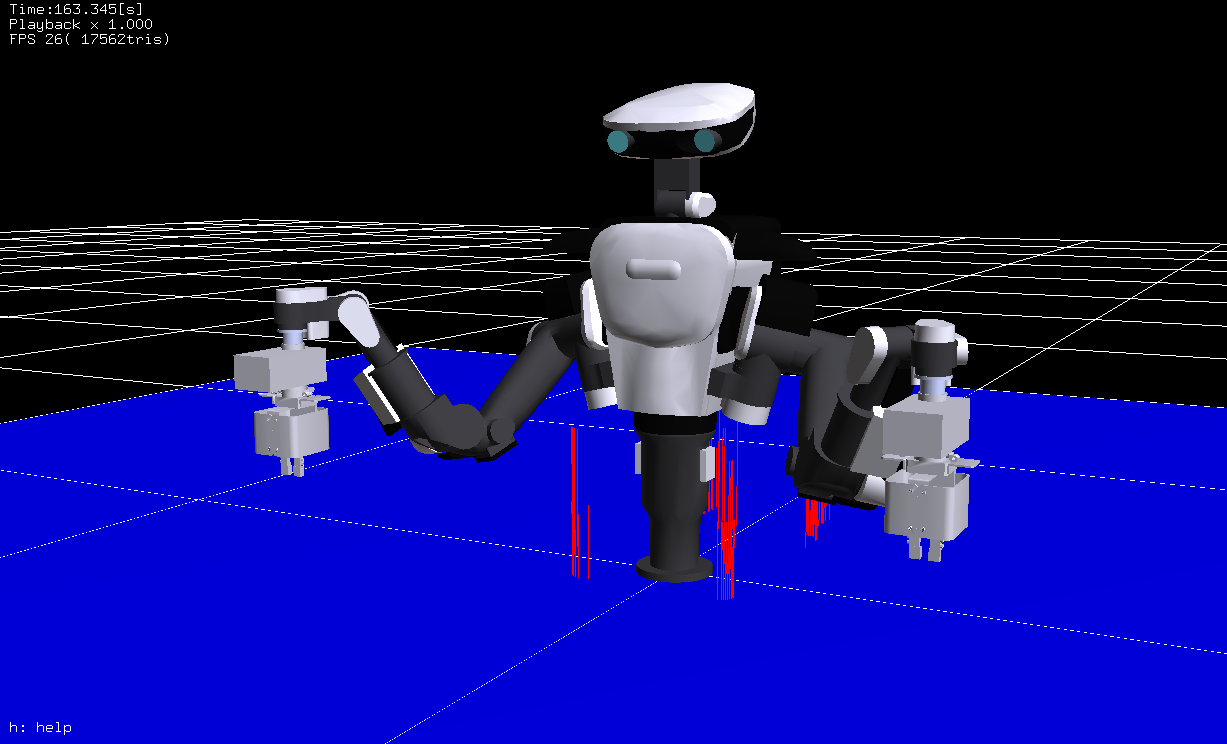
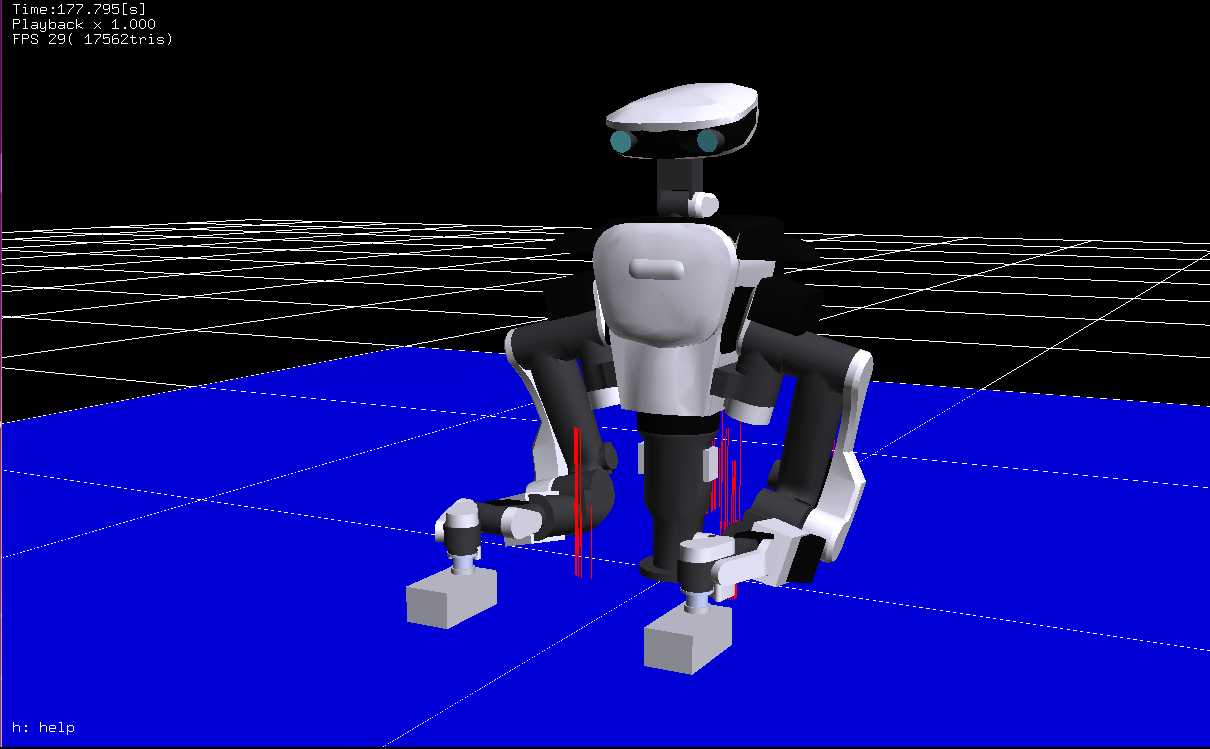
Define position and orientation of end-effector-link, and go target pose.
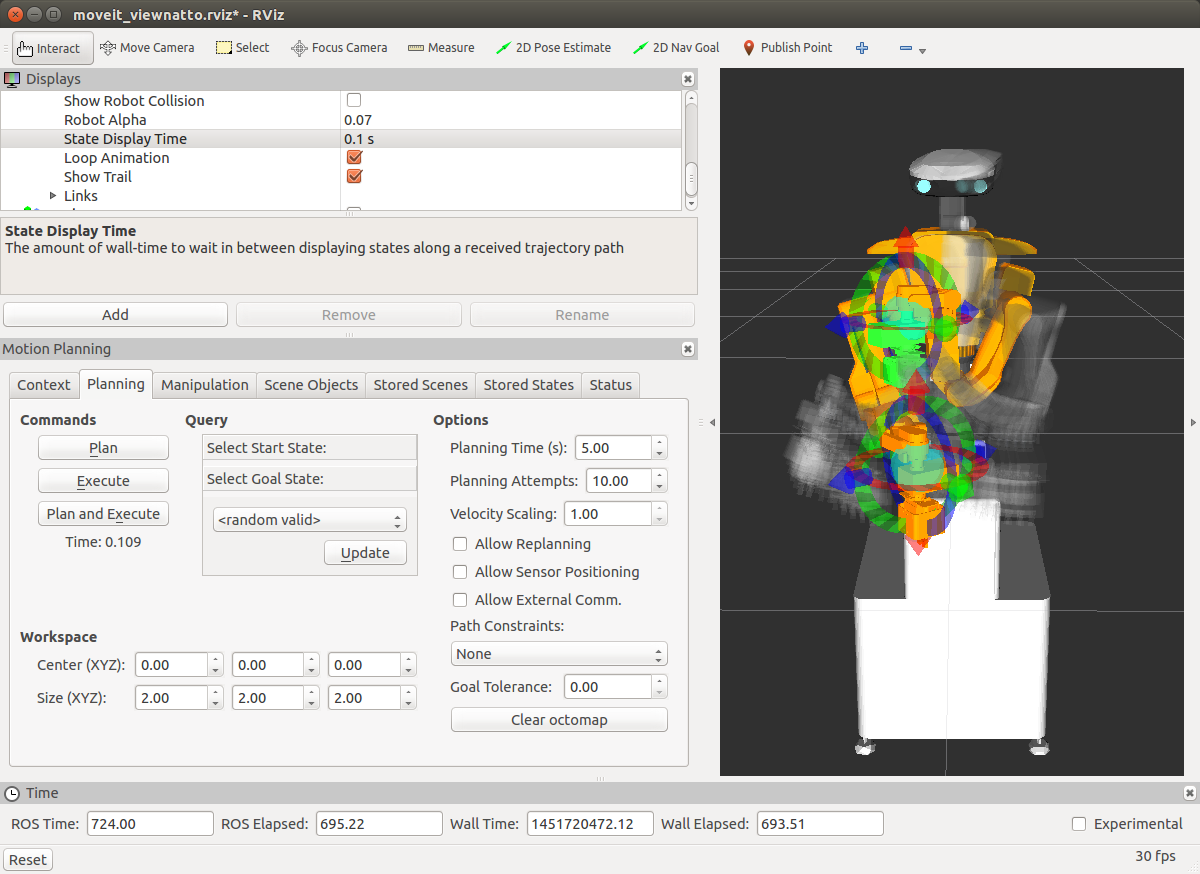
You'll see the planning happens on RViz.
For a little more methods available in Python, consult moveit_commander wiki.
Planning both arms
nextage moveit configuration provide dual arm settings, you can choose this from Motion Planning > Planning request > Planning Group > botharms. You can also control via Python code
import moveit_commander
import rospy
from geometry_msgs.msg import Pose

def main():
        rospy.init_node("moveit_command_sender")

        botharms = moveit_commander.MoveGroupCommander("botharms")

        target_pose_r = Pose()
        target_pose_l = Pose()
        q = quaternion_from_euler(0, -math.pi/2,0)
        target_pose_r.position.x = 0.3
        target_pose_r.position.y = 0.1
        target_pose_r.position.z = 0.0
        target_pose_r.orientation.x = q[0]
        target_pose_r.orientation.y = q[1]
        target_pose_r.orientation.z = q[2]
        target_pose_r.orientation.w = q[3]
        target_pose_l.position.x = 0.3
        target_pose_l.position.y =-0.1
        target_pose_l.position.z = 0.3
        target_pose_l.orientation.x = q[0]
        target_pose_l.orientation.y = q[1]
        target_pose_l.orientation.z = q[2]
        target_pose_l.orientation.w = q[3]
        botharms.set_pose_target(target_pose_r, 'RARM_JOINT5_Link')
        botharms.set_pose_target(target_pose_l, 'LARM_JOINT5_Link')
        botharms.go()
        rospy.sleep(1)

        target_pose_r.position.x = 0.3
        target_pose_r.position.y =-0.2
        target_pose_r.position.z = 0.0
        target_pose_l.position.x = 0.3
        target_pose_l.position.y = 0.2
        target_pose_l.position.z = 0.0
        botharms.set_pose_target(target_pose_r, 'RARM_JOINT5_Link')
        botharms.set_pose_target(target_pose_l, 'LARM_JOINT5_Link')
        botharms.go()
Existing sample using ROS_Client
Let's look at the sample program that we also used in the previous tutorial with RTM client. This program implements the same tasks both via RTM client and ROS client. Now, run it with ROS client just to confirm how it works.
$ ipython -i `rospack find hironx_ros_bridge`/scripts/acceptancetest_hironx.py -- --host %HOSTNAME%
:
IN [1]: acceptance.run_tests_ros()
The entire code:
   1 # -*- coding: utf-8 -*-
   2
   3 # Software License Agreement (BSD License)
   4 #
   5 # Copyright (c) 2014, TORK (Tokyo Opensource Robotics Kyokai Association)
   6 # All rights reserved.
   7 #
   8 # Redistribution and use in source and binary forms, with or without
   9 # modification, are permitted provided that the following conditions
  10 # are met:
  11 #
  12 #  * Redistributions of source code must retain the above copyright
  13 #    notice, this list of conditions and the following disclaimer.
  14 #  * Redistributions in binary form must reproduce the above
  15 #    copyright notice, this list of conditions and the following
  16 #    disclaimer in the documentation and/or other materials provided
  17 #    with the distribution.
  18 #  * Neither the name of TORK. nor the
  19 #    names of its contributors may be used to endorse or promote products
  20 #    derived from this software without specific prior written permission.
  21 #
  22 # THIS SOFTWARE IS PROVIDED BY THE COPYRIGHT HOLDERS AND CONTRIBUTORS
  23 # "AS IS" AND ANY EXPRESS OR IMPLIED WARRANTIES, INCLUDING, BUT NOT
  24 # LIMITED TO, THE IMPLIED WARRANTIES OF MERCHANTABILITY AND FITNESS
  25 # FOR A PARTICULAR PURPOSE ARE DISCLAIMED. IN NO EVENT SHALL THE
  26 # COPYRIGHT OWNER OR CONTRIBUTORS BE LIABLE FOR ANY DIRECT, INDIRECT,
  27 # INCIDENTAL, SPECIAL, EXEMPLARY, OR CONSEQUENTIAL DAMAGES (INCLUDING,
  28 # BUT NOT LIMITED TO, PROCUREMENT OF SUBSTITUTE GOODS OR SERVICES;
  29 # LOSS OF USE, DATA, OR PROFITS; OR BUSINESS INTERRUPTION) HOWEVER
  30 # CAUSED AND ON ANY THEORY OF LIABILITY, WHETHER IN CONTRACT, STRICT
  31 # LIABILITY, OR TORT (INCLUDING NEGLIGENCE OR OTHERWISE) ARISING IN
  32 # ANY WAY OUT OF THE USE OF THIS SOFTWARE, EVEN IF ADVISED OF THE
  33 # POSSIBILITY OF SUCH DAMAGE.
  34
  35 import rospy
  36
  37 from hironx_ros_bridge.testutil.abst_acceptancetest import AbstAcceptanceTest
  38
  39
  40 class AcceptanceTestROS(AbstAcceptanceTest):
  41
  42     def __init__(self, robot_client):
  43         '''
  44         @type robot_client: hironx_ros_bridge.ros_client.ROS_Client
  45         '''
  46         self._robotclient = robot_client
  47
  48     def go_initpos(self, default_task_duration=7.0):
  49         self._robotclient.go_init(default_task_duration)
  50
  51     def set_joint_angles(self, joint_group, joint_angles, msg_tasktitle=None,
  52                          task_duration=7.0, do_wait=True):
  53         '''
  54         @see: AbstAcceptanceTest.move_armbyarm_impl
  55         '''
  56         rospy.loginfo("'''{}'''".format(msg_tasktitle))
  57         self._robotclient.set_joint_angles_deg(
  58                          joint_group, joint_angles, task_duration, do_wait)
  59
  60     def set_pose(self, joint_group, posision, rpy, msg_tasktitle=None,
  61                  task_duration=7.0, do_wait=True, ref_frame_name=None):
  62         '''
  63         @see: AbstAcceptanceTest.set_pose
  64         '''
  65         rospy.loginfo('ROS {}'.format(msg_tasktitle))
  66         self._robotclient.set_pose(joint_group, posision, rpy, task_duration,
  67                                    do_wait, ref_frame_name)
  68
  69     def set_pose_relative(
  70                         self, joint_group, dx=0, dy=0, dz=0, dr=0, dp=0, dw=0,
  71                         msg_tasktitle=None, task_duration=7.0, do_wait=True):
  72         rospy.logerr('AcceptanceTestROS; set_pose_relative is not implemented yet')
  73         pass
First, you need to instantiate ROS_Client, which is done here outside of this code above; simply do like:
self._robotclient = ROS_Client()
Going to initial pose is the simplest 1 line:48 def go_initpos(self, default_task_duration=7.0): 49 self._robotclient.go_init(default_task_duration)
Giving positions to the joints is also done in a single line.51 def set_joint_angles(self, joint_group, joint_angles, msg_tasktitle=None, task_duration=7.0, do_wait=True): : 57 self._robotclient.set_joint_angles_deg(joint_group, joint_angles, task_duration, do_wait)
You can also use pose in Cartesian coordinate. This requires MoveIt! service to be running.
  60 def set_pose(self, joint_group, posision, rpy, msg_tasktitle=None, task_duration=7.0, do_wait=True, ref_frame_name=None):
  :
  66     self._robotclient.set_pose(joint_group, posision, rpy, task_duration, do_wait, ref_frame_name)
Walk-through for another example of ROS_Client
Let's look at another, a little more elaborate example on interactive manner using ipython.
First, run the client.
ipython -i `rospack find hironx_ros_bridge`/scripts/hironx.py                      (simulation)
ipython -i `rospack find hironx_ros_bridge`/scripts/hironx.py -- --host %HOSTNAME% (for real robot)
Make sure that the client class is instanciated.
In [1]: ros
Out[1]: <hironx_ros_bridge.ros_client.ROS_Client at 0x7f0d34a00590>
Move to initial pose.
In [2]: ros.go_init()
[INFO] [WallTime: 1453005565.730952] [1923.265000] *** go_init begins ***
[INFO] [WallTime: 1453005572.749935] [1930.345000] wait_for_result for the joint group rarm = True
[INFO] [WallTime: 1453005572.750268] [1930.345000] [positions: [0.010471975511965976, 0.0, -1.7453292519943295, -0.26529004630313807, 0.16406094968746698, -0.05585053606381855]
velocities: []
accelerations: []
effort: []
time_from_start:
  secs: 7
  nsecs: 0]
Joint-level commands
Move robot arm using a list of joint angle target values.
In [3]: ros.set_joint_angles_rad('larm', [0.010, 0.0, -2.094, -0.265, 0.164, 0.06], duration=2, wait=True)
[INFO] [WallTime: 1453005602.774010] [1960.440000] wait_for_result for the joint group larm = True

In [4]: ros.set_joint_angles_rad('larm', [0.010, 0.0, -1.745, -0.265, 0.164, 0.06], duration=2, wait=True)
[INFO] [WallTime: 1453005606.789887] [1964.500000] wait_for_result for the joint group larm = True
You can also use set_joint_angles_deg method to send joint angles in degree.
set_joint_angles_* methods not only set the target values, but also execute the command.
EEF-level commands
Move robot arm using target pose commands specifying poses of EEF (end-effector).
IN [4]: ros.set_pose?
Type:       instancemethod
Definition: ros.set_pose(self, joint_group, position, rpy=None, task_duration=7.0, do_wait=True, ref_frame_name=None)
Docstring:
@deprecated: Use set_pose_target (from MoveGroupCommander) directly.
Accept pose defined by position and RPY in Cartesian format.

@type joint_group: str
@type position: [float]
@param position: x, y, z.
@type rpy: [float]
@param rpy: If None, keep the current orientation by using
            MoveGroupCommander.set_position_target. See:
             'http://moveit.ros.org/doxygen/' +
             'classmoveit__commander_1_1move__group_1_1' +
             'MoveGroupCommander.html#acfe2220fd85eeb0a971c51353e437753'
@param ref_frame_name: reference frame for target pose, i.e. "LARM_JOINT5_Link".

In [5]: ros.set_pose('larm', [0.3256221413929748, 0.18216922581330303, 0.16756590383473382], [-2.784279171494696, -1.5690964385875825, 2.899351051232168], task_duration=7, do_wait=True)
[INFO] [WallTime: 1453007509.751512] [3869.365000] setpose jntgr=larm mvgr=<moveit_commander.move_group.MoveGroupCommander object at 0x7f21aaa8a950> pose=[0.3256221413929748, 0.18216922581330303, 0.16756590383473383, -2.784279171494696, -1.5690964385875825, 2.899351051232168] posi=[0.3256221413929748, 0.18216922581330303, 0.16756590383473383] rpy=[-2.784279171494696, -1.5690964385875825, 2.899351051232168]

In [6]: ros.set_pose('larm', [0.3256221413929748, 0.18216922581330303, 0.06756590383473382], [-2.784279171494696, -1.5690964385875825, 2.899351051232168], task_duration=7, do_wait=True)
[INFO] [WallTime: 1453007518.445929] [3878.220000] setpose jntgr=larm mvgr=<moveit_commander.move_group.MoveGroupCommander object at 0x7f21aaa8a950> pose=[0.3256221413929748, 0.18216922581330303, 0.06756590383473382, -2.784279171494696, -1.5690964385875825, 2.899351051232168] posi=[0.3256221413929748, 0.18216922581330303, 0.06756590383473382] rpy=[-2.784279171494696, -1.5690964385875825, 2.899351051232168]
Using tf
To get current pose of the EEFs with respect to a certain frame, use a powerful library of ROS called `tf`, and its listener client `TransformListener`.
Here we're getting a relative pose of the left hand w.r.t the waist frame.
import tf
import rospy
listener = tf.TransformListener()
try:
    (trans, rot) = listener.lookupTransform('/WAIST', '/LARM_JOINT5_Link', rospy.Time(0))
except (tf.LookupException, tf.ConnectivityException, tf.ExtrapolationException):
Send the obtained pose to the robot.
In [7]: pos = list(trans)
In [8]: rpy = list(tf.transformations.euler_from_quaternion(rot))
In [9]: ros.set_pose('larm', pos, rpy, task_duration=7, do_wait=True)
[INFO] [WallTime: 1453006377.256805] [2735.650000] setpose jntgr=larm mvgr=<moveit_commander.move_group.MoveGroupCommander object at 0x7f0d1d31b950> pose=[0.3255715961317417, 0.18217283734133255, 0.06760844121713444, 2.8644073530085747, -1.569564170540247, -2.7497620461224517] posi=[0.3255715961317417, 0.18217283734133255, 0.06760844121713444] rpy=[2.8644073530085747, -1.569564170540247, -2.7497620461224517]
Note that return value from lookupTransform are in tuple, but set_pose accepts list. So do not forget to convert a tuple to list format using list function, before sending a pose with the set_pose method. tf.transformation provides utility to convert quaternions to euler.
You can use numpy library to shift values in position and orientation vectors.
In [7]: ros.set_pose('larm', list(numpy.array(pos) + numpy.array([0,0,0.1])), rpy, task_duration=7, do_wait=True)
[INFO] [WallTime: 1453006471.587639] [2830.075000] setpose jntgr=larm mvgr=<moveit_commander.move_group.MoveGroupCommander object at 0x7f0d1d31b950> pose=[0.32557159613174169, 0.18217283734133255, 0.16760844121713445, 2.8644073530085747, -1.569564170540247, -2.7497620461224517] posi=[0.32557159613174169, 0.18217283734133255, 0.16760844121713445] rpy=[2.8644073530085747, -1.569564170540247, -2.7497620461224517]
Some notes:
You can also use lookupTransform to obtain target pose of objects detected by perception process; obviously you need to run certain vision processing nodes for doing this. Example:
Using AR marker (e.g. ar_track_alvar)
As we're referencing /WAIST frame, which is the default transformation base frame in HiroNXO, the returned value should be equal to move group's get_current_pose method (TODO needs more explanation). Change the reference frame accordingly for your purpose.
For head movement (e.g. head keeping track of objects/EEF location), you can refer to this tutorial. It's outdated, so you'll be likely to need tweaks; use PointHead message in control_msgs package, for instance.
Using low level API of ROS
See ROS_Client.
Or there's a tutorial available in PR2 page.


