| |
Running ROS process, operating via scripts and GUI.
Description: Fire up some particular processes on Ubuntu to use applications. Also learn interactive operation using python script on ipython terminal.Keywords: rtm_ros_bridge
Tutorial Level: BEGINNER
Next Tutorial: Monitoring, operating via GUI
Contents
NOTE: All the tutorials available under the URL http://wiki.ros.org/rtmros_nextage/Tutorials are applicable to the multiple products of Kawada Industries; Hiro (only with the one that opensource software is installed) and NEXTAGE OPEN. To simplify the notation in the rest of the tutorials, we use HiroNXO to appoint the aforementioned robots.
Overview
In nutshell, you need to run the following few things to operate the robot:
Run "RTM-ROS bridge" (simulation users should have already launched this if you came from the previous tutorial).
Run MoveIt! if necessary.
The following shows how to do these.
Steps
Run rtm_ros_bridge
- (Simulation users don't need this; it should be done already) Run:
$ roslaunch hironx_ros_bridge hironx_ros_bridge_real.launch nameserver:=%HOSTNAME%    (HIRO)
$ roslaunch nextage_ros_bridge nextage_ros_bridge_real.launch nameserver:=%HOSTNAME%  (NEXTAGE OPEN)
Replace %HOSTNAME% with an appropriate value in your environment; eg. hiro001, nxc011;
That's it.Inside of QNX, the processes that accept connection from Ubuntu should be already running. So you only have to launch what we call as rtm_ros_bridge (or sometimes just ros_bridge, but don't get confused with other bridgers. E.g. rosbridge, ros_arduino_bridge).
- (Optional) You might want to check what ROS nodes are running:
$ rosnode list
/diagnostic_aggregator
/hrpsys_profile
/hrpsys_ros_diagnostics
/hrpsys_state_publisher
/rosout
Run MoveIt!
At the time of writing (rtmros_hironx 1.0.23), MoveIt! processes need to be separately started. This gives the users a choice to run it or not; MoveIt! processes are costly performance-wise (though negligible on the most of the new machines).
- (Only first time) You might want to install packages that might be missing:
$ apt-get install ros-%YOUR_ROS_DISTRO%-moveit-planners-ompl
- Run:
$ roslaunch hironx_moveit_config moveit_planning_execution.launch   (HIRO)
$ roslaunch nextage_moveit_config moveit_planning_execution.launch  (NEXTAGE OPEN)

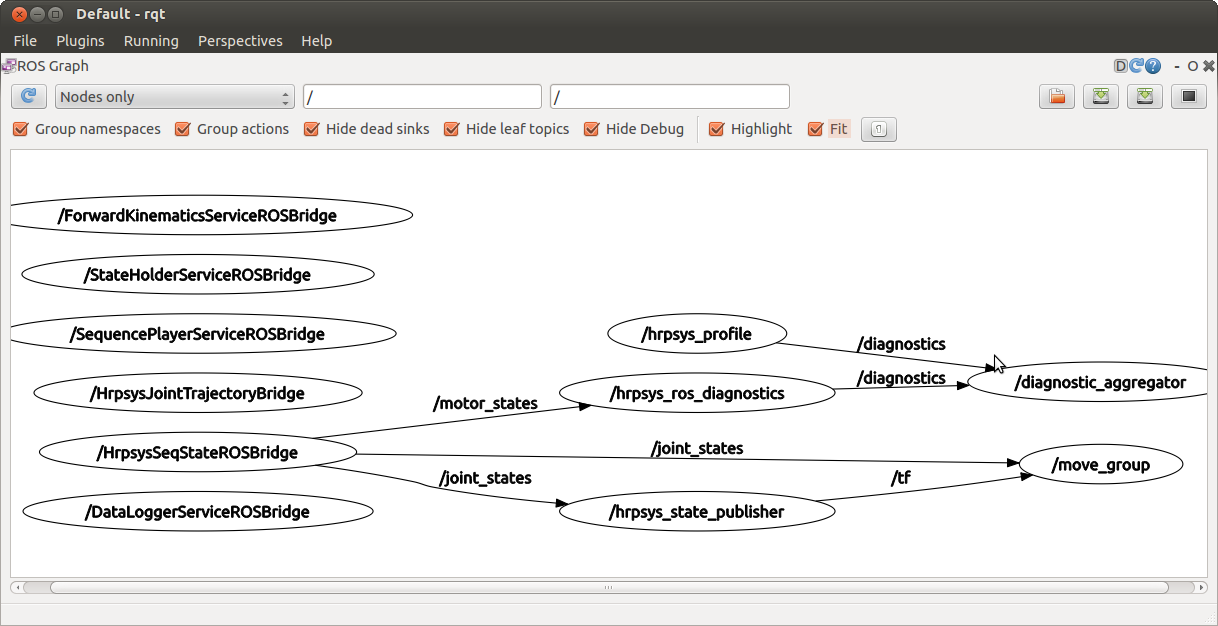
This spawns a new ROS Node called "move_group" that provides an interface between your robot and MoveIt! services. rqt_graph now shows it too:

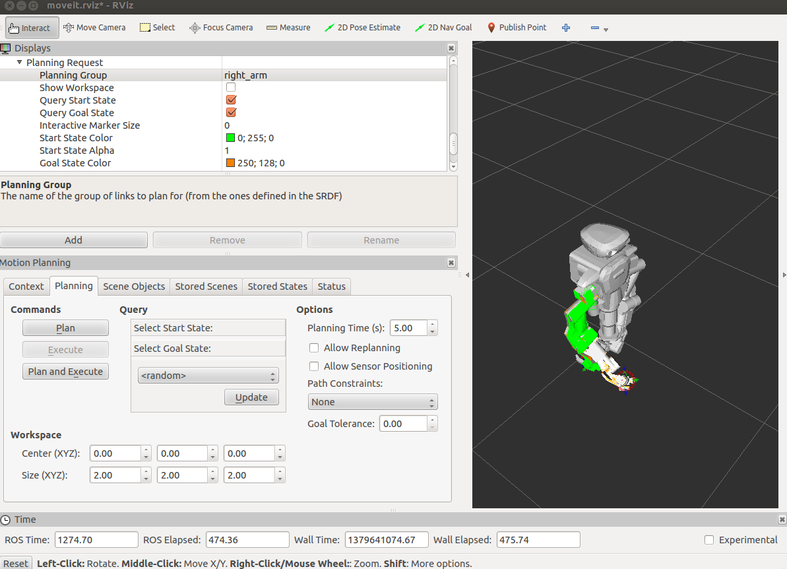
Refer to plugin usage page for how to operate MoveIt! via RViz plugin (the page uses info specific to PR2 personal robot, but you can get the essense).
Note: Interactive Markers have not really been implemented with Hiro. Patch from YOU is welcomed :).
Run python script for interactive operation
Establish connection
There's a script that allows you to interactively work with robot. Here are the steps.
- Run:
$ ipython -i `rospack find hironx_ros_bridge`/scripts/hironx.py -- --host hiro014
$ ipython -i `rospack find nextage_ros_bridge`/script/nextage.py -- --host nextage101
:  (same initialization step as simulation)
[hrpsys.py]  initialized successfully
For simulation, simply remove arguments:
$ ipython -i `rospack find hironx_ros_bridge`/scripts/hironx.py
$ ipython -i `rospack find nextage_ros_bridge`/script/nextage.py
- What happens during the initialization process includes:
Find RTCManager (a class in OpenRTM that starts RT components) and RobotHardware (an RT component defined in hrpsys that interfaces with robot's hardware).
Create, connect to, and activate the RT Components necessary for hrpsys controller to run.
- Start logger.
(Specific to Hiro/NXOpen) Assign joint groups.
- Alternatively, you can specify other values (only if you need to):
$ ipython -i `rospack find hironx_ros_bridge`/scripts/hironx.py -- --modelfile /opt/jsk/etc/HIRONX/model/main.wrl --host hiro014 --port 15005
$ ipython -i `rospack find nextage_ros_bridge`/script/nextage.py -- --modelfile /opt/jsk/etc/HIRONX/model/main.wrl --host nextage101 --port 15005
- What happens during the initialization process includes:
Some common commands
Now, here are some methods particular for a real robot. In addtion to the following brief introduction, you're recommended to go through the API doc of HIRONX class.
![]() With the real robot, robot moves per some of the commands from here, which means that you're required to keep the relay switch handy (see Quick start guide).
With the real robot, robot moves per some of the commands from here, which means that you're required to keep the relay switch handy (see Quick start guide).
- Run calibration. Note that body moves with this.
ipython>>> robot.checkEncoders()
- This can be done only when the robot is not calibrated (most likely the robot state indicator lights on its chest blink green. Please be sure to consult hardware manual if this is correct).
- Transition to the initial pose.
ipython>>> robot.goInitial()
- Move to end-of-day pose. Once it stalls, the servo tunrs off. So it's good to call this before you restart/shutdown the system.
ipython>>> robot.goOffPose()
- Turn on servo.
ipython>>> robot.servoOn()
- You need to turn servo on manually after you turned it off by either one of the followings:
Running goOffPose.
Hit the relay switch (you first need to run servoOff in this case).
- Giving problematic commands to the robot so that it emergency-stopped.
This also adjusts commanded angle values with the physical state of the joints (by internally calling goActual() method).
- You need to turn servo on manually after you turned it off by either one of the followings:
- Turn off servo.
ipython>>> robot.servoOff()
- Other than the situation where you want to explicitly turn the servo off, you also have to use this command when you hit the relay switch.


