| Note: This tutorial assumes that you have a basic understanding of the MoveIt package and about Roboception's rc_visard. This tutorial assumes that you have completed the previous tutorials: rc_visard/Tutorials/Computing grasps (configuration with rosservice calls), rc_visard/Tutorials/Setting up the rc-pick modules. |
| |
Pick Module - MoveIt tutorial
Description: This tutorial shows how to integrate the MoveIt package together with our ItemPick and BoxPick modules and their respective ROS clients.Keywords: rc_visard, itempick, boxpick, moveit
Tutorial Level: ADVANCED
Contents
Goal
The goal of this tutorial is to show an integration's example of the MoveIt package with one of our Pick modules. After this tutorial, you will be able to plan and execute a trajectory for a robot's tool center point (TCP) to a grasping position calculated by Roboception's picking modules.
Before we start
The rc-pick-client's and rc-hand-eye-calibration-client's version should be at least 2.7. In order to go through this tutorial, the following prerequisites should be met:
Prerequisites
In this tutorial, the Universal Robot UR5 is being used. If you haven’t already done so, make sure you have the Universal Robots packages already installed. https://github.com/ros-industrial/universal_robot
In order to use a real robot, the hand-eye calibration between the robot and the sensor should be performed. If the hand-eye calibration is not available, a transformation from the external frame to the camera frame must be published as a tf frame.
The MoveIt package must be installed together with the moveit-visual-tools.
A region of interest tutorial_roi has to be configured. (Managing regions of interest tutorial)
Installation
The following Roboception's packages are needed to go through this tutorial:
$ sudo apt-get install ros-${ROS_DISTRO}-rc-pick-client ros-${ROS_DISTRO}-rc-hand-eye-calibration-client ros-${ROS_DISTRO}-rc-visard-driver ros-${ROS_DISTRO}-rc-common-msgsAdditionally, the rc_visard_moveit_tutorial package has to be installed in your workspace.
Creating a robot's description package
A grasp provided by Roboception's ItemPick and BoxPick components represents the recommended pose of the robot's TCP for grasping an object. The grasp orientation is a right-handed coordinate system and is defined such that its z axis is normal to the surface pointing inside the object at the grasp position.
Therefore, the orientation of the robot's TPC's should be configured such that the z-axis is pointing outwards of the robot's end-effector. Setting up a respective end-effector for a robot can be done with help of the Moveit Setup Assistant.
In this tutorial, the ur_description package is used which already satisfies this requirement.
Include rc_visard in the sensor manager
To use the rc_visard's point cloud for collision checking, the configuration file of the sensor has to be included in the robot's sensor manager.
For the tutorial package, we already completed this steps and added the needed launch files. If a robot other than the UR5 is being used, the following changes to it's sensor manager must be made:
- Open the sensor_manager file:
$ roscd <robot's moveit configuration package>
$ gedit launch/sensor_manager.launch.xml
- Edit the parameters for the octomap monitor:
<!-- Params for the octomap monitor -->
  <param name="octomap_frame" type="string" value="external" />
  <param name="octomap_resolution" type="double" value="0.01" />
  <param name="max_range" type="double" value="1.0" />
- Add the rc_visard specific configuration to the file:
 <!-- Load the robot specific sensor manager; this sets the moveit_sensor_manager ROS parameter -->
  <rosparam command="load" file="$(find rc_visard_moveit_tutorial)/config/rc_visard_pointcloud.yaml" />
Running the robot's configuration and driver
A distinction between using a real robot and running a simulation will be done on this section. If using a simulation, go section 6.1, otherwise, if using a real robot, go to section 6.2.
There is a known issue with RViz, where all the links of a robot are displayed at the same position. If you encounter this problem, go to: https://github.com/ros-visualization/rviz/issues/1151#issuecomment-345687074
Using the simulated robot
- This step is easy. Just run the demo launch file of the robot's model:
roslaunch rc_visard_moveit_tutorial demo.launch config:=true
Using a real robot
Due to the limited representation of the world by the point cloud, a collision free trajectory can not be guaranteed.
The remote control on the robot should be active.
- To start the robot, use the following command:
$ roslaunch ur_description ur5_upload.launch robot_ip:=<ip_of_the_robot> limited:=true
Then, to allow MoveIt! motion planning, run:
$ roslaunch rc_visard_moveit_tutorial ur5_moveit_planning_execution.launch limited:=true
For starting up rviz with a configuration including the MoveIt! Motion Planning plugin run:
$ roslaunch ur5_moveit_config moveit_rviz.launch config:=true
See also the Universal Robot repository: https://github.com/ros-industrial/universal_robot for more information on how to start the robot's drivers.
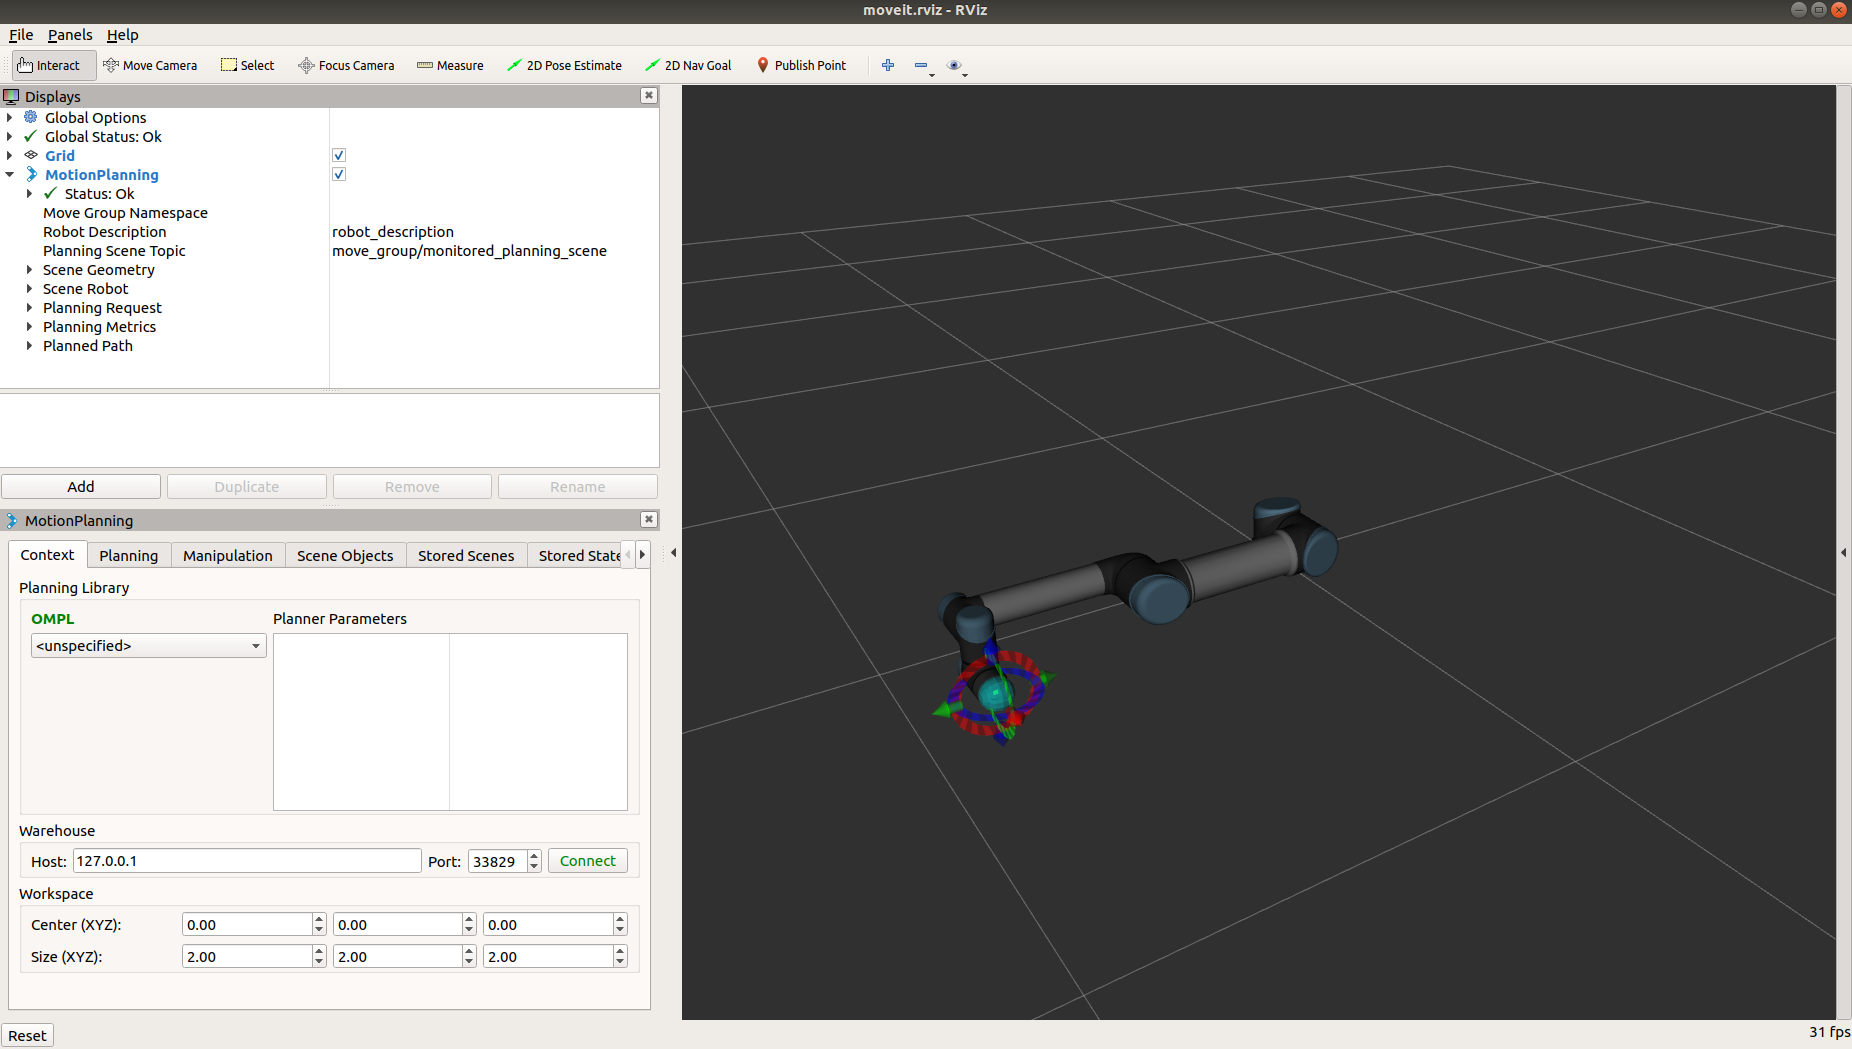
After following the previous steps, a RViz window will open and should look like the following:

Launch
Now that we have the robot's model and controller running, we can launch the rc_visard_moveit_tutorial and all other required nodes. The easiest way is to use the grasp_trajectory.launch file. The following arguments are needed:
- device: The serial number of the rc_visard.
- rc_package: Name of the pick package being used. (rc_itempick or rc_boxpick)
- end_effector_link: Name of the TCP link.
- manipulator_group: Name of the end-effector's planning group of the robot.
For this tutorial, we will be using the rc_itempick module.
$ roslaunch rc_visard_moveit_tutorial grasp_trajectory.launch device:=<serial_number> rc_package:=rc_itempick end_effector_link:=tool0 manipulator_group:=manipulator
After successfully running the previous command, it is encouraged to import the RViz configuration provided under: rc_visard_moveit_tutorial/config/config.rviz. Subsequently, the RViz window should look like the following:

Planning and executing grasp trajectories
The message content of the rc_visard_moveit_tutorial services depends on the rc_package argument given to the launch file (rc_itempick or rc_boxpick). The service request is the same as in the compute_grasps service of each pick module. For more information, visit rc_visard/Tutorials/Computing grasps (configuration with rosservice calls).
There are two services that can be used:
rc_visard_moveit_tutorial_node/plan_trajectory: Computes grasp poses and plans a trajectory of the robot's TCP's current pose to the grasp's pose.
$ rosservice call /rc_visard_moveit_tutorial_node/plan_trajectory "pose_frame: 'camera'
region_of_interest_id: 'tutorial_roi'
suction_surface_length: 0.01
suction_surface_width: 0.01"
/rc_visard_moveit_tutorial_node/execute_trajectory: Computes grasp poses, plans and executes a trajectory of the robot's TCP's current pose to the grasp's pose.
$ rosservice call /rc_visard_moveit_tutorial_node/execute_trajectory "pose_frame: 'camera'
region_of_interest_id: 'tutorial_roi'
suction_surface_length: 0.01
suction_surface_width: 0.01"
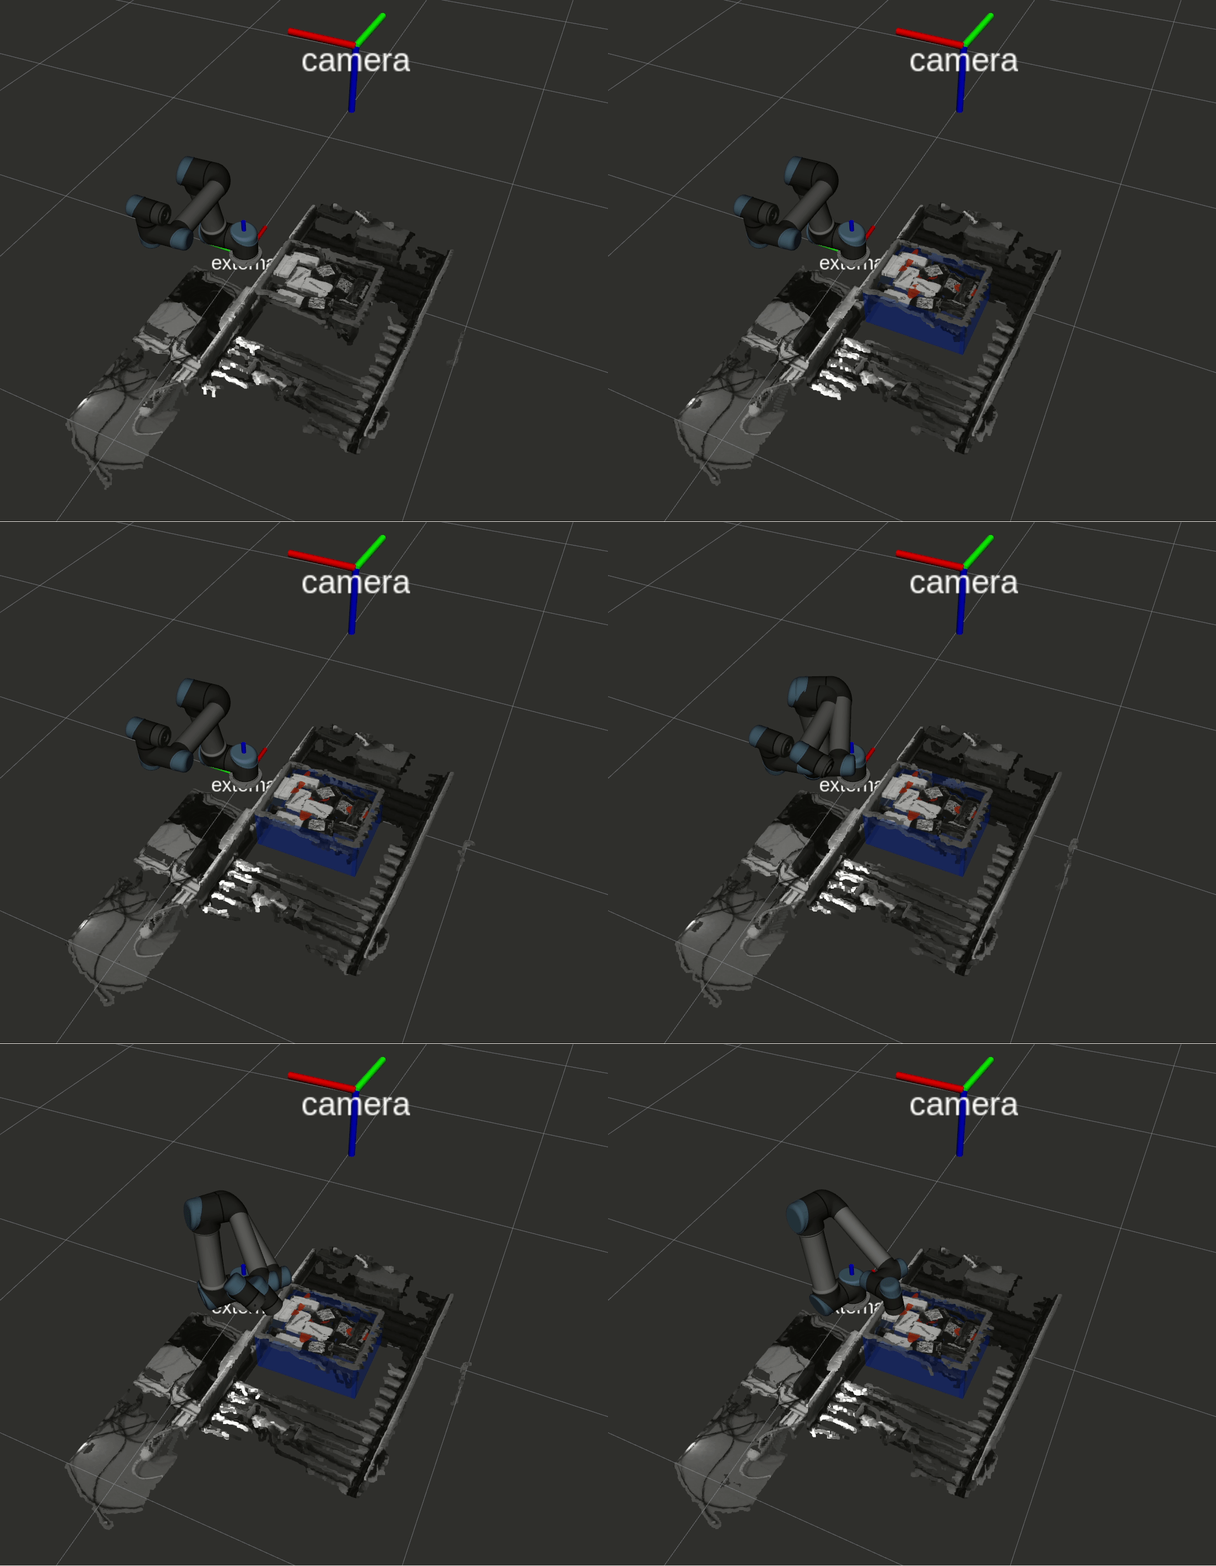
Here is an example of how the RViz simulation should look like when calling the /rc_visard_moveit_tutorial_node/execute_trajectory rosservice:

Troubleshooting and FAQ
For more information about the Universal Robot's driver, compatibility and configuration visit the Universal Robot ROS Wiki
For troubleshooting on the computation of grasping points using the Pick modules visit the ItemPick tutorial: FAQs and troubleshooting
For more information about the MoveIt package, refer to the MoveIt documentation


